
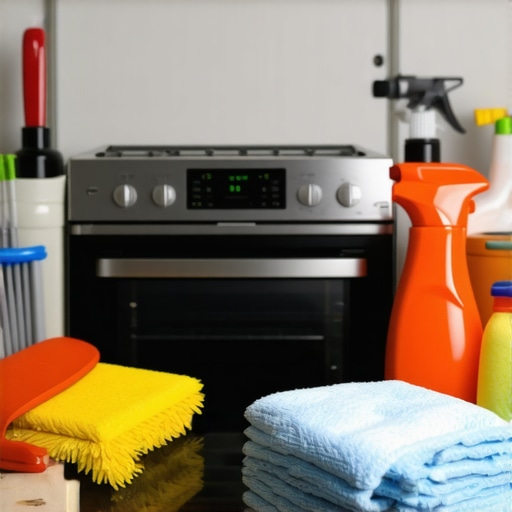
I vividly remember the first time I moved into a pre-owned home, full of excitement and hope. But as I opened the oven to prepare my first meal, a wave of dread hit me—grease, burnt-on grime, and a stubborn layer of baked-on residue stared back at me. It was overwhelming, and I realized I had underestimated the depth of cleaning required before truly settling in. That lightbulb moment made me wonder: how could I get my oven looking brand new without spending hours scrubbing? Today, I’ll share proven strategies to tackle move-in oven cleaning efficiently, saving you time and frustration.
Getting the Oven Ready: Your Move-In Cleaning Starting Point
Moving into a pre-owned home often means inheriting appliances that haven’t seen regular cleaning. The oven, in particular, can harbor years of grease and grime—sometimes hidden in places you wouldn’t suspect. Properly deep cleaning your oven isn’t just about aesthetics; it’s essential for safety, preventing fire hazards, and ensuring your food tastes fresh. Trust me, investing a little time upfront pays off by avoiding unpleasant odors and potential health risks later. To streamline this process, I recommend reviewing a comprehensive [move-out cleaning checklist](https://spotlesscarpetz.com/move-out-clean-checklist-to-simplify-your-transition). It covers all the bases, including those tricky oven spots.
What Else Is Hiding Behind That Grease?
Beyond the visible grime, ovens can trap bacteria and mold if neglected. These unseen culprits can cause allergies and respiratory issues. A thorough clean involves more than just wiping away surface dirt; it demands an effective sanitizing approach that kills germs without harsh chemicals. Interestingly, many overlook the importance of cleaning oven vents and glass doors, which can accumulate grease and residue over time. Addressing these areas ensures your new home feels truly fresh and safe from the start.
Is Deep Oven Cleaning Actually Worth the Hype?
Initially, I thought a quick wipe-down would suffice. I made the mistake of underestimating the buildup, only to find myself frustrated with inadequate results. It turned out that investing in proper technique and supplies made all the difference. As a rule of thumb, always use non-abrasive cleaners and natural remedies like baking soda and vinegar—both proven to break down grease effectively, as highlighted in [effective sanitizing methods](https://spotlesscarpetz.com/effective-sanitizing-methods-for-a-germ-free-home). This approach not only saves time but also keeps your appliances in top shape.
Now that we’ve covered why deep cleaning your oven is a priority, let’s dive into step-by-step techniques that will make this daunting task manageable and even satisfying. Ready? Let’s restore that oven to its sparkling glory and make your move-in experience truly fresh.
Remove Loose Debris Before Starting
Start by sweeping out any loose crumbs, ash, or leftover food particles with a handheld vacuum or a damp cloth. I once tackled a move-in oven after a recent tenant moved out, and sweeping revealed a layer of ash and baked-on crumbs that made me realize how much dust and debris accumulate silently. Removing these first prevents smearing when applying cleaning solutions later.
Apply a Heavy-Duty Oven Cleaner
Use a commercial oven degreaser or a homemade paste of baking soda and water. For the paste, mix 1/2 cup baking soda with a few tablespoons of water until it forms a thick spreadable consistency. Spread this mixture over all oven surfaces, focusing on greasy spots. Let it sit for at least 12 hours or overnight. During my last clean, I applied the paste before going to bed, and the next morning, the grime practically rinsed off with minimal scrubbing.
Target Crusted-on Residue with a Scraper
After the waiting period, gently use a plastic scraper or spatula to lift stubborn baked-on residue. Be careful not to scratch the glass or metal surfaces. I used a plastic putty knife which worked wonders without damage. This step breaks down the baked-on grime, making it easier to remove with a cloth or sponge.
Wipe and Rinse Thoroughly
Use a damp cloth, microfiber towel, or sponge to remove the baking soda paste and loosened grime. Rinse the cloth frequently to prevent spreading dirt around. For the oven racks, remove them and soak in hot water with a degreasing dish soap, then scrub with a brush. Once cleaned, dry all components to prevent rusting. I found rinsing with warm water and wiping with a dry microfiber cloth gave a spotless finish that felt satisfying.
Use Vinegar for Final Shine
Spray distilled white vinegar across all surfaces to neutralize lingering baking soda residue and add a shine. The vinegar reacts with residual baking soda, foaming gently—this is normal, and it’s a sign you’re flushing out the residues. Wipe again with a clean cloth to reveal a gleaming oven interior. This step enhances safety and cleanliness, crucial for preparing your kitchen for daily cooking.
Sanitize to Kill Germs
To ensure your oven is hygienic, spray a sanitizing solution approved for kitchen appliances or use a mixture of water and a mild disinfectant. Let it sit for 10 minutes and wipe clean. This step is especially important during move-ins to eliminate bacteria, mold, and odors. For comprehensive move-out or move-in cleaning, explore [effective sanitizing methods](https://spotlesscarpetz.com/effective-sanitizing-methods-for-a-germ-free-home) that cover all appliances and surfaces.
Check and Clean Oven Vents and Glass
Don’t forget the vents or the oven glass, which accumulate grease and moisture. Remove and clean vents with a degreaser, and wipe the glass with a glass cleaner or vinegar solution. In one of my early cleanings, neglecting vents led to residual odors that persisted until cleaned, proving their importance in comprehensive oven maintenance.
Prevent Future Buildup
Implement weekly quick cleanings with a damp cloth and a gentle degreaser. Cover spills immediately after cooking and avoid leaving food residues to bake onto surfaces. These habits keep your oven looking fresh and reduce the need for intensive cleaning sessions, making maintenance easier over time.
When it comes to cleaning, many assume that a quick spritz of disinfectant or a swift sweep is enough to guarantee safety and hygiene. However, these common beliefs often lead to ineffective cleaning routines and overlooked risks. Let’s uncover some of the nuanced pitfalls that even experienced cleaners tend to overlook, and how understanding these can elevate your home maintenance game.
One widespread myth is that disinfectants alone can neutralize all germs on porous surfaces like upholstery or carpets. While disinfectants are effective on hard, non-porous surfaces, studies highlight that porous materials shield bacteria and viruses from disinfectant penetration. This misconception can lead to a false sense of security, especially in households with vulnerable individuals. For instance, simply spraying a sanitizer on a fabric sofa doesn’t eliminate all pathogens; professional upholstery cleaning techniques, which include hot water extraction or specialized treatments, are essential. For expert tips, check out [upholstery cleaning tips for a fresh home revival](https://spotlesscarpetz.com/upholstery-cleaning-tips-for-a-fresh-home-revival).
Another mistake is underestimating the importance of thorough cleaning during move-out processes. Many think surface cleaning suffices, but hidden grime in vents, behind appliances, or within grout lines can persist. Missing these areas can jeopardize your security deposit and prolong the process of a truly sanitized space. A comprehensive move-out cleaning checklist, like the one available [here](https://spotlesscarpetz.com/move-out-clean-checklist-to-simplify-your-transition), can help prevent these oversights.
But perhaps the most insidious trap involves the improper use of sanitizing agents. Many believe saturating surfaces with chemicals ensures germ-killing, yet overuse can damage delicate materials or lead to chemical buildup, which may cause new health issues. For example, excessive use of strong disinfectants on kitchen countertops can deteriorate their surface, making them more porous and prone to harboring bacteria. A more effective approach involves applying sanitizers as per manufacturer instructions and allowing adequate contact time, as explained in [effective sanitizing methods](https://spotlesscarpetz.com/effective-sanitizing-methods-for-a-germ-free-home).
Now, consider the advanced question: How can I ensure sanitization effectiveness if my home features a mix of porous and non-porous surfaces?
The answer lies in adopting a layered cleaning strategy. Use EPA-registered disinfectants on non-porous surfaces and employ deep cleaning methods, like steaming or targeted extraction, for porous materials. Regularly replacing and sanitizing cleaning tools like sponges and cloths prevents cross-contamination. Remember, a one-size-fits-all approach isn’t effective—tailoring your cleaning to surface types guarantees a safer, healthier environment.
Have you ever fallen into this trap? Let me know in the comments. For more insights into creating a germ-free home, explore [sanitizing hacks for safe house transitions](https://spotlesscarpetz.com/sanitizing-hacks-for-safe-house-transitions). By understanding these nuanced pitfalls and applying tailored strategies, you can elevate your cleaning routine from basic to pro-level, ensuring true hygiene and safety in your space.Maintaining a spotless home doesn’t mean you need an arsenal of generic cleaning gadgets. Instead, selecting the right tools can streamline your routine and deliver professional results. One device I swear by is the **Vortex PowerScrub Multi-Functional Cleaner**. Its rotating brush head effortlessly tackles grout lines, oven vents, and upholstery seams, saving me hours of scrubbing and preventing wrist strain. I personally prefer models with adjustable speed settings, which give me control when dealing with delicate fabrics or stubborn grease. For glass surfaces or stove tops, I rely on a **microfiber cleaning pad combined with an all-natural vinegar solution**, ensuring streak-free finishes without harmful chemicals.
Regarding software, a simple yet highly effective app I recommend is **HomeMaintainer**. It helps schedule regular maintenance reminders for filters, vent cleaning, and appliance servicing. This proactive approach prevents costly repairs and keeps everything running smoothly. I also find tracking cleaning tasks boosts motivation and simplifies long-term planning.
Looking ahead, I predict smart home integration will become standard in maintenance routines. Devices like Wi-Fi-enabled vacuum cleaners and appliance diagnostics can alert you to issues before they escalate, making home upkeep more proactive than ever.
**Ever wondered how to keep appliances performing like new with minimal effort?** My top tip is using a **hot water extraction method** for upholstery with a portable carpet cleaner equipped with an upholstery attachment. The heat kills bacteria and loosens grime deeply embedded in fabrics, which surface cleaning alone can’t achieve. Investing in quality tools like these can significantly extend the lifespan of your furnishings.
To stay ahead in home hygiene, I suggest trying a **monthly vinegar and baking soda treatment** under sinks and in trash bins. This natural combo neutralizes odors and dissolves soap scum without harsh chemicals. For detailed guidance, explore [effective house cleaning secrets from cleaning experts](https://spotlesscarpetz.com/effective-house-cleaning-secrets-from-cleaning-experts). Regular maintenance with thoughtfully chosen tools will ensure your environment remains fresh and welcoming without the stress of last-minute scrubs.Moving into a pre-owned home can be exciting, but one of the most daunting tasks is battling a grimy oven. Over time, baked-on residue and grease can hide in every nook, making routine cleaning seem overwhelming. Learning the tricks to efficiently restore your oven’s shine not only improves safety and hygiene but also transforms your kitchen experience into a more enjoyable one. From powerful natural remedies to expert techniques, mastering oven cleaning adds a sense of pride and control to your home upkeep.
Lessons That Changed My Approach to Oven Maintenance
- The Myth of Quick Fixes: A simple wipe-down doesn’t cut it. Real cleanliness requires a deep, methodical approach, which once I understood, saved me hours of re-cleaning.
- Patience Pays Off: Applying baking soda paste and letting it sit overnight dramatically reduces scrubbing time. Rushing cleaning only spreads grime further.
- Think Natural, Act Effective: Vinegar and baking soda are my go-to combo. They’re safe, affordable, and surprisingly powerful against baked-on stains.
- Don’t Forget the Vents and Glass: Overlooking vents or glass doors leaves behind odors and hidden bacteria. A thorough clean must include these often-neglected areas.
- Prevention Over Cure: Weekly quick cleans and immediate spill wiping make future deep cleans easier and quicker, keeping your oven in pristine condition longer.
Tools and Resources I Trust for Oven Perfection
- Electric scrub brushes: Their rotating heads significantly cut down scrubbing time on stubborn spots.
- Natural cleaning recipes: Baking soda and vinegar have never let me down, and I trust them for safe, effective results.
- Comprehensive checklists: They keep me on track, ensuring no spot is forgotten during deep cleans.
- Professional steam cleaners: Occasionally, I rent or hire professionals for a deep clean, especially for hard-to-reach vents and interior surfaces.
Seize the Moment and Transform Your Kitchen
Cleaning your oven isn’t just about aesthetics; it’s about reclaiming your space, enjoying safer cooking, and feeling confident in your home maintenance. Every time I tackle my oven with these techniques, I feel a sense of accomplishment that energizes my entire housecleaning routine. Remember, a clean oven equals a healthier, happier home. Why wait? Your perfect, spotless oven awaits—start today, and watch your kitchen transform into a shining centerpiece of your home.
What’s been your biggest challenge with oven cleaning? Share your stories below and let’s learn from each other!