
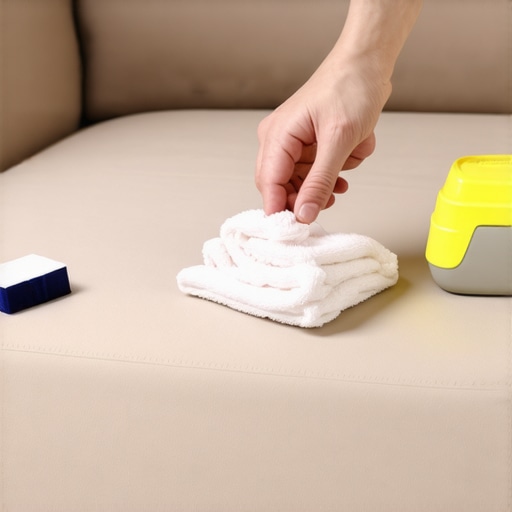
It was one of those mornings that start with a gentle sip of coffee and end with a loud gasp—you know, when you see a stubborn ink smear spreading across your beloved beige sofa like an unwelcome art project. I remember freezing, heart pounding, realizing that my toddler’s latest doodle was now permanently etched onto my favorite piece of furniture. Ugh. We’ve all been there, right?
That lightbulb moment hit me hard: I needed a game plan to tackle ink stains without turning my living room into a chemical wasteland or worse, ruining the fabric altogether. After countless trials, errors, and a few panic-induced Google searches, I discovered that removing ink from upholstery is less about magic and more about knowing the right techniques. Today, I want to share with you what I’ve learned—simple, effective strategies that actually work and won’t ruin your sofa.
Why Removing Ink Stains from Your Sofa Shouldn’t Be a Stress-Fest
Ink stains can feel like a nightmare, especially on light-colored furniture. But here’s the thing: delay can make the stain set, turning a quick fix into a long-term problem. Many folks panic and reach for harsh cleaners or abrasive tools that damage delicate fabrics—trust me, I’ve been guilty of this early on. My biggest mistake was rubbing furiously, which only spread the ink or pushed it deeper. A quick online search revealed that using the wrong solvents can weaken fabric fibers, leading to permanent discoloration or tears. That’s why knowing what to do—and what not to do—is essential. Interestingly, according to furniture cleaning experts, acting swiftly and using the right kind of stain remover can mean the difference between a fresh-looking sofa or an expensive replacement.
Feeling overwhelmed? Don’t worry. In the next section, I’ll guide you through the straightforward steps I swear by for lifting ink stains—without wrecking your furniture or your sanity. And if this problem sounds familiar, keep reading. I’ve been there, and I promise these tips will make your cleanup a breeze.
Apply a Blotting Technique to Lift Excess Ink
One time, I spilled a pen cap across my beige sectional. To start, I grabbed a clean, white cloth and gently blotted the ink—never rub, as it spreads the stain. Think of blotting like dabbing paint with a sponge—absorbing without pressing deeper. This initial step prevents the ink from sinking further into the fabric and makes subsequent steps more successful.
Use Isopropyl Alcohol Carefully
Moisten a cotton ball or soft cloth with 70% isopropyl alcohol. Gently dab the stained area, working from the outside in to avoid spreading the ink. In my experience, using alcohol dissolves many types of ink efficiently. Before applying, test on a hidden corner of your sofa to ensure the fabric won’t discolor or degrade. Keep the fabric damp—not soaked—and avoid over-wetting, which can damage the upholstery.
Employ a Mild Detergent for Residue Removal
Next, mix a small amount of gentle dish soap with water. Using a clean cloth, lightly sponge the soap solution onto the area to lift remaining ink particles. This step acts like a solvent booster, helping the alcohol do its job without harsh chemicals. Remember, always rinse with a damp cloth afterward to remove soap residue, which can attract dirt and cause an uneven appearance.
Rinse and Dry Properly
Use a fresh, damp cloth to gently blot the cleaned area, removing any leftover cleaning solution. Pat the surface dry with a towel and allow the upholstery to air dry completely. I once hurried this step and ended up with a water spot—so patience is key. Ensuring complete drying prevents mold and guarantees the stain won’t reappear.
Repeat if Necessary and Protect the Fabric
If the stain persists, repeat the process—avoid scrubbing, which risks harming delicate fibers. Once satisfied with the stain removal, consider applying a fabric protector spray to fortify against future ink mishaps. Regular maintenance, like using protective covers, can save you from stressful cleanups later. For more tips on upholstery care, check out this guide.
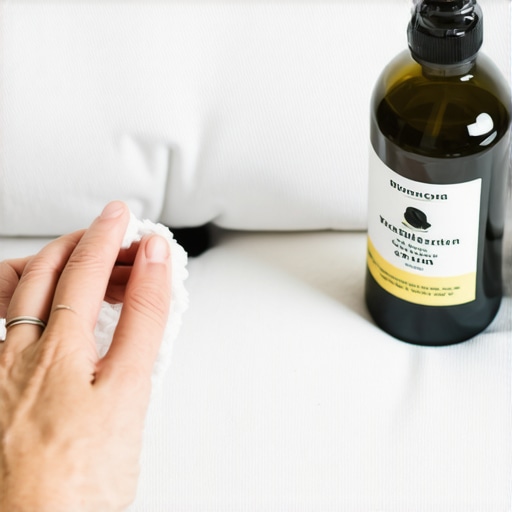 When it comes to house cleaning, especially move-out cleans, upholstery care, and sanitizing, many people rely on myths or surface-level beliefs that can backfire. As an expert who has spent years studying cleaning science and techniques, I want to shed light on some of these misconceptions and reveal the hidden nuances that can make or break your cleaning effectiveness.
Why ‘Kill All Germs’ Isn’t Always the Goal
One widespread myth is that using the strongest disinfectants guarantees a germ-free home. However, according to scientific studies, especially from the CDC, overusing harsh chemicals can be counterproductive by creating resistant bacteria or damaging surfaces. Effective sanitizing involves understanding the correct contact time and choosing the right agents—they don’t have to be the most potent, just appropriate for the task. For advanced insights, check out this guide.
Beware the Deep-Cleaning Trap
Many think that once in a while deep cleaning is enough, but this leads to neglecting maintenance routines that are crucial for long-term cleanliness. For example, upholstery fabrics require regular gentle care tailored to their material—using abrasive cleaners or excessive water can cause quick deterioration. As I cover in this article, understanding fabric-specific cleaning nuances prevents costly mistakes.
Are Residue and Build-Up Sabotaging Your Efforts?
One often-overlooked aspect is the residue left behind by incorrect cleaning products or techniques. Using too much soap or harsh chemicals can lead to buildup that attracts dirt faster, making your house seem dirtier over time. For example, vinegar or lemon-based cleaners may seem natural but can leave deposits if not used properly. Being aware of the right cleaning agents and methods—like rinsing thoroughly—ensures your efforts last. For practical tips, visit this resource.
Advanced Question: How Do I Balance Speed and Thoroughness in Move-Out Cleaning?
Many tenants or homeowners face the dilemma of needing to clean quickly for a move-out inspection while ensuring no detail is missed. This requires understanding which areas are most scrutinized, like corners behind toilets or under appliances, and employing targeted strategies. Professional move-out checklists suggest a methodical approach that prioritizes high-impact tasks without wasting time on trivial spots. To streamline this process, check out this move-out checklist. Remember, rushing can cause overlooked dirt or missed sanitation, so it’s about smart efficiency—not just speed.
Have you ever fallen into this trap? Let me know in the comments. Recognizing these hidden nuances can dramatically improve your cleaning results and save you money and stress down the line.
Investing in Quality Equipment for Lasting Results
When it comes to maintaining a spotless and sanitized home, having the right tools is non-negotiable. I personally rely on a high-grade HEPA vacuum cleaner with adjustable settings to tackle various surfaces effectively. Its powerful suction and advanced filtration system not only remove dust and allergens but also prevent the recirculation of fine particles, ensuring cleaner indoor air. For upholstery, I swear by a professional-grade steam cleaner that heats water to optimal temperatures, sanitizing deep into fibers without chemicals. Using these tools consistently has dramatically extended the life of my furniture and kept my home healthier.
Streamlining Maintenance with Software and Checklists
Beyond physical tools, employing digital checklists and scheduling apps helps me stay on top of regular cleaning routines. I utilize a customizable planner that prompts monthly tasks like deep carpet cleaning and quarterly upholstery refreshes. This proactive approach prevents grime buildup and reduces the need for intensive repairs or replacements down the line. For example, scheduling regular sanitizing sessions reduces the risk of bacteria accumulation in high-touch areas, supporting a safer household environment. For tailored strategies, I recommend exploring this comprehensive guide.
Should You Consider Professional Equipment for Your Home?
While many DIY tools are effective, there’s value in professional-grade equipment for those committed to long-term maintenance. Stepping up from rental machines to models like dry vapor steamers or commercial extractor vacuums can make a noticeable difference in cleaning quality and efficiency. Additionally, investing in high-quality microfiber cloths with antimicrobial properties can improve dust and dirt pickup, reducing cleaning time. As the industry evolves, hybrid approaches that combine home equipment with periodic professional services are becoming the norm for optimum results. Industry experts predict that future innovations will focus on smart, IoT-connected cleaning devices that monitor cleanliness levels in real-time—making maintenance more effortless than ever.
Maintaining Your Cleaning Arsenal Over Time
To prolong the effectiveness of your tools, regular maintenance is essential. For electrical equipment, I recommend cleaning filters and checking for wear every few months, following manufacturer guidelines closely. Keeping cloths and brushes sanitized prevents transferring bacteria between cleaning sessions. Also, storing equipment in a dry, organized space reduces damage risks and extends their lifespan. Regular calibration of tools, like steam cleaner temperature checks, ensures peak performance and consistent sanitation. Finally, staying updated with the latest product reviews and innovations helps incorporate new tools that could save you time and effort in the long run. For ongoing learning, check out this resource on the latest in cleaning technology.
How Do I Keep My Tools in Prime Condition Over Time?
Regular inspection, cleaning, and proper storage are key. For example, after each use, rinse out hoses and clean filters thoroughly. Applying a disinfectant spray to microfiber cloths before storage can inhibit bacterial growth. Additionally, rotating tools periodically prevents overuse of a single appliance, reducing wear and tear. Investing in a dedicated storage cabinet with compartments for different equipment keeps everything organized and accessible. Remember, well-maintained tools perform better and last longer, saving you money and ensuring consistent results. Want to ensure your vacuum’s longevity? Try sealing its filter with a vacuum-specific sealing spray, as recommended by industry professionals, to prevent dust ingress and maintain optimal suction levels.
The Hardest Lesson I Learned About Move-Out and Upholstery Cleaning
One of my biggest realizations came when I underestimated the power of regular maintenance. I used to think deep cleaning once in a while was enough, but I discovered that consistent, light-touch care keeps upholstery looking fresh and prevents stubborn stains like ink from becoming disasters. Skipping routine upkeep only makes the job harder—and more costly—down the line.
3 Misconceptions About Freshening Your Home That Set Me Back
I believed that using the strongest disinfectants was always the best choice, but I learned that overdoing it can actually damage surfaces and create resistant germs. Also, I thought that scrubbing vigorously was effective—until I saw the fabric fibers fray and ink spread further. Understanding that gentle, targeted techniques yield better results was a game-changer. These insights helped me avoid unnecessary wear and tear during my cleaning routines.
My Personal Awakening With the Secrets of Proper Rinsing and Drying
I used to rush through rinsing with water, thinking it was enough to remove residue. But I found that thorough rinsing and patience in drying prevent water spots and mold. Allowing furniture to air dry fully—even when time is tight—ensures the stain stays gone and the fabric remains undamaged. This patience in the finishing touches truly pays off in the long run.
Where I Went Wrong with DIY Cleaning and What You Should Do Instead
I used to rely on vague online advice about cleaning chemicals, which sometimes made stains worse. After consulting experts and trying different products, I realized the importance of choosing specific solutions suited to each problem—like using alcohol carefully on ink stains. Now, I focus on understanding my fabrics and applying tailored techniques, which saves me money and preserves the furniture’s integrity.
Curated Tools for Lasting Upholstery and House Cleanliness
My trusted toolkit includes a high-grade steam cleaner, which sanitizes deep into fibers without harsh chemicals. Also, microfiber cloths with antimicrobial properties help me pick up dirt efficiently without spreading germs. I’ve switched from rental equipment to professional-grade tools, and the difference in cleanliness and time saved is remarkable. For comprehensive insights, I recommend exploring this upholstery care guide.
Embracing a Routine That Keeps the Home Feeling New
Implementing a schedule that combines quick daily touch-ups with quarterly deep cleans has transformed my living space. Using digital checklists reminds me to sanitize high-touch areas regularly, preventing buildup. This proactive approach not only extends furniture lifespan but also creates a healthier environment. If you’re unsure where to start, this strategy guide can help streamline your routines.
The Future of Home Care Is Smarter and Simpler
As technology evolves, integrating smart tools like IoT-connected vacuums and sensors will make maintenance even easier. Investing in high-quality equipment now, coupled with ongoing learning about best practices, positions you for a cleaner, healthier home in the years ahead. Remember, the journey toward perfect cleanliness is ongoing—and every step you take now builds a more comfortable, inviting space for your family.