
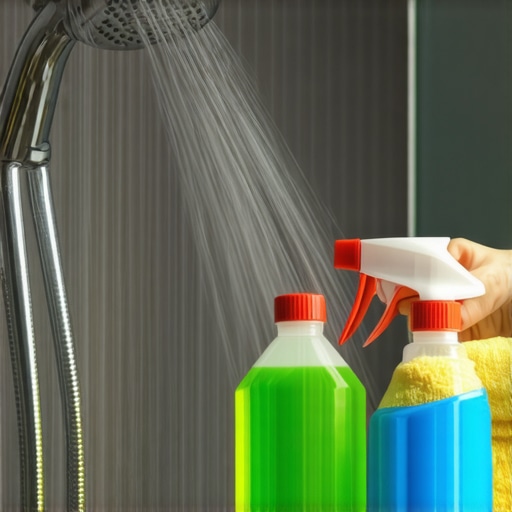
Have you ever stood in your shower, watching that weird crusty film slowly build up on your shower head, and wondered, “Is there any way to actually fix this without buying a new one?” Trust me, I’ve been there. It’s that annoying layer of mineral deposits that seem to appear out of nowhere, especially if you live in an area with hard water. You turn around, start rinsing off, and suddenly, the flow isn’t as satisfying—more like a weak waterfall than a revitalizing shower.
Why Hard Water Deposits Drive Us Crazy and Ruin Our Showers
Hard water deposits, also known as limescale, are mineral residues—primarily calcium and magnesium—that cling stubbornly to surfaces over time. They’re not only unsightly but can also cause your shower head to clog, reducing water pressure and ultimately, making your daily routine less enjoyable. More than just an aesthetic issue, these deposits can harbor germs and bacteria, compromising your bathroom’s hygiene. Plus, replacing the shower head isn’t always practical or budget-friendly, especially when a simple fix can save you money.
I used to believe I had to buy a new shower head every year, lamenting the constant buildup. But one lightbulb moment changed everything: I realized that with a bit of know-how, I could restore my current fixture to almost new condition. And honestly, the satisfaction of fixing it myself? Well, that’s priceless. Today, I’ll share the exact method I swear by—no harsh chemicals, no expensive tools—just a natural, effective solution that I’ve tested a hundred times over.
Before jumping into the practical steps, ask yourself: Have you faced this problem and wondered if there’s a way to avoid costly replacements? If yes, stick around. You’re about to learn a simple, proven trick that can breathe new life into your shower head, saving you both time and money. And trust me, once I cracked the code, I couldn’t believe I hadn’t done this sooner. According to a report by the American Water Works Association, mineral buildup is the leading cause of shower head inefficiency and early failure—so tackling it head-on can make your fixtures last years longer and function better.
Ready to transform your shower experience? Let’s get into how to remove those stubborn deposits for good and restore your shower head’s full pressure and sparkle.
Prepare Your Supplies for a Quick Fix
Gather white vinegar, a plastic bag, a rubber band, an old toothbrush, and a clean cloth. I remember the first time I did this; I accidentally used apple cider vinegar, which took longer to work and smelled odd. To avoid that, stick with plain white vinegar—it’s inexpensive and highly effective.
Remove the Shower Head or Use a Bag Method
Option 1: Detach the Shower Head
If possible, unscrew the shower head using adjustable pliers wrapped in a cloth to prevent scratching. I once forgot to cover the fittings and ended up with a small leak; since then, I always use a cloth to protect the surface.
Option 2: Keep It Attached with a Bag
If removal isn’t easy, submerge the shower head’s outlet in a vinegar-filled bag. Place a sturdy plastic bag over the shower head, secure it with a rubber band, ensuring the nozzles are submerged. This method saves time and avoids dismantling the fixture.
Soak and Dissolve the Deposits
Fill the bag with enough vinegar to cover the nozzles. Leave it to soak for at least an hour; I found that overnight works best for heavy buildup. During my first attempt, I realized that a longer soak loosened even stubborn deposits—my shower head looked brand new afterward.
Scrub Away Remaining Deposits
Remove the bag and use an old toothbrush dipped in vinegar or water to scrub the nozzles gently. Pay special attention to blocked holes. I once spent extra time scrubbing, but it paid off when the water pressure improved instantly. This step ensures all residual limescale is dislodged.
Rinse and Reassemble
If you detached the shower head, screw it back on carefully, ensuring a tight fit. Turn on the water to flush out any loosened debris. Check for leaks and smooth water flow. That initial bad water pressure? Restored to a satisfying stream after this simple process.
Extra Tips for Persistent Buildup
If deposits remain stubborn after the first try, repeat the soaking process or use a mixture of vinegar and baking soda for extra power. Remember to clean the filter screen inside the shower head if accessible, as it often traps mineral residues. For more tips on efficient cleaning routines, visit daily house cleaning routine.
Prevent Future Buildup and Keep Pressure High
Regularly wiping down your shower head with a vinegar-soaked cloth helps prevent new deposits from forming. Installing a water softener can also dramatically reduce mineral buildup. I learned that lesson when I didn’t want to repeat this process every few months—since then, my shower head stays pristine longer. For more insights into maintaining a spotless bathroom, see bathroom safety tips.
Every homeowner has heard some cleaning advice that sounds too good to be true, and the truth is, many of these so-called tips are actually misconceptions. For example, a widespread myth is that using vinegar on all surfaces is always safe and effective. While vinegar is a fantastic natural cleaner, it can damage natural stone countertops like granite or marble, as its acidity can etch the surface over time. Consulting expert sources, such as the comprehensive cleaning tips on professional cleaning secrets, can help you avoid costly mistakes and adopt safer, more effective methods.
Are You Making This Hidden Mistake During Sanitization?
Many assume that spraying disinfectant and wiping immediately kills germs, but leading studies by microbiologists reveal that most disinfectants need to sit on surfaces for a certain contact time—often 10 minutes—to be truly effective. Rushing the process or wiping too quickly can leave harmful bacteria behind, jeopardizing your home’s safety. For an in-depth look at effective sanitizing techniques, check out sanitizing secrets for a safer house.
Furthermore, when it comes to move-out cleans, some people think scrubbing every inch meticulously is necessary, but this can lead to unnecessary wear and tear, especially on delicate surfaces. Instead, focusing on the high-traffic areas and problem spots—like behind the toilet or inside cabinets—often yields the best return, and you can find expert strategies at move-out cleaning hacks. Also, misjudging upholstery cleaning can be costly; using high-powered rental machines without proper knowledge can damage fabrics. For the best results, trust professional info found at upholstery care guide.
Many believe that more chemicals mean cleaner results, but overusing disinfectants or harsh cleaners can leave residues, degrade surfaces, or cause health issues. Natural alternatives and knowing when to use them is key. If you’re unsure about the right approach, explore expert plans at sanitizing hacks for safe house transitions. Remember, the goal isn’t just clean—it’s safe and sustainable cleaning that protects your loved ones and prolongs your fixtures’ lifespan. Have you ever fallen into this trap? Let me know in the comments.Maintaining a spotless and hygienic home isn’t a one-time effort but an ongoing commitment. Having the right tools and establishing effective routines can make this process both manageable and rewarding. For instance, I swear by a high-quality, adjustable microfiber mop like the O-Cedar ProMist MAX; its microfiber material traps dust and grime efficiently, reducing the need for repeated deep cleans. Pair this with a steam cleaner such as the McCulloch MC1275 Heavy-Duty Steam Cleaners. I personally use it to sanitize upholstery and tiles without harsh chemicals, ensuring safety for my family and prolonging the life of fabrics and surfaces.
How do I maintain my cleaning tools over time?
Proper maintenance extends the lifespan and effectiveness of your equipment. Regularly wash microfiber cloths and mop heads in hot water with a bit of vinegar—this removes residual dirt and eliminates bacteria. For tools like steam cleaners, always consult the manufacturer’s instructions for descaling and filter replacement to avoid mold buildup or clogging, which can reduce performance. Additionally, using tool-specific attachments—like soft brushes for upholstery—can prevent unnecessary wear and tear, keeping your equipment in top shape for years to come.
The future of house maintenance seems to lean toward automation and smart technology.
Smart robotic vacuums like the iRobot Roomba i7+ are increasingly sophisticated, learning your home’s layout and scheduling cleanings even when you’re not there. As these devices continue to evolve, expect integration with home automation systems for seamless control. This trend not only reduces manual effort but also ensures that cleaning becomes a consistent part of your routine, preventing stubborn grime buildup. To keep these devices functioning optimally, regular emptying of dustbins and routine filter changes are vital. For detailed guidance, check out expert cleaning tips.
The Hardest Lesson I Learned About House Cleaning and Sanitizing
One of the biggest surprises I encountered was realizing that stubborn mineral deposits could be tackled effectively without harsh chemicals, saving money and protecting my family’s health. This taught me the importance of patience and experimenting with natural solutions like vinegar, which is surprisingly powerful if used correctly. Remember, patience truly pays off when restoring your fixtures.
3 Myths About House Cleaning That Held Me Back
I used to believe that using more cleaning products meant better results, but over time, I discovered that natural methods often outperform synthetic cleaners—especially when it comes to maintaining fixtures like shower heads. Additionally, I thought replacing old tools frequently was necessary, but proper maintenance of cleaning tools prolongs their lifespan and effectiveness. Challenging these misconceptions has transformed my cleaning routines.
What Experts Won’t Tell You About Upkeeping Your Bathroom
Despite what popular advice suggests, frequent chemical use isn’t always the answer. Instead, regular vinegar soaks and scrubbing can prevent build-up and prolong the life of your shower head. I’ve learned that understanding the specific materials in your bathroom helps avoid damage—like using vinegar on natural stone surfaces—so always source expert insights for safe cleaning practices. Learn more about effective sanitizing at professional cleaning secrets.