
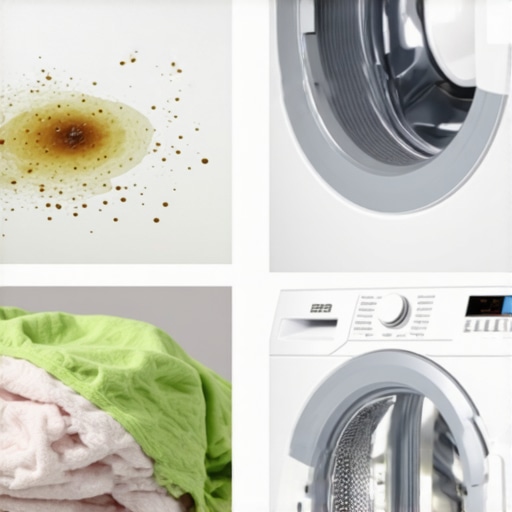
It was one of those mornings where everything went wrong—fumble with the detergent, spill on the freshly folded shirts, and then, the dreaded realization. I had missed a grimy spot in my laundry room that, years ago, I wouldn’t have thought twice about but now, could cost me dearly at my move-out inspection. That lightbulb moment hit me hard: some sneaky spots hide grime so stubborn that they can threaten your deposit recovery.
Why Overlooking the Dirty Nooks Could Cost You Big
Think about when you’re scrubbing your bathroom tiles or wiping down the kitchen counters. It’s easy to focus on the visible mess, but what about those tiny, neglected areas in your laundry space? Often, it’s the unseen grime in corners, behind appliances, or along the edges that leave landlords disappointed—especially if you’re trying to get your full refund. I’ve learned from personal experience that a few overlooked spots can turn a sparkling home into a deposit-deduction nightmare.
The thing is, these areas are tricky because they hide in plain sight. They’re not immediately obvious, and many homeowners or renters mistake cleaning the surface for a thorough job. But the reality is, grime in the laundry room can attract mold, cause odors, and even damage surfaces over time. According to cleanliness experts, neglecting these hidden spots can lead to long-term issues that affect both your health and your financials.
If you’ve ever faced the sinking feeling of discovering a missed spot just before handing over the keys, you’re not alone. I remember rushing to wipe down my laundry room walls just before an inspection—only to spot black mold in the corner behind the dryer. That experience taught me the importance of targeted cleaning, focusing on those neglected nooks.
Have you ever overlooked stubborn grime in your laundry room and worried it might impact your move-out deposit? If so, don’t worry. I’ve got your back. Today, I’m going to walk you through the three most common but easily missed grimy spots in your laundry space that could threaten that deposit refund.
Before we jump into the cleaning hacks, let’s address a common skepticism. Many people wonder, “Is it really worth the extra effort to clean behind the appliances?” Trust me, it is. Small spots like behind the washer and dryer or inside the dryer vent accumulate dust and dirt that can leave marks if ignored. Plus, a deep clean here can prevent costly mold and pest issues down the line.
Now that I’ve shared my own slip-ups and emphasized why these tiny areas matter, it’s time to get practical. Grab your cleaning supplies, and let’s tackle those overlooked laundry room spots that can make all the difference in ensuring you get your full deposit back. Ready to dive into step-by-step solutions? Let’s go!
Move Appliances for Deep Access
Start by unplugging your washing machine and dryer, then carefully slide them out from the wall. Use a furniture dolly or sliders if available. Once moved, thoroughly inspect and clean behind and underneath the appliances where dust, lint, and mold often accumulate. I remember once myself struggling with a stubborn mold patch behind my dryer; moving it revealed years of accumulated grime that a simple wipe couldn’t handle. This approach prevents long-term mold growth and keeps your laundry space hygienic.
Inspect and Clean Vents and Ducts
Next, check your dryer vent and exhaust ducts. Disconnect the vent hose and remove any lint buildup with a vacuum or brush designed for duct cleaning. Rigid or flexible ducts trap dust and debris that can cause odors or even fire hazards. Regularly cleaning these parts ensures optimal airflow and prevents odors from seeping into your laundry room. I once used a flexible brush to clean my vent thoroughly, instantly noticing improved drying times and no more musty smells.
Scrub Hidden Corners with Precision Tools
Use a narrow brush or toothbrush dipped in a cleaning solution of warm water and mild detergent or vinegar to scrub tricky corners, mold spots, and grime around the edges of your appliances. Focus on the seam lines, joints, and corners that cleaning cloths might miss. For instance, after my last move, I noticed black mold in the corner behind the washer; a dedicated brush reached into every crevice, making a significant difference. This step helps prevent mold spores from spreading and keeps your laundry space safe.
Clean Behind and Inside the Machines
Remove the access panels of your washing machine, if possible, and vacuum out lint, dust, and detergent residue. Use a damp cloth to wipe down the interior surfaces. Similarly, clean inside the dryer drum with a lint brush and check for any hidden residue. Once, I found a forgotten sock stuck behind my washing machine, preventing proper drainage. Inside, it was covered with dust and lint that could have become mold if left untouched.
Sanitize and Deodorize Each Area
Finish by spraying a disinfectant or sanitizing spray, such as a mix of vinegar and water, on all surfaces, including the floor and corners. Let it sit for a few minutes before wiping clean. This kills bacteria, mold spores, and neutralizes odors. For heavy odors, sprinkle baking soda before mopping. Remember, good sanitation is essential not just for cleanliness but also to protect your appliances and ensure your move-out inspection goes smoothly. This simple step kept my laundry room smelling fresh and free from pollutants.
Final Touchups and Regular Maintenance
After cleaning, replace the appliances, reconnect the vents, and wipe down the surrounding walls and baseboards. Set a schedule to repeat this deep cleaning semi-annually, especially before moving out. Regular maintenance prevents grime buildup and makes routine cleaning easier. I learned that a quick wipe-down of the area behind the machines every few months avoided the tedious cleanup I had to do before my last move. Precaution and consistency save time and money, ensuring you secure your full deposit back and maintain a healthy laundry space.
Many homeowners assume that a quick vacuum or surface wipe suffices for upholstery and deep cleaning tasks, but this oversimplifies the complexity of truly effective cleaning. Contrary to popular belief, not all cleaning methods are equally effective across different fabric types or surface materials. For example, many believe that steam cleaning is universally safe for all upholstery, yet experts warn that high temperatures can damage delicate fabrics like silk or velvet, leading to permanent discoloration or texture change, as detailed in the effective upholstery cleaning tips.
Maintaining a spotless and sanitized home requires not just dedication but also the right tools. Over the years, I’ve tested various equipment and products to ensure my cleaning solutions are both effective and efficient. Investing in quality tools saves time, enhances results, and extends the lifespan of your upholstery and surfaces. One essential asset in my toolkit is a high-quality steam cleaner. I personally favor models like the Bissell PowerFresh Steam Mop because it provides deep cleaning without harsh chemicals, making it safe for delicate fabrics and versatile for different surfaces. Regular use of a steam cleaner can prevent stubborn grime buildup, especially in areas prone to mold or odors, and as noted by cleaning professionals, steam cleaning helps eliminate bacteria and dust mites more effectively than traditional methods.
For tackling hard-to-reach corners, I rely on a precision spray and brush attachment set from MyCleanTools, which allows me to target mold and dust in those tricky spots behind appliances or along baseboards. These are particularly valuable in move-out cleaning scenarios, where attention to detail is crucial for securing your deposit.
How do I maintain my cleaning tools over time?
I recommend thorough cleaning of your equipment after each use—descale your steam cleaner periodically to prevent mineral buildup, and replace brushes when they show signs of wear. Proper maintenance not only prolongs the tool’s lifespan but also ensures consistent, optimal performance. For detailed guidelines, I consult reputable sources like cleaning experts who emphasize routine care of your equipment.
As technology advances, new cleaning innovations are emerging. In the future, I predict smart cleaning devices integrated with IoT sensors will monitor grime accumulation and notify homeowners when maintenance is needed, streamlining upkeep and maintaining home hygiene effortlessly. Already, some robotic vacuums now include air quality sensors, hinting at this trend.
To ensure your upholstery stays fresh and your house hygienic, I encourage you to try a professional-grade steam cleaner combined with targeted attachments for those hard-to-clean spots. Consistent use and proper maintenance will significantly enhance the longevity of your furniture and surfaces, saving you money and stress in the long run. Want some more tips? Check out my detailed upholstery care guide.
What I Wish I Knew About Upholstery Care Before Moving Out
One of the biggest lessons I learned was the importance of regular, targeted cleaning of upholstery to prevent stubborn stains and odors from setting in, which can be costly during move-out inspections. I used to think vacuuming was enough, but deep cleaning with the right tools truly transformed my home’s freshness and helped me avoid deposit deductions.
Another insight is the significance of understanding fabric types before cleaning. Using harsh chemicals on delicate materials can cause damage, so I always double-check the manufacturer’s recommendations or consult trusted guides like the Upholstery Care Guide. This knowledge prevents costly repairs and maintains the integrity of your furniture.
Lastly, I discovered that sealing and protecting upholstery after a professional cleaning can significantly extend its life and keep it looking fresh longer. Investing in fabric protectors has been a game-changer for me, especially when managing especially vulnerable pieces in high-traffic areas.
My Top Picks for Maintaining a Spotless Home and Ensuring Deposit Refunds
- Steam Cleaners Like Bissell PowerFresh: I trust this for deep sanitizing without harsh chemicals, perfect for delicate upholstery and quick touch-ups.
- Precision Tools from MyCleanTools: These attachments help reach those tricky corners, behind appliances, and between cushions where dirt and mold tend to hide.
- Natural Sanitizing Sprays: Vinegar and water mixes, along with baking soda, keep surfaces disinfected and odor-free, all eco-friendly options I rely on.
- Move-Out Checklists: A solid plan helps me stay organized and ensures I don’t miss those overlooked spots, like behind the fridge or inside vents—details that make or break a deposit refund. For comprehensive strategies, check out my move-out cleaning tips.
Take Action Now and Protect What Matters
Your home deserves care, and a little effort now can save you from costly surprises later. By focusing on specific areas and using the right tools, you not only maintain a fresh, healthy environment but also guarantee your full deposit refund. Don’t wait until the last minute—start deep cleaning today and experience the difference it makes!
Have you ever hesitated to tackle those stubborn upholstery stains or forgotten a hidden corner during cleaning? Share your story below—I’d love to hear what worked for you!