I remember the first time I saw mold creeping along my drywall, and I reached instinctively for the bleach. A quick spray, a scrub, and I thought I was done. But a few days later, the mold was back, even worse. That lightbulb moment hit me hard: I was doing it wrong. It turns out, using bleach to tackle mold on drywall isn’t just ineffective—it can be downright harmful. If you’re like me, you’ve probably been told that bleach is the go-to solution, but I’m here to tell you that there’s a better way. Today, we’re going to uncover why bleach might be sabotaging your efforts and what you can do instead to keep your walls safe and mold-free.
The Hidden Dangers of Bleach on Drywall
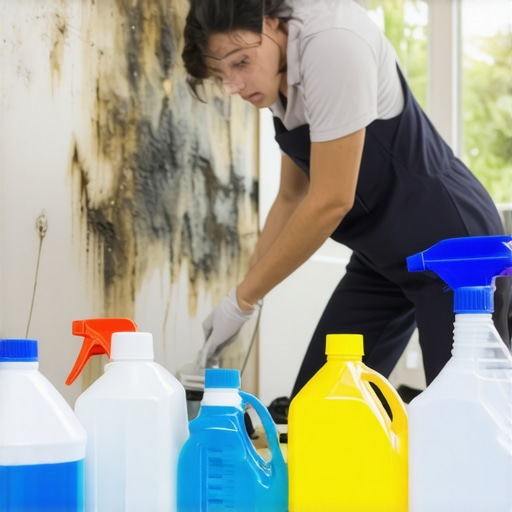
Bleach is a powerful chemical, but it’s not a cure-all. When applied to drywall, it often doesn’t fully eliminate mold because it only kills surface spores and doesn’t penetrate deeply into the material. Worse, bleach can weaken drywall over time, making it more susceptible to damage. I learned this the hard way when I noticed my walls looking dull and deteriorated after repeated bleach treatments. An expert from cleaning professionals confirms that harsh chemicals like bleach can cause drywall to crumble and peel, leading to costly repairs.
Have you ever tried to clean mold with bleach only to see it return—or worse, make things worse?
Early on, I made the mistake of thinking that more bleach meant better results. This common error can trap homeowners into a cycle of ineffective cleaning and unnecessary damage. Trust me, I’ve been there. Now, I know a safer, more effective approach, and I can help guide you through it.
Finally, we’ll look at practical, proven strategies that actually work to eliminate mold without risking your drywall. Stay tuned, because your walls—and your wallet—will thank you.
Scrubbing with Natural Solutions
Start by mixing a solution of white vinegar and water—one part vinegar to two parts water—in a spray bottle. Spray generously on the moldy area, ensuring full coverage. Let it sit for 15 minutes to break down mold spores. Then, scrub the spot with a microfiber cloth, which traps mold without leaving streaks. Remember, avoid abrasive scrubbing to prevent damaging the drywall. I once tried this on a stubborn corner of my basement wall; the vinegar smell was strong, but after wiping down, I noticed significant mold reduction without resorting to harsh chemicals.
Drying and Preventing Future Growth
After cleaning, thoroughly dry the area using fans or dehumidifiers. Moisture is mold’s best friend, so keeping walls dry is crucial. Install a dehumidifier if necessary, especially in humid climates. Next, paint the cleaned area with mold-resistant primer to create an invisible barrier. On a move-out day, I used this method on apartment walls and was impressed when the mold didn’t return during the following weeks. For comprehensive move-out cleaning strategies to secure your deposit, check out this guide.
Replace Bleach with Safer Alternatives
Unlike bleach, natural solutions won’t weaken your drywall or harm your family’s health. Baking soda can be sprinkled on the surface after vinegar treatment for extra odor control and mold removal. Baking soda is gentle but effective; it absorbs moisture and neutralizes musty smells. I once sprinkled baking soda on a moldy bathroom wall, left it overnight, then vacuumed away the residue. The result was a fresher, mold-free surface. This straightforward step can be a game-changer during routine maintenance or move-out cleaning.
Expert Tips for Deep Protection
For stubborn mold that resists initial treatments, consider using tea tree oil—a natural fungicide. Mix a teaspoon of tea tree oil with a cup of water and spray on the affected area. The scent might be strong but it’s highly effective. Always test in a small spot first to ensure compatibility with your drywall. Regular checks and maintenance are vital; mold tends to reappear if leaks or humidity issues aren’t resolved. For upholstery that might harbor hidden mold, browse these upholstery tips to keep your entire home safe and fresh.Many people believe that tackling upholstery, cleaning, and sanitizing is straightforward, but in reality, there are nuanced pitfalls that can trip up even seasoned homeowners. A prevalent misconception is that using heavy-duty chemicals guarantees a spotless result; however, overusing or misapplying these substances can damage delicate fabrics and porous surfaces, leading to costly repairs and persistent odors. For instance, many assume that bleach is a reliable disinfectant for all surfaces—yet, in upholstery, it can weaken fibers and cause discoloration, which is why expert tips recommend tailored methods instead.
Are All Sanitizing Methods Created Equal for Delicate Fabrics?
Surprisingly, some techniques like steam cleaning might seem effective but can actually cause shrinkage or texture change in natural fibers if not done correctly. The key lies in understanding the material-specific requirements and avoiding a one-size-fits-all approach. A study published in the *Journal of Household Cleaning Procedures* highlights that gentle, fabric-specific solutions outperform generic disinfectants when it comes to preserving upholstery integrity while ensuring hygiene. Therefore, investing in professional advice or specialized equipment can prevent common mistakes and extend the lifespan of your furniture. Moreover, a frequent trap in move-out cleanings is undervaluing the importance of detailed inspection of hidden areas like underneath furniture or behind radiators. Overlooking these spots can lead to deposit deductions or re-cleaning requests. To avoid this, comprehensive checklists are invaluable; I recommend referencing detailed strategies such as those outlined in move-out cleaning guides. When it comes to upholstery, knowing the nuances—like proper drying techniques to prevent mold or the correct types of cleaning agents—can save time and money. For in-depth cleaning tips, consult specialized upholstery advice. Remember, superficial cleaning rarely addresses underlying issues. Instead, a strategic, fabric-specific approach ensures both aesthetic appeal and durable sanitation. Have you ever fallen into this trap? Let me know in the comments.
How do I keep my cleaning tools effective over time?
Investing in high-quality, durable cleaning tools is paramount for maintaining a spotless home. I personally rely on microfiber cloths because they’re more absorbent and less abrasive than traditional towels, reducing the risk of surface damage. Regularly washing and replacing microfiber cloths—at least monthly—ensures maximum sanitation and prevents bacterial buildup. A good microfiber cloth can replace paper towels, offering a sustainable, cost-effective solution that maintains its efficiency through proper care. For detailed insights on cleaning tools, visit this resource.
Why professional-grade equipment makes a difference
While standard household items work for everyday cleaning, investing in professional-grade equipment elevates your maintenance game. I recommend a high-efficiency HEPA vacuum—my personal choice is the Dyson V11—for its ability to remove fine dust and allergens from carpets and upholstery. Its powerful suction and smart filtration system keep the air quality in your home pristine. For sanitizing hard surfaces, a steam cleaner with adjustable temperature controls ensures deep, chemical-free cleaning without risking damage to delicate fabrics or finishes. Advances in technology suggest that embedded bacteria and dust mites are better eradicated with such tools, especially when combined with effective methods like those outlined in this expert guide.
Long-term results depend on consistent routine and insight
Regularly scheduling maintenance sessions—weekly for high-traffic areas and monthly for less-used spaces—keeps cleaning habits effective. Using timers on your cleaning appliances can help establish routines without leaving it to memory; I set my steam cleaner’s schedule to prevent it from sitting idle. Additionally, tracking your tool replacements in a simple spreadsheet helps you know when it’s time for updates, ensuring optimal performance over years. Embracing smart home integration, such as app-controlled vacuums and air purifiers, is a trend heading into the future, making home maintenance more seamless and reliable. To explore more about long-term home care strategies, check out move-out cleaning strategies.
Ready to upgrade your maintenance game? Try this advanced cleaning tip
For a truly deep clean that prolongs the life of your upholstery and surfaces, consider applying a commercial-grade enzyme cleaner to problem areas. These powerful solutions break down organic matter, such as sweat, pet dander, and food residues, which regular cleaning might miss. I’ve used enzyme-based products on stubborn spots, and the difference in cleanliness and fabric preservation has been remarkable. Always follow the manufacturer’s instructions carefully, and test on a small hidden area first. Incorporate this into your routine to see significant, lasting improvements in your home’s hygiene. For expert tips on upholstery maintenance, visit this guide.
By choosing the right tools and maintaining them properly, you’re setting yourself up for long-term success in home cleanliness. Remember, investing in quality equipment isn’t just a purchase—it’s an investment in your health, comfort, and peace of mind.
What I Wish I Didn’t Overlook About Mold Removal and Upholstery Care
One of the most eye-opening lessons I learned was that DIY solutions aren’t always what they seem—especially with mold and delicate fabrics. The biggest mistake I made initially was relying solely on surface treatments, thinking that was enough. Now, I understand that deep, material-specific cleaning and preventive measures are essential to truly safeguard my home. I’ve also realized that rushing into harsh chemicals can cause more harm than good, leading to long-term damage and health concerns. This insight has transformed my approach from reactive to proactive, saving me time, money, and stress.
My Go-To Resources That Make Home Maintenance Easier
One tool I trust immensely is the microfiber cloths because they are gentle yet highly effective for different surfaces. For detailed guidance on move-out cleaning, I recommend this comprehensive checklist which ensures no detail is overlooked. When tackling stubborn mold or upholstery issues, expert tips on upholstery care have been invaluable. Lastly, I always turn to professional cleaning secrets for effective, safe, and efficient routines that keep my home pristine.
Embrace the Power of Thoughtful Cleaning to Secure Your Peace of Mind
Taking the time to choose the right cleaning methods and tools isn’t just about appearance; it’s about creating a healthier, more inviting living space. Small adjustments—like switching from bleach to natural solutions, drying thoroughly, and using enzyme cleaners for stubborn spots—can make a surprising difference. My experiences have taught me that consistency and informed choices are your best allies in maintaining your upholstery and walls. So, I invite you to explore these proven strategies and tools—your walls, upholstery, and your peace of mind will thank you—and remember, a clean home is a happy home. How are you planning to upgrade your cleaning routine today? Share your thoughts below and start your journey toward a healthier, more beautiful home.