Ever jumped into your car after a fun day with your furry friend, only to be greeted by a mountain of pet hair on your seats? That disappointing sight hits hard, especially knowing how stubborn pet hair can be to remove. I remember one particularly frustrating afternoon, after my dog decided to cozy up during a long drive, leaving behind enough hair to start a small tumbleweed farm. I tried everything—vacuuming, sticky rollers, even elaborate brushing—but nothing seemed to do the trick fast enough to get me back on the road quickly.
Why Pet Hair Clings So Relentlessly to Car Seats
Pet hair is infamous for sticking to fabric surfaces, and car seats are no exception. The fibers in upholstery act like tiny magnets, especially when you’ve got a pet that loves snuggling during drives. Moreover, the static electricity in your car amplifies this clinginess, making the hair stubbornly resistant to simple vacuuming. Early on, I made the mistake of thinking regular household cleaners or just a quick vacuum would solve my problem. Spoiler alert: it doesn’t. The real breakthrough came when I realized time and technique matter more than brute force. If you’re tired of spending ages trying to pick up pet hair and are eager for faster, smarter solutions, you’re in the right place.
Today, I promise to share effective tricks and hacks that have transformed my car cleaning routine. These aren’t just quick fixes—they’re tried-and-true methods that save you precious time, especially when you’re in a rush or preparing for an important event. Think of this as your personal toolkit for a pet hair-free drive, no matter how furry your friend gets.
Is It Really Possible to Get Pet Hair Out Quickly and Effectively?
For a long time, I believed the only way was to endure hours of scrubbing or shell out for professional detailing. But I learned early on that making a mistake—like relying solely on traditional vacuuming—can actually worsen the problem or at least make it last longer. Some pet owners swear by special lint rollers or rubber gloves, but I’ll tell you this: combining multiple approaches is what really works. Want to skip the endless struggle and get back to cruising smooth? Keep reading. I’ll walk you through the best methods that I use myself, backed by expert tips from upholstery cleaning insights, like those you can find at Spotless Carpetz.
Use a Rubber Doorstop or Gloves for Instant Results
One trick I swear by is using a damp rubber glove or a rubber doorstop. When I had my Chesapeake, I found that putting on a slightly damp rubber glove and running my hand over the upholstery clumps the pet hair into manageable balls, making it easy to pick up. During a recent road trip, I quickly cleaned a chair in less than five minutes this way, saving me from that embarrassing pet-hair explosion before arriving at a family gathering.
Vacuum with the Right Attachments for Deep Cleaning
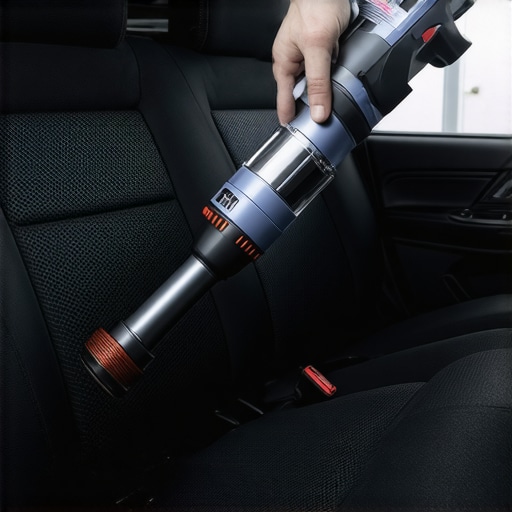
Don’t just grab your regular vacuum; switch to the crevice or upholstery attachment. Place the vacuum nozzles close to the surface and move in zigzag motions. I once missed this step and only used the general cleaner, which left most hair behind. After switching attachments and going over the seats twice, my car looked fresh and hair-free. Remember, a thorough vacuuming is essential for removing embedded pet hair rather than just surface lint.
Use Static Electricity to Your Advantage
Applying a static charge can make pet hair stand up, facilitating removal. Lightly spraying the fabric with a mixture of water and a tiny bit of fabric softener using a spray bottle helps. For example, I sprayed my fabric seats and quickly pulled a wide masking tape or lint roller over the surface. The static trapped the hair, and the tape lifted it off effortlessly—saving me from endless vacuuming sessions. To learn more about softening your upholstery while cleaning, check out house cleaning secrets.
Utilize a Lint Roller and Sticky Tape for Final Touch-Ups
For stubborn residual hairs, a lint roller works wonders. I keep one in my glove compartment for quick touch-ups. Alternatively, wrap some wide masking tape around your hand with the adhesive side out and press against the fabric. This method is great for quick clean-ups before surprises like a last-minute guest or a spontaneous drive. Also, avoid over-soaking the fabric with sprays, as excessive moisture can lead to mold or odors, especially in the confined space of a car.
Prevent Pet Hair Build-Up for the Future
Regular grooming reduces the amount of hair shed into your vehicle. Brushing your pet before long rides is a game changer. I also use pet-specific grooming tools that remove loose fur more effectively. For instance, during the weekend, I spent 10 minutes brushing my Labrador and noticed a significant decrease in hair in the car afterward. Pairing this with seat covers made of washable fabric creates a barrier that keeps car seats cleaner longer. To ensure your car stays fresh after cleaning, refer to upholstery cleaning tips.
Many homeowners assume that following basic cleaning routines guarantees a germ-free and well-maintained home. However, this belief often leads to overlooked nuances that can compromise cleanliness and safety. One widespread myth is that more frequent cleaning using harsh chemicals automatically results in a healthier environment. In reality, excessive use of strong disinfectants can damage surfaces and contribute to chemical sensitivities. Experts recommend targeted sanitizing approaches, especially focusing on high-touch areas, as highlighted in professional sanitizing tips. Additionally, many think that move-out cleaning is just about surface wiping. But overlooked dirt in hidden spots like behind appliances, in ventilation ducts, or under baseboards can cause deposit deductions or lead to mold growth. Always remember that a thorough move-out strategy includes detailed attention, as outlined in comprehensive move-out checklists. What’s more, there’s a misconception about upholstery cleaning—many believe that standard vacuuming suffices. Yet, deep cleaning fabrics, especially natural fibers, requires specialized techniques that prevent fiber damage and trap removal. To learn advanced methods, visit upholstery cleaning insights. Now, let’s explore some nuanced insights that might challenge your current understanding or reveal hidden risks.
Investing in the Right Equipment for Lasting Cleanliness
Maintaining a consistently clean and sanitized home demands more than just regular wiping—it calls for the right tools combined with effective techniques. My preferred investment has been a high-quality HEPA-filter vacuum with specialized upholstery attachments. I chose this model because it traps even the tiniest dust particles and pet dander, which is essential for long-term air quality and preventing allergen buildup. For instance, I use a Miele Complete C3 Cat & Dog vacuum, as it offers an adjustable power setting and a thorough HEPA filtration system, making the cleaning process both efficient and gentle on delicate fabrics. To keep upholstery pristine between professional cleanings, I also recommend **microfiber cloths** treated with appropriate cleaning solutions—these cloths are surprisingly effective at trapping dust and hair without spreading allergens or residue. For a DIY approach, check out this guide on maintaining microfiber cloths properly.
Technology is evolving, with AI-powered robotic vacuums, like the iRobot Roomba i7+, now capable of mapping your home and scheduling cleanings automatically. These devices can handle routine maintenance, freeing you up for more important tasks. Looking ahead, I predict that automation and smart home integrations will play larger roles in maintaining household hygiene—allowing homes to stay fresh almost autonomously. Imagine setting your vacuum to run during work hours or while you’re away, ensuring constant upkeep with minimal effort.
How do I keep my cleaning tools effective now and in the future?
Proper maintenance of your cleaning equipment is essential for sustained performance. Regularly replacing vacuum filters, cleaning brushes, and descaling steam cleaners will extend their lifespan and efficiency. For example, I clean my vacuum’s HEPA filter every month and ensure the brushes are free of hair and debris—this practice prevents clogging and maintains suction power. When it comes to upholstery cleaning, scheduling professional deep cleans every 6 to 12 months helps ensure fabrics are thoroughly sanitized and fibers are preserved. Deep cleaning fabrics, especially natural ones, requires specialized techniques that avoid fiber damage. Learn more about advanced upholstery care at this resource.
Maintaining your cleaning tools and methods now ensures that your home stays fresh longer, prevents dirt and allergens from embedding deep into surfaces, and saves money on frequent replacements or professional interventions. As technology advances, integrating smarter tools into your routine will become more accessible, making home maintenance easier than ever. Try scheduling regular equipment checks and proactive cleaning of your tools—your home will thank you for the effort and consistency.
What I Wish I Knew About Pet Hair Battles
One of my biggest lightbulb moments was realizing that patience and experimentation often trump brute force. Instead of endlessly vacuuming or brushing, I started combining techniques—like dampening a rubber glove and running it over seats—that transformed my cleaning routine. Embracing a flexible approach prevented frustration and made pet hair removal more manageable.
Another lesson was understanding the static element. Spraying a mixture of water and fabric softener before removing pet hair created static electricity, making hairs stand up and come away effortlessly. This insight saved me countless scrubbing hours and kept my car looking fresh.
I also discovered that regular grooming of my pet significantly reduced the amount of loose hair that sneaks onto seats. Investing in good grooming tools and establishing a routine eliminated much of the stress associated with deep-cleaning trips.
Gear Up for Success with Trusted Tools
My top recommendation is a high-quality HEPA-filter vacuum with dedicated upholstery attachments. I personally rely on the Miele Complete C3 Cat & Dog model because it traps tiny allergens and pet dander, ensuring cleaner air inside my vehicle. Microfiber cloths treated with suitable cleaning solutions are surprisingly effective for quick tidying up—more than just lint rollers alone.
Looking ahead, AI-powered robotic vacuums, like the iRobot Roomba i7+, are game-changers for maintaining a pet-hair-free home. Scheduling routine cleanings during work hours keeps the car and home consistently fresh without extra effort.
Keep Your Car Supplies Working Hard for You
Maintenance of your cleaning tools is essential. Regularly replacing filters, cleaning brushes, and descales extend their effectiveness. I advise cleaning vacuum filters monthly and checking attachments for hair buildup—simple steps that make a big difference over time. Deep upholstery cleans every 6 to 12 months, especially for natural fibers, ensure thorough sanitation and fabric longevity. For detailed routines, visit this comprehensive guide.
Implementing these practices guarantees a cleaner, healthier environment while maximizing the lifespan of your equipment. As technology evolves, integrating smarter cleaning tools will become more accessible, empowering you to maintain a pristine automobile with minimal effort.