Ever scrubbed and scrubbed, only to see stubborn white spots lingering stubbornly on your bathroom fixtures, shower doors, or glassware? I’ve been there. One random morning, I noticed a faint but persistent cloudy film on my soap dish. I thought, “This will come off with a little elbow grease,” but nope—those sneaky mineral deposits had other plans. That lightbulb moment made me realize I was dealing with more than just everyday grime; I was battling tough hard water stains that seemed impossible to remove using harsh chemicals alone.
Why Hard Water Stains Are More Than a Nuisance
Hard water contains minerals like calcium and magnesium that leave behind those telltale spots—annoying, stubborn, and if left untreated, capable of dulling your fixtures and making your home look neglected. Did you know that over 85% of homes in the U.S. experience hard water problems? (Source: EPA) The good news? You don’t need to rely on powerful, chemical-laden cleaners that often do more harm than good. Instead, I’ve discovered that natural ingredients often do the trick—and in a way that’s safe for you and the environment.
What If I’ve Tried Everything? Is Natural Really Effective?
That’s a common skepticism I encounter. I used to think that only commercial cleaners could tackle those pesky deposits. Early on, I made the mistake of relying on store-bought harsh chemicals that promised quick results, only to be disappointed. The reality? Many of these products contain acids that can damage your fixtures over time. After some experimentation—and a few failed attempts—I found that using simple, natural solutions not only works but also keeps my fixtures shiny and free of residual chemicals.
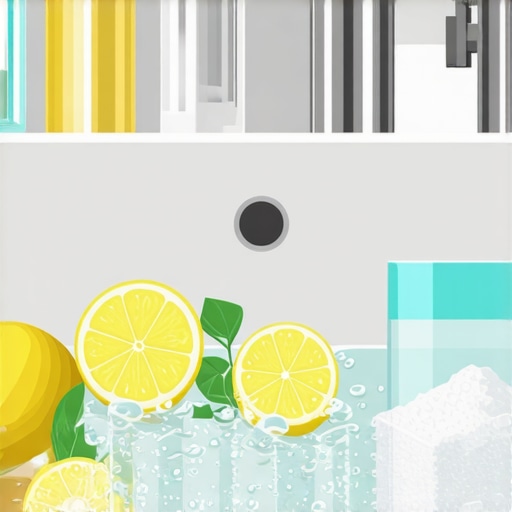
Now, I’ll walk you through how you can harness the power of common kitchen ingredients to banish those hard water stains for good. If you’ve ever faced similar frustration, keep reading—you’re about to discover a friendlier, more sustainable way to restore your home’s sparkle.
Start by Preparing Your Cleaning Solution
Mix equal parts white vinegar and water in a spray bottle. For tough stains, add a few drops of lemon juice to enhance cleaning power. I remember tackling a set of foggy bathroom fixtures after a weekend of DIY experimenting; the vinegar spray completely transformed the dull surfaces, making them look brand-new.
Apply the Solution Generously to Stained Areas
Spray the vinegar solution onto the hard water deposits, ensuring thorough coverage. Let it sit for 10-15 minutes—it allows the minerals to loosen. In my experience, patience is key: rushing results only spreads the deposits. While spritzing, I once noticed a stubborn ring on my glass shower door start to crackle as the mineral bonds weakened.
Use a Non-Abrasive Scrubbing Tool
Employ a soft-bristle brush or a microfiber cloth to scrub the surface gently. Think of it as exfoliating, not scrubbing a stubborn scab—too harsh damages the finish. I learned this when I pressed too hard on my chrome fixtures and left scratches, which are now visible even after cleaning.
Rinse and Dry Thoroughly
Wipe the area with a clean, damp cloth to remove residual vinegar and loosened deposits. Follow with a dry microfiber cloth to prevent streaks. I recall a time I skipped this step, leaving behind a vinegar film that attracted more dust and made the fixtures look cloudy again.
Apply a Protective Finish
For added protection against future stains, apply a thin layer of carnauba wax or a specialized glass protector. This creates a barrier that prevents minerals from adhering. After applying wax on my bathroom mirror, the water droplets simply bead up and roll off, keeping the glass clearer longer. For detailed tips on upholstery care, visit this guide.
Repeat Regularly for Long-Term Results
Consistency is critical. I set a monthly reminder to reapply the vinegar solution, which before felt tedious, but now feels like a routine. This simple maintenance prevents buildup and keeps your fixtures shining without harsh chemicals. For sanitizing tips during this process, check out this article.
 While many believe that a basic sweep and wipe are sufficient for move-out cleaning or upholstery maintenance, the reality is far more nuanced. One common misconception is that using aggressive chemicals guarantees spotless results. In my experience, over-reliance on strong cleaners can damage delicate fabrics and surfaces, often leading to costly repairs or replacements. For example, many homeowners resort to bleach or ammonia without considering their long-term effects, which can weaken fibers and cause discoloration. Instead, understanding the specific material composition of your upholstery or surfaces can inform safer, more effective cleaning methods. According to experts in restoration and cleaning sciences, tailored approaches yield better results and preserve the integrity of your furnishings.
What are the advanced pitfalls that even seasoned cleaners often overlook?
One subtle mistake is neglecting the microscopic buildup of dust and bacteria in hidden areas, such as behind appliances or under furniture, which can harbor allergens and pathogens. Regularly cleaning visible spots isn’t enough; comprehensive move-out cleaning requires a detailed inspection of these often neglected zones. Additionally, many overlook the importance of proper drying and ventilation after cleaning, which can promote mold growth and residual odors. For deeper insights into effective cleaning practices and avoiding common traps, check out this expert guide. Always remember, rushing the process or using generic solutions often results in subpar outcomes and potential damage. Take the time to research the material-specific cleaning techniques, utilize gentle yet effective products, and thoroughly ventilate the space afterward. This approach not only ensures your deposit is secured but also prolongs the life of your furnishings. Have you ever fallen into this trap? Let me know in the comments. 
Keeping It Working: Tools I Recommend for Effective House Care
Maintaining a spotless home requires more than just knowing the right cleaning techniques; it hinges on having the right tools at your disposal. Over the years, I’ve perfected a toolkit that makes move-out cleaning, upholstery refreshment, and sanitizing much more manageable and effective. Investing in quality equipment not only saves time but also prolongs the lifespan of your surfaces and fixtures, ensuring your home remains inviting and well-maintained long-term.
Why Your Vacuum Matters and Which One to Choose
Many underestimate the importance of a reliable vacuum cleaner. I personally prefer Dyson V11 Torque Drive because of its powerful suction and smart technology that adapts to different surfaces. It effectively lifts pet hair, dust, and allergens without dispersing particles back into the air—crucial for homes with pets or allergy sufferers. Using a high-quality vacuum with HEPA filters can make a significant difference in maintaining air quality and preventing the buildup of dust in hard-to-reach corners.
Steam Cleaners: A Versatile Maintenance Partner
For sanitizing and stubborn stain removal, I rely on the Reliable SteamerPlus. Its multi-surface capability allows me to clean tiles, upholstery, and even curtains effectively without harsh chemicals. The real advantage is its ability to kill bacteria and viruses with just water vapor, aligning with the latest research indicating that steam cleaning can be both eco-friendly and highly effective (source).
Strategic Tools for Upholstery and Dust Control
When it comes to upholstery, I swear by a handheld upholstery cleaning machine like the Bissell SpotClean Pro. It’s compact, easy to use, and perfect for targeted cleaning in tight spaces. I also always keep microfiber cloths from this guide handy. They capture dust effectively without spreading it around, especially when used with the right cleaning solutions.
Maintaining Your Tools for Long-Term Results
Proper maintenance of your cleaning equipment extends its lifespan and keeps performance optimal. Regularly replacing vacuum filters, descaling steam cleaners, and washing microfiber cloths prevents the spread of germs and dust. According to expert recommendations, cleaning your tools after each use is essential in avoiding bacterial buildup (source).
Looking Ahead: The Future of Cleaning Devices
Advancements in smart home technology are transforming traditional cleaning tools. I predict we’ll see more AI-integrated devices that customize cleaning routines based on household activity and surface type, further enhancing efficiency and effectiveness. Staying updated with these innovations ensures you’re not left behind in the cleaning game.
How do I keep my tools in top shape?
Creating a regular maintenance routine—such as descaling steam cleaners, replacing filters, and laundering microfiber cloths—ensures your equipment performs at its best. Think of your tools as investments that should be cared for diligently. Regular check-ups, as recommended in this comprehensive guide, maximize longevity and optimize cleaning results. Don’t wait for performance issues before servicing your tools—set monthly reminders to conduct quick maintenance checks. This proactive approach saves you time and money while keeping your home consistently clean and sanitized.
Lessons the Hard Way: What I Wish I Knew During Move-Out Cleaning
- One of the biggest surprises I encountered was how overlooked those tiny, hidden spots are—like behind appliances or under furniture—that can make or break your security deposit. Learning to methodically inspect and clean these areas transformed my approach.
- Discovering that a gentle, tailored cleaning routine with natural ingredients not only preserves surfaces but also keeps my home healthier was a game-changer. I realized that aggressive chemicals often cause more harm than good in the long run.
- Timing is everything. Regular maintenance, like monthly microfiber wipes and prompt stain treatments, prevents buildup and saves hours of scrubbing before move-out day. Establishing this routine made the entire process smoother and less stressful.
- Investing in knowledgeable tools—like a good vacuum with HEPA filters and a versatile steam cleaner—made all the difference. These tools became my allies in ensuring a thorough, quick, and chemical-free cleanup.
- The importance of a detailed checklist cannot be overstated. Staying organized with a comprehensive plan helped me avoid missed spots and last-minute panic, ensuring I secured my full deposit.
My Favorite Resources for Clean Home Confidence
- Effective House Cleaning Secrets from Cleaning Experts — This guide offers insider tips on maximizing cleaning efficiency and protecting your surfaces, making it my go-to for detailed strategies.
- Upholstery Cleaning Tips for a Fresh Home Revival — I trust this resource for maintaining fabric health without chemical damage, extending the life of my furniture.
- Why Microfiber Cloths Stop Working—and How to Save Them — Replaces wasteful habits with effective cleaning techniques that keep dust and streaks away.
- Sanitizing Hacks for Safe House Transitions — A must-know for thorough, eco-friendly disinfecting without risking surface damage or chemical overload.
Your Path to Move-Out Success Starts Here
Embarking on your move-out cleaning journey might seem daunting at first, but with the right mindset, tools, and tips, you can transform it into a manageable and even rewarding experience. Remember, maintaining consistent, gentle cleaning habits now will save you from last-minute stress—and ensure your home shines for the next occupant. Dive into these trusted strategies, and step confidently toward that full security deposit return. What move-out cleaning challenge are you facing now? Share your stories below and let’s tackle them together!
https://spotlesscarpetz.com/privacy-policy