
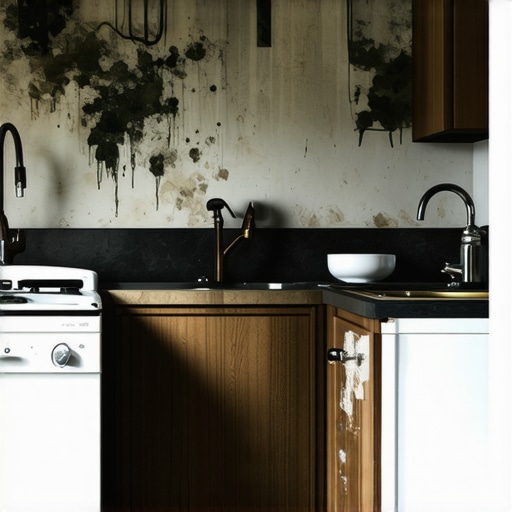
It was that sinking feeling I got as I hesitated before turning off the oven—once again, I’d overlooked that stubborn grease behind the stove. Weeks after moving out, I got the dreaded call: deductions on my security deposit for unsanitary kitchen corners. The realization hit me hard. I’d missed those sneaky grime spots that landlords always catch—and it was costing me.
Have you ever experienced a similar moment of shock, discovering that little neglected nook or cranny is ruining your chances of getting your full deposit back? That frustration is universal among renters, but I’ve learned a few secrets over time, and I want to share them with you.
In this post, we’ll uncover the five hidden grime spots that often go unnoticed—and more importantly, how to tackle them effectively to maximize your refund.
Why Overlooking These Spots Could Cost You
Small details matter more than you think. Even after a thorough cleaning, those tiny corners—like behind appliances or inside vents—can harbor dirt, grime, and bacteria. Landlords or inspectors don’t just look at the obvious; they scrutinize every nook. A study from the National Apartment Association highlights that unaddressed hidden spots are a leading cause of deposit deductions.
Early in my renting journey, I made the mistake of focusing only on visible surfaces, ignoring those “out of sight, out of mind” areas. That oversight cost me a significant chunk of my deposit. Now I know better, and I want to help you avoid that pitfall.
Let’s dive into tackling these sneaky spots effectively, starting with the kitchen—arguably the most neglected area. Curious to learn how to give your kitchen a deep clean that landlords will thank you for? Keep reading. If you want a comprehensive checklist, my go-to resource is the [move-out cleaning checklist](https://spotlesscarpetz.com/move-out-clean-checklist-to-simplify-your-transition) which covers everything from floorboards to hidden corners.
Remember, a thorough clean isn’t just about appearance; it’s about sanitization and leaving your space in pristine condition. Stay tuned as we explore each grime zone and the best methods to conquer them overnight.
Start with a Detailed Inspection
Before diving into cleaning, walk through your entire space and make a checklist of areas that tend to hide dirt, like behind appliances, under cabinets, or inside vents. Think of it as mapping out your battlefield—know where the enemy (dirt and grime) hides to attack effectively.
Remove and Prepare Items
Take out all movable items, including furniture, small appliances, and decorative items. This creates open space for thorough cleaning. For upholstery, check out these upholstery tips to handle fabric and leather pieces properly.
Deep Clean Kitchen Grease and Surfaces
Spray a degreasing cleaner on kitchen cabinets, especially around stove areas—these are grease traps that often get overlooked. Use a soft brush or sponge to scrub away baked-on grease, akin to exfoliating your skin for a fresh finish. For stubborn spots, apply a paste of baking soda and water, then scrub gently. Don’t forget behind the fridge and stove—these cracks hide years of grime.
Target Hidden Spots
Use a narrow brush or an old toothbrush to reach tight corners, vent covers, and grout lines. Pay special attention to hidden dust traps behind appliances where dust and dirt settle unnoticed.
Sanitize and Disinfect High-Touch Areas
After visible cleaning, focus on sanitizing high-touch surfaces like switches, door handles, and faucet knobs. Use an effective disinfectant and allow it to sit for the recommended contact time to ensure germs are killed—think of this as applying a security badge that stays in place long enough to do its job. For a safer, chemical-free approach, check out these sanitizing methods.
Scrub Bathroom Grime Thoroughly
Bathrooms are notorious for buildup—soap scum, mold, and mineral deposits. Use a bathroom-specific cleaner on tiles, grout, and fixtures. Use a grout brush to scrub away discoloration—think of it as giving your tiles a facial. Focus on the toilet, sink, and shower trims, applying disinfectant and letting it sit to work its magic.
Deep Clean Upholstery and Soft Furnishings
Upholstery can harbor dust, pet hair, and stains. Vacuum thoroughly with an upholstery attachment, then treat spots with appropriate stain removers—avoid harsh chemicals like ammonia, which can damage delicate fabrics. For best results, follow these upholstery care tips.
Address Hidden Floor Areas and Baseboards
Sweep and mop along baseboards and under furniture. Use a damp microfiber cloth to wipe dust from corners and moldings. Pay special attention to window tracks and baseboards, which collect dirt and often get missed.
Ventilation and Final Touches
Finally, open windows and run fans to air out the space. Wipe down all surfaces one last time to catch any missed spots. Remember, consistency is key—think of this as polishing the final gemstone to ensure your home is spotless and ready for inspection.
Many homeowners and renters alike believe they know the best methods for cleaning, sanitizing, or maintaining upholstery, but often, these assumptions are based on misconceptions that could compromise results. One widespread myth is that using harsh chemicals guarantees a deeper clean; however, in my experience, gentle, targeted approaches—like those outlined in these upholstery tips—are more effective and safer for delicate fabrics. Another common mistake is neglecting to pre-inspect hidden areas before cleaning, which can lead to overlooked grime traps and deposit deductions. Here’s where advanced techniques come into play—using tools like narrow grout brushes or microfiber dusters to reach those tricky spots. An often overlooked nuance is the chemical interaction between cleaning agents and surfaces; for example, overusing vinegar on stone countertops can cause etching, a detail emphasized in this expert guide. Being aware of these advanced details prevents costly mistakes and results in a truly thorough cleanse. Have you ever fallen into this trap? Let me know in the comments.Maintaining a spotless home requires more than just routine cleaning; it demands the right tools, consistent methods, and a strategic mindset to ensure long-term results. Personally, I rely on professional-grade equipment that has transformed my cleaning routine and can do the same for you. For instance, a high-quality steam cleaner is a game-changer—not only does it sanitize deeply, but it also tackles stubborn stains without the need for harsh chemicals. I use the Dupray One Plus steam cleaner, chosen for its versatility and powerful steam output, which effectively kills bacteria in grout lines and upholstery alike. This tool is especially useful for upholstery, as it allows for deep cleaning without saturating delicate fabrics, aligning with guidelines from this comprehensive upholstery guide.
Lessons from the Trenches That Changed My Approach
- One of the toughest lessons I learned was that even a rigorous cleaning routine can miss tiny grime traps behind appliances. Once I realized that, my move-out process became meticulously detailed, saving me from deposit deductions.
- I used to think focusing on visible surfaces was enough—then I discovered that landlords scrutinize unseen spots like vent covers and moldings. Now, I tackle these areas first, ensuring nothing slips through the cracks.
- Getting advice from cleaning professionals taught me that quality tools, like narrow grout brushes and microfiber dusters, are game changers for reaching tricky corners. Incorporating these into my routine transformed my results.
Tools and Resources That Make Deep Cleaning Easier
- Dupray One Plus Steam Cleaner: This versatile tool deep-sanitizes upholstery, grout, and hard-to-reach areas without chemicals. I trust it for its power and gentle touch on delicate surfaces.
- Move-out Cleaning Checklist from this resource—comprehensive and easy to follow, helping me stay organized and thorough every time.
- Upholstery Cleaning Tips from this guide—a lifesaver for freshening up soft furnishings and maintaining appeal.
- Sanitizing Secrets from this article—essential for high-touch areas and minimization of germs post-cleaning.
Your Path to Confident Cleanliness Starts Today
Achieving a spotless home isn’t just about appearances; it’s about peace of mind and securing your deposit. Equip yourself with the right knowledge, tools, and mindset—your future self will thank you for the effort. Remember, every hidden corner cleaned is a step closer to success in your move-out inspection. Ready to tackle those sneaky spots and turn cleanliness into your best move? Let’s do it! How have you approached those elusive grime traps before? Drop your tips or questions below—I’d love to hear your experience.