Have you ever been deep into a move-out cleaning, only to discover that your dishwasher’s filters are coated in a grimy film? I remember my first attempt—thinking I could skip this step. Big mistake. The smell, the buildup—it all felt insurmountable. It wasn’t just about aesthetics; it was a sinking feeling knowing that ignoring these small details could jeopardize my move-out refund. That lightbulb moment hit me hard: those tiny filters matter more than I thought.
Why Dirty Dishwasher Filters Can Cost You Your Refund
In my experience, overlooked spots like dishwasher filters are often the sneakiest culprits when it comes to failed move-out inspections. They’re hidden deep inside, easy to forget, yet right in the line of fire for inspection checklists. I discovered that failing to properly clean them not only risks negative reviews from landlords but could even lead to losing part or all of your deposit. It’s pretty surprising, but according to cleaning experts, these little filters can trap harmful bacteria and residues that test for cleanliness during inspections (see more tips here).
Is It Really Worth the Effort or Just Another Trend?
I made the mistake early on of dismissing the importance of dishwasher filters, thinking they were just minor details. That was a costly oversight. The truth is, when you’re aiming for that flawless 2026 floor check, every spot counts—especially those you can’t see right away. Cleaning these filters is not just about sanitizing; it’s about securing your hard-earned deposit and avoiding last-minute surprises. If you’ve ever felt overwhelmed trying to keep track of all the cleaning chores, you’re not alone. The good news? With a simple, proven method, you can tackle this step efficiently. Want to make sure you’re not missing out on crucial details? Keep reading, because I’ll guide you through the easiest way to clean those grimy dishwasher filters and guarantee you get your full refund.
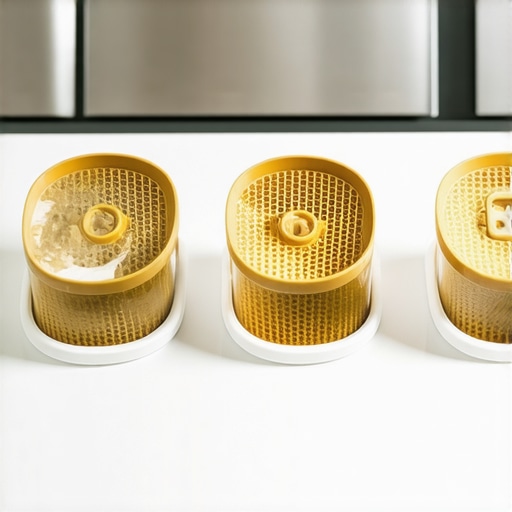
Remove and Disassemble the Filter
Start by locating your dishwasher’s filter, usually at the bottom of the appliance. Carefully remove the filter assembly, which often involves twisting or unscrewing specific parts. Use a soft cloth or paper towel to wipe away loose debris. Remember, if you’re unsure about the disassembly process, consult your dishwasher’s manual or check online tutorials for model-specific guidance. I once struggled with a stubborn filter clip, but gently prying with a plastic scraper avoided damage and made reassembly smoother (need help? contact us).
Soak and Scrub the Filter Thoroughly
Submerge the disassembled filter components in hot water mixed with a cup of white vinegar or a specialized dishwasher cleaner. Let it sit for 15–30 minutes to loosen grease and mineral buildup. After soaking, use an old toothbrush or a soft-bristled brush to scrub every crevice. Think of it like exfoliating your skin—gentle but effective—removing layers of grime that an ordinary rinse misses. I vividly remember the first time I scrubbed my filter, and the difference in cleanliness was immediately noticeable (try these upholstery cleaning tips for similar dirt battles).
Check and Clean Surrounding Areas
While the filter is out, inspect the area behind it for trapped debris or mold. Use a damp cloth or a small brush to wipe surrounding surfaces, ensuring no residue remains that could contaminate your dishes later. This step is crucial because hidden crumbs or mold can cause unwanted odors or bacteria transfer—both red flags during move-out inspections. I once missed this detail, which led to a smell that was tough to eliminate later, wasting hours on additional cleaning (learn what inspectors look for).
Reassemble and Run a Hot Water Cycle
Carefully put the cleaned parts back into place, ensuring all clips and screws are securely fastened. Run a high-temperature cycle for the dishwasher or, if your model allows, pour a cup of vinegar inside and run an empty cycle. This step disinfects the interior and flushes out any remaining residues, leaving your dishwasher sparkling. Think of this as a final rinse for a perfect finish—like finishing a painting with a clear coat. I’ve found this step critical—an otherwise spotless filter can be compromised if the interior isn’t sanitized properly (see sanitizing hacks).
Double-Check and Keep it Dry
After your cycle completes, open the door and inspect the filter area again. Ensure no leftover debris or water remains. A completely dry area prevents mold growth during storage and keeps your appliance in top shape. Remember, fresh and dry equals clean—an essential factor for passing move-out inspections without issues. I learned this the hard way when residual moisture caused a musty smell during our next use (avoid common oversights).
 Many homeowners operate under misconceptions that can sabotage their move-out efforts. One common myth is the belief that regular surface wiping is sufficient for a thorough clean. While surface cleaning improves appearance, it often leaves behind hidden residues, molds, or bacteria that are only visible under special scrutiny—like UV light or professional inspections. Relying solely on visible cleanliness can lead to failing move-out inspections and losing your deposit. Scientific studies emphasize the importance of deep cleaning techniques that target microscopic contaminants, which standard methods often overlook (see expert tips here).
Keeping Your Cleaning Equipment in Top Shape
One of my top tips for maintaining a pristine home over the long haul is investing in high-quality, durable tools specifically designed for the tasks at hand. For instance, I swear by a cordless electric scrubber for stubborn grout lines and bathroom tiles; its oscillating brush heads cut down cleaning time remarkably while reducing manual effort. Regularly inspect your tools—like vacuum filters, mop heads, and microfiber cloths—to ensure they’re free of debris and in good condition. A simple routine of rinsing and air-drying these items after use extends their lifespan and keeps them performing effectively, avoiding the buildup of bacteria or mold. Incorporating reliable tools not only makes cleaning more efficient but also more consistent, significantly impacting your long-term results. For example, a well-maintained steam cleaner can sanitize surfaces more deeply and safely, reducing the need for harsh chemicals over time. I predict that the future of home maintenance will lean heavily toward smart, self-cleaning tools with AI integration, which could notify you when parts need replacing or when a cleaning cycle isn’t optimal. To stay ahead, I recommend choosing versatile equipment that offers multiple functionalities—like a handheld steam cleaner that also doubles as a fabric refresher—saving space and investment. Want to maximize your cleaning effectiveness? Regularly check and maintain your vacuum’s HEPA filters; a clogged filter can diminish suction power and air quality. For detailed maintenance routines, consult trusted resources like expert cleaning tips here. Remember, a little preventative upkeep goes a long way in preserving your tools’ performance and your home’s cleanliness in the long run.
How Do I Maintain My Cleaning Tools Over Time?
Establish a routine of inspection and cleaning for your tools, such as rinsing microfiber cloths after each use and replacing mop heads every few months. Store them in a dry, ventilated area to prevent mold growth. Schedule periodic deep cleans of your vacuum filters or steamers—these maintenance steps are crucial to keeping them functioning optimally. Using specialized cleaning solutions for your equipment, like descaling agents for steam cleaners, can prevent mineral buildup that hampers performance. Investing in a storage system that keeps your tools organized and accessible, like wall mounts or dedicated bins, ensures you’re more likely to follow your maintenance schedule. As technology advances, expect tools to become increasingly smart—think self-maintaining scrubbers or vacuums that notify you when filters need replacement. Starting with a high-quality tool like a cordless steam cleaner, which I rank as indispensable for bathroom surfaces, can make this process smoother. Experiment with cleaning solutions and check manufacturer instructions regularly to ensure longevity. To streamline your maintenance, I recommend setting monthly reminders and keeping a log of your tool upkeep. Curious to make your cleaning tools last longer and work better? Try the simple step of replacing your vacuum’s HEPA filter every three months; it’s a small investment with significant returns on air quality and suction power. For more techniques, visit these upholstery cleaning tips and adapt them for your other equipment. Maintaining your tools might seem tedious, but it’s the secret to consistent, stellar cleaning results—and it saves money in the long run.
What I Didn’t Know Until It Was Too Late About Cleanliness
One of the most eye-opening lessons I learned was that the tiniest overlooked spots can make or break a move-out inspection—especially when it comes to dishwasher filters. These small details had me scrambling at the last minute, realizing that perfect cleanliness isn’t just about obvious stains or dirt but also about deep cleaning hidden areas that inspectors are trained to scrutinize. My lightbulb moment? Recognizing that consistent attention to these details saves time, money, and stress in the long run.
How Small Changes Can Save Your Deposit
Implementing targeted cleaning techniques, like soaking and scrubbing dishwasher filters, can feel tedious but pays off big. I found that dedicating just 15 minutes to disassemble, soak in vinegar, and scrub prevents bacterial buildup and odor issues—common pitfalls that can cause landlords to withhold deposits. Trust me, these small, proactive steps transform your cleaning game and ensure you approach move-out day with confidence, not last-minute panic.
The Real Cost of Ignoring Hidden Spots
Over the years, I realized that superficial cleaning often leaves behind microscopic residues or mold hidden in dark corners or behind appliances. This oversight can lead to failed inspections and unexpected losses. The key is to adopt a mindset that thoroughness extends beyond what the eye can see, aligning with the science-backed advice I found in expert resources. Deep cleaning is an investment in peace of mind and guarantees that your efforts truly shine during inspection.
Why Maintenance of Cleaning Tools Matters More Than You Think
After mastering the art of deep cleaning, I understood that maintaining my tools—like vacuum filters and microfiber cloths—was equally vital. Regularly inspecting, cleaning, and replacing them ensures consistent results and prolongs their lifespan. Incorporating simple routines, such as rinsing tools after use or scheduling monthly checkups, keeps my cleaning arsenal ready and reliable. Small maintenance acts today prevent major setbacks tomorrow, making house cleaning a more manageable task.
Embrace the Hidden, Prepare for Success
The journey to a perfect move-out clean is less about brute force and more about strategic focus on those hidden spots that most overlook. By cultivating a meticulous mindset, you not only secure your deposit but also develop skills that elevate your entire household maintenance routine. Remember, every detail counts when it comes to making your space spotless and inspection-ready. Ready to level up your cleaning game and see the results firsthand?
Resources to Keep Your Cleaning Sharp
For tools that make deep cleaning easier, I swear by durable, high-quality equipment like cordless electric scrubbers—these significantly cut down cleaning time and effort. My favorite guide remains the expert tips from cleaning professionals, which offers insights on tackling those tricky spots. When it comes to maintaining my tools, these upholstery cleaning tips have been invaluable and adaptable for multiple surfaces around my home. Investing in reliable, well-maintained equipment is a game-changer, making every cleaning session more effective and less stressful.
Your Turn to Shine in Your Next Move
Now that I’ve shared my lessons learned about mastering the hidden details of house cleaning, I encourage you to approach your next move-out with a fresh perspective. Focusing on those small but critical spots—like dishwasher filters—can make all the difference in securing your deposit and leaving a spotless impression. Are you ready to tackle those overlooked corners and elevate your cleaning routine? Share your thoughts or ask questions below—I’d love to hear about your experiences and tips!