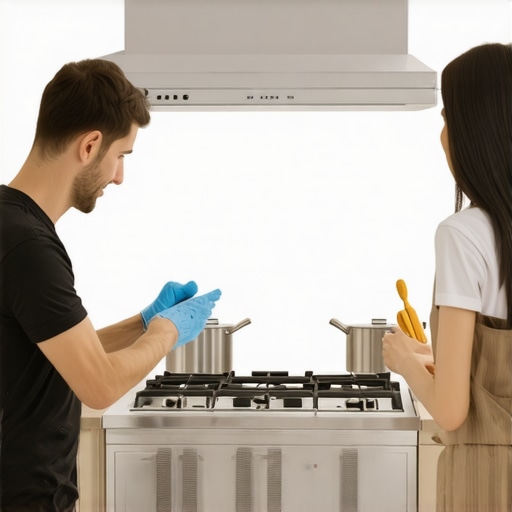
I remember the exact moment I realized my kitchen was failing the move-out inspection—not because of the fridge or the countertops, but because of the stubborn, grimy range hood lurking above my stove. That little corner always seemed to gather grease and dust, and I kept ignoring it, convincing myself it was just part of the natural wear and tear of a busy kitchen. But when the inspector arrived, my heart sank. The grease buildup was so obvious they gave me a laundry list of fixes—or risk losing my deposit altogether.
Your secret weapon to squeaky-clean move-out success
If you’ve ever been in my shoes, you know how frustrating it can be to overlook a small area that turns into a big problem on inspection day. The good news? With just a few smart fixes, you can transform that filthy range hood into a shining example of cleanliness. Today, I’ll share my personal tips—tested and proven—that will help you breeze through your 2026 move-out inspection and secure your deposit.
Is DIY Range Hood Cleaning Overhyped, or Worth the Effort?
Early in my cleaning journey, I made a classic mistake: I took on the range hood without the right tools or knowledge. I assumed a quick wipe would do the trick, but the grease was stubborn, and I barely made a dent in the accumulation. That mistake taught me to invest in proper cleaning supplies and to follow specific steps for different hood types. Now, I focus on strategic, effective methods—saving time and effort—and I’ve seen how a little know-how can make all the difference. Curious to see how simple fixes can turn your range hood from gross to gleaming? Keep reading.
Start with a Detailed Plan to Break Down Tasks
Begin by listing all key areas that need cleaning, including kitchen appliances, bathrooms, carpets, and hidden spots like behind appliances. Personally, I found that creating a checklist saved me from missing critical spots. This prevents overwhelm and ensures nothing gets overlooked, especially in tricky areas like the corners behind the fridge or under the sink. Use a cleaning schedule to allocate specific tasks each day leading up to move-out day.
Equip Yourself with the Right Tools for Each Job
Invest in quality cleaning supplies tailored to different surfaces—microfiber cloths for dust, non-abrasive scrub brushes for stubborn grime, and specialized cleaners for appliances. I learned this the hard way when I used generic degreasers on my oven’s stubborn grease, which wasn’t effective. For example, a heavy-duty degreaser saved me hours when cleaning the stove’s greasy spots, ensuring they came off easily. Always read labels to choose the appropriate product for each material, whether it’s tile, glass, or upholstery.
Methodical Approach to Grease and Dust Removal
Tackle grease buildup systematically, starting from the top down—ceiling fans, cabinets, then countertops—to prevent re-soiling freshly cleaned areas. When I cleaned my kitchen exhaust fan, I first removed the filters, soaked them in a mixture of warm water and baking soda, then scrubbed gently. Remember, for heavy grease, letting the cleaner sit for a few minutes can loosen stubborn deposits. Repeat on all kitchen surfaces, paying attention to hidden spots like the vents or behind appliances, which often harbor dust and grease—see how I addressed this in my post about hidden vent spots.
Deep Clean Upholstery and Fabrics
For upholstered furniture, vacuum thoroughly before applying spot treatments. I once ignored my recycled silk couch’s stains, which resulted in a failed inspection. Use steam or specialized fabric cleaners for deep stains, following manufacturer instructions meticulously. For delicate fabrics, opt for gentle methods like a dry-cleaning approach combined with a vacuum with adjustable suction. Regularly sanitize fabric surfaces using approved methods—consider insights from these upholstery tips—to eliminate allergens and odors that may cause inspection problems.
Sanitize Common Touchpoints Effectively
Focus on high-touch areas such as door handles, switches, and appliance controls. I used a microfiber cloth sprayed with disinfectant to wipe down all light switches and doorknobs, ensuring I targeted areas often overlooked. For smart devices and sensors, quick spritzing followed by wiping prevents residue build-up without damaging electronics—see how to handle your smart home features in smart upholstery sanitation.
Pay Attention to Hidden Spots Landlords Check
Many landlords inspect seemingly insignificant areas like baseboards, vents, and behind appliances—areas that can make or break your deposit return. I learned this firsthand when I cleaned behind the fridge and found dust and crumbs I never noticed before. Use a long-handled duster or vacuum attachment to reach these spots. Consistent cleaning of these often-neglected zones ensures you’re covering all bases, aligning with what landlords expect during their assessments—refer to AI inspection tips.
Many people assume that house cleaning is straightforward, but overlooking nuanced details can lead to costly mistakes during move-out inspections. One widespread misconception is that scrubbing lightly is enough; in reality, deep sanitation, especially of upholstery and hidden spots, is essential to secure your deposit. Another myth is that disinfectants alone eliminate the need for thorough physical cleaning—yet, studies show that mechanical removal of dust and grime is crucial for effective sanitation (Cleaning Experts). Furthermore, many underestimate the importance of specialty cleaning for fabrics like recycled silk or modern upholstery, which require tailored approaches to avoid damage and ensure compliance with landlord expectations. A common trap is neglecting hidden or overlooked areas like behind appliances or ventilation ducts, which are often scrutinized during inspections. Failing to address these can cause deposit deductions even if the visible surfaces look spotless. To truly master move-out cleaning, it’s vital to understand these nuances—investing in targeted techniques not only saves you money but also builds trust with landlords. So, next time you plan your cleaning strategy, ask yourself: Have I considered the hidden, advanced aspects? If you found this insight helpful, share your experiences or questions below. For comprehensive tactics, visit our move-out cleaning strategies guide.
Maintaining a pristine home over the long term requires more than just the right products; it involves investing in reliable tools and establishing routines that keep your space sparkling without excessive effort. One of my go-to investments is a high-quality, cordless handheld vacuum, like the Dyson V7 Motorhead. I personally favor this model because it combines portability with powerful suction, making it perfect for quick daily cleanups of upholstery, corners, and hard-to-reach spots. Its lightweight design reduces fatigue, enabling me to maintain a consistent cleaning schedule without feeling overwhelmed.
How do I keep my cleaning tools performing at their best?
Regular maintenance is key. For instance, I clean the filter of my vacuum every month using cold water, allowing it to dry completely before reuse—this practice preserves suction power and prolongs the device’s lifespan. Additionally, replacing filter components as recommended by the manufacturer ensures optimal performance. For mops and brushes, I sterilize them weekly by soaking in a mixture of hot water and vinegar, which prevents bacteria buildup and keeps odors at bay. Maintaining your tools not only enhances their longevity but also guarantees a more effective clean each time.
Another essential item in my arsenal is a steam cleaner, like the Kärcher SC 3 EasyFix. I use it on tiles, upholstery, and even sealed carpets. Its continuous steam capability allows me to sanitize surfaces thoroughly, reducing reliance on chemical cleaners. I regularly descale the device following the manufacturer’s guidelines, which prevents mineral buildup and maintains consistent steam pressure—this simple act keeps my cleaning results sharp and dependable.
What future trends will shape cleaning tools and routines?
Advancements in smart home technology are beginning to revolutionize maintenance practices. Automated robotic vacuums equipped with AI navigation are becoming more sophisticated, capable of scheduling, mapping, and avoiding obstacles. As these devices improve, expect a future where routine cleaning largely becomes autonomous, freeing up your time for other tasks. Moreover, integration with smart home assistants will allow voice-activated controls, making maintenance even more effortless. Staying informed about these innovations can give you a competitive edge in maintaining a spotless home with less manual effort. To explore the latest in smart cleaning gadgets, visit our contact page.
How do I maintain upholstery and fabrics over time?
Consistent care is vital for upholstery longevity and appearance. I recommend scheduling deep-cleaning sessions every six months using a steam cleaner with fabric-safe attachments. For daily maintenance, a fabric protector spray can prevent stains from setting, making spot removal easier. Regularly inspecting for signs of wear or discoloration allows you to address issues early, prolonging the life of your furniture. For detailed techniques, check out these upholstery tips. Implementing these practices ensures your fabrics remain fresh, clean, and inviting.
Remember, investing in quality equipment and establishing regular maintenance routines are foundational to keeping your home effortlessly clean over the years. I challenge you to try out my favorite steam cleaner technique this week—descaling your device every month—to see the difference it makes in your cleaning results. Proper tool care is an underrated secret to long-term satisfaction and efficiency.
Lessons No One Told Me About Final Cleanups
One of the biggest surprises I had was realizing that the tiniest overlooked spots—like behind the bathroom mirror or inside vent covers—could make or break my move-out success. It taught me that attention to detail isn’t just a myth but a real game-changer. I also learned that rushing through surface cleaning often leaves hidden allergens and grime that landlords catch, so meticulousness pays off. Lastly, I discovered that investing in specialized tools, like a small upholstery steamer, actually saved me hours and prevented last-minute stress during inspection day.
My Go-To Gear for Spotless Results in 2026
Over the years, I’ve relied on must-have tools like an ultra-compact steam cleaner for upholstery and tiles, which you can find reviewed at this resource. A cordless handheld vacuum, such as my favorite Dyson V7, helps me tackle dust in tricky corners effortlessly. I also trust eco-friendly, professional-grade disinfectants for high-touch areas—I’ve found that this combination keeps surfaces sanitized and inspection-ready. For a comprehensive strategy, I recommend reading these expert tips to refine your toolkit further.
Sealing the Deal with Confidence and Care
Embarking on your move-out cleaning journey might seem daunting, but remember—every corner cleaned is a deposit secured. Imagine the relief of knowing you’ve exceeded expectations by paying close attention to hidden spots and fabric care. The future of house cleaning is heading toward smarter, faster routines, with technology like AI-driven vacuums and remote sanitizers making deep cleans easier than ever. Start today by implementing a regular maintenance schedule; small consistent efforts will pay off immensely when the inspector walks through. Have you tried any advanced cleaning tricks lately? Share your stories below—your insights can inspire others on their journey to a pristine move-out.