
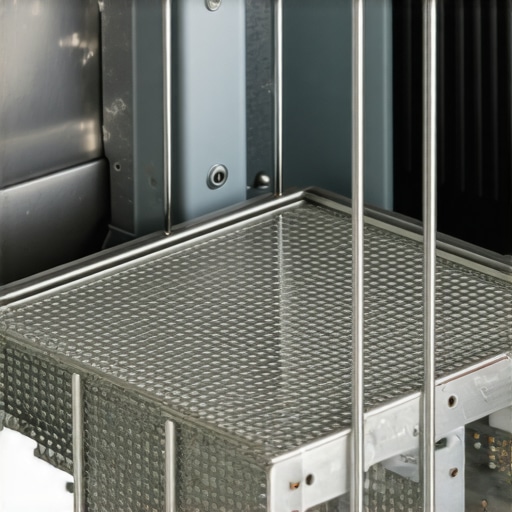
I stood there staring at my “clean” dinner plates, feeling a weird mix of confusion and pure disgust. There was a tiny, dried piece of kale stuck to the bottom of a bowl that had supposedly just been through a high-temp sanitizing cycle. It wasn’t just a fluke; my glasses were cloudy, and the kitchen had this lingering, sour odor I’d been blaming on the garbage disposal for weeks. I realized then that my dishwasher wasn’t actually washing anything. It was just a fancy box recirculating old food particles and grease. If you have ever pulled out a “clean” glass and found it covered in tiny, mysterious specks, you know exactly what I’m talking about. Today, I’m going to show you how to find and tackle the gunk in your dishwasher filter so you can finally get back to that “fresh out of the box” sparkle.
Stop Blaming Your Detergent for Dirty Plates
For the longest time, I thought the problem was my detergent choice. I swapped pods, tried gels, and even added those fancy rinse aids, yet why your dishwasher leaves a white film on your glasses remained a total mystery to me. I was making a classic mistake: I assumed the machine was a self-cleaning miracle. It’s not. Most modern dishwashers have a manual-clean filter at the bottom that acts like a lint trap for your food. If you don’t clean it, that trap becomes a stagnant pool of “old dinner” that sprays back onto your plates every single time you hit start. I remember the first time I actually pulled mine out—it was covered in a grey, slimy sludge that looked like something out of a horror movie. It’s a level of grime that standard daily house cleaning routines often miss until the smell becomes unbearable.
Is cleaning a dishwasher filter actually worth the effort?
You might be thinking, “Isn’t the hot water and soap enough to keep it clean?” I used to think the same thing, but the reality is much grosser. According to research published in the journal Medical Mycology, dishwashers are prime environments for fungal growth, including black yeast, which thrives in the warm, moist environment of your machine’s seals and filters. This isn’t just about aesthetics; it’s about sanitizing secrets for a safer house in 2025. If you are preparing for a move-out clean or just trying to keep your family healthy, ignoring this filter is like mopping your floors with a bucket of dirty water. Have you ever noticed that weird, damp-basement smell coming from your “clean” dishes? That’s your sign that the dust and food trap is full. It takes less than five minutes to fix, but the difference in your water quality and dish clarity is night and day. Trust me, I learned the hard way after a very embarrassing dinner party where my boss’s wine glass had a “rim” of old spinach from three nights ago. We are going to dive into the effective house cleaning secrets that pros use to keep these appliances running efficiently without the nasty buildup.To start, you need to gain access to the belly of the beast. Pull out the bottom rack completely and set it aside on your kitchen floor. It is like clearing the stage before the main act. Most modern dishwashers house their filters right in the center or the back corner of the tub floor. If you see a round plastic component with arrows indicating ‘lock’ or ‘unlock,’ you have found the treasure. You usually just need to give it a quarter-turn counter-clockwise and it should pop right out. I remember my first time doing this—I was terrified I would snap a plastic clip, but these units are built to be handled regularly. When I finally lifted mine out, a pool of murky, grey water surged up into the basin. It reminded me of a stagnant swamp. This is one of those 3 germ hotspots in your kitchen that soap alone wont fix because the detergent pods simply cannot penetrate a thick layer of physical debris trapped in a fine mesh.
Scrub Away the Sludge with These Simple Tools
Now that you have the filter assembly in your hand, take it to the sink. You will likely notice it consists of a cylindrical fine-mesh screen and potentially a secondary flat metal or plastic plate. If they are covered in a greasy, translucent film, do not panic; that is just a season’s worth of pasta sauce and butter. Use warm water and a liberal amount of degreasing dish soap. Remember, why your cleaning sponge is the dirtiest object in your house, so avoid using your everyday dish sponge for this. Instead, grab an old toothbrush or a dedicated nylon scrub brush. I once tried to use a paper towel for this task and it just shredded against the mesh—it was a total disaster. You need stiff bristles to poke through those tiny holes and eject the calcium scales and microscopic food bits. 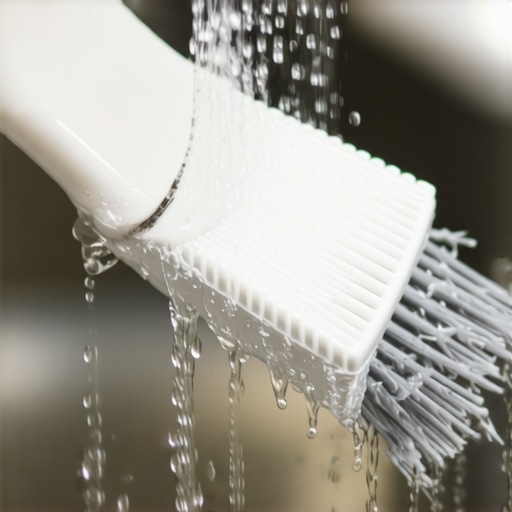
Clear the Sump to Stop the Smell at the Source
While your filter is soaking in the sink, do not make the mistake of ignoring the hole where it lived. This is called the ‘sump,’ and it is where the heavy stuff ends up. I once pulled a whole cherry pit and a jagged piece of plastic wrap out of there. These items are too large to pass through the drain pump, so they just sit there, rattling around and rotting in the heat. If you are currently working through a move-out clean checklist to simplify your transition, this is a non-negotiable step to ensure you do not leave a lingering odor for the next tenant. Reach in (carefully, in case there is broken glass) and scoop out any solids. Use a damp cloth to wipe the housing clean. It is all about the effective house cleaning secrets that ensure your machine actually cleans rather than just moving dirt around. This is also a prime opportunity to utilize sanitizing secrets for a safer house in 2025 by wiping down the rubber gaskets around the door. These seals often collect a black, slimy mold that smells like a wet basement. Once everything is scrubbed, slide the filter back in, twist it until it clicks into place, and you will immediately notice the water drains faster and the ‘clean’ cycle actually produces results you can trust.
The soap trap that ruins your machine
Most people think the key to a sparkling kitchen is a heavy hand with the cleaning products. In my experience, the ‘more is better’ approach is a recipe for disaster. If you have been doubling up on pods because your plates look dull, you are likely just contributing to why your dishwasher leaves a white film on your glasses. Excess detergent doesn’t just disappear; it creates a sticky residue that actually attracts more food particles. This residue builds up in the spray arms and hoses, eventually leading to a mechanical failure that looks like a leak but is actually just a soap-clogged system. I have seen countless homeowners call a repairman when all they really needed was to scale back their detergent use and run a vinegar rinse.
Why your pre-rinse habit is actually making dishes dirtier
Here is a contrarian view that usually shocks my friends: stop pre-rinsing your dishes before you put them in the dishwasher. Everyone says you should scrape and rinse until the plate is nearly clean, but modern detergents are designed with enzymes specifically engineered to latch onto food proteins and fats. According to experts at the American Cleaning Institute, if those enzymes have nothing to cling to, they simply float around and can actually become abrasive, etching your glassware over time. You should scrape off the big chunks, but leave the grease—it actually helps the detergent do its job. It sounds counterintuitive, but letting the machine work as intended is one of those effective house cleaning secrets that saves you time and protects your investment. 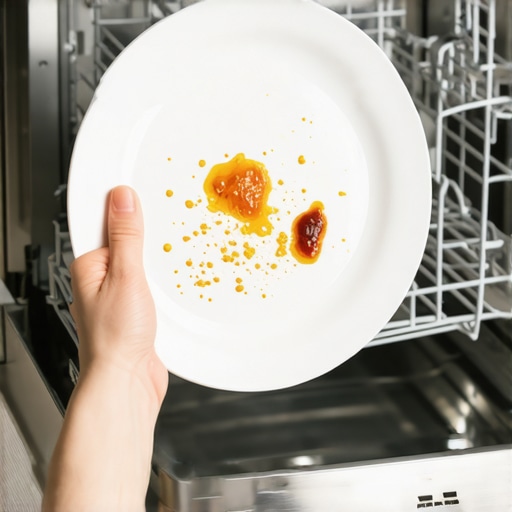
Is a high-temp sanitize cycle actually worth the extra electricity?
For most daily loads, a standard cycle is sufficient, but there are nuances. A study by the University of Arizona found that even ‘clean’ kitchens can harbor coliform bacteria in dishwashers due to low-temperature washes that fail to break down biofilms. This is where sanitizing secrets for a safer house in 2025 come into play. If you have been sick or have dealt with raw poultry on your cutting boards, that 150-degree sanitize cycle is non-negotiable for breaking down resistant pathogens. However, do not fall into the trap of using it for every load. Constant high heat can prematurely degrade the rubber gaskets and seals, leading to the very leaks you are trying to avoid.
Avoid the chemical cocktail mistake
When people get desperate to remove odors, they often start mixing cleaners. This is the biggest ‘oops’ factor in home maintenance. Never mix bleach-based cleaners with the acidic rinses commonly used in dishwashers; the resulting fumes can be toxic in a confined kitchen space. If you are preparing for a move-out cleaning, stick to one system at a time. This logic applies to your entire home, from the kitchen to the living room. For instance, knowing how to treat s-coded upholstery fabric without ruining it is vital because the wrong solvent-based cleaner can melt synthetic fibers. Cleaning is a science, not just a chore. Have you ever accidentally ruined a finish by being ‘too’ thorough? Let me know in the comments below, and let’s troubleshoot those cleaning fails together.
The specific tools I use for maintenance
Beyond just avoiding chemical cocktails, you need a dedicated kit to keep your appliances in top shape. I personally swear by a specialized nylon detailing brush—the kind with the offset handle—and food-grade citric acid. While many suggest vinegar, technical bulletins from the Association of Home Appliance Manufacturers (AHAM) note that concentrated mineral deposits often require stronger descaling agents to protect the internal heating elements without corroding the seals. I use the brush to scrub the tiny spray arm nozzles where calcium builds up over time. If those holes are blocked, the water pressure drops, and you are back to square one with dirty plates. This isn’t just for the kitchen; I use similar detailing techniques when following my daily house cleaning routine to maintain perfection throughout the rest of the home. I have found that standard sponges simply cannot reach into the crevices of the rotating arms where mold loves to hide. Use the brush to gently agitate the edges of the filter housing too. By spending an extra two minutes on these details, you prevent the machine from overworking, which saves you hundreds in repair bills. #IMAGE_PLACE_HOLDER_D#
How do I maintain dishwasher performance over the years?
The secret to longevity is not a one-time scrub; it is a consistent rhythm. I recommend a ‘monthly reset.’ Every 30 days, run an empty cycle with a cup of citric acid crystals in the detergent cup. This dissolves the limescale you cannot see inside the pump and hoses. It is the same logic I apply when learning how to schedule a deep clean that actually lasts more than a week. If you are a renter, keeping this up is one of the smartest move-out cleaning strategies to secure your deposit because it prevents the permanent swamp smell that landlords check for immediately. Just like why your washing machine smells like a swamp and how to fix it, your dishwasher requires consistent airflow; always leave the door slightly ajar after a cycle to let the rubber gaskets dry out completely. This prevents the black yeast and pink slime from gaining a foothold.
The future of kitchen hygiene is smarter than you think
Looking ahead, I predict we are going to see a massive shift toward AI-driven sensor technology in home appliances. We are already seeing high-end dishwashers that can detect the turbidity of the water—basically how cloudy or dirty it is—and adjust the cycle time and water pressure automatically. Soon, built-in UV-C light sanitization will likely become a standard feature, integrating even more sanitizing secrets for a safer house in 2025 directly into the machine’s hardware. This means we will rely less on harsh chemicals and more on precision engineering to keep our kitchens germ-free. However, until we all have self-cleaning robots, the best tool you have is your own two hands and a bit of ‘know-how.’ I challenge you to pull out your bottom spray arm today and check the nozzles for debris—you might be surprised what has been hiding in there and how much better your next load will look once those holes are clear.I stood there staring at my “clean” dinner plates, feeling a weird mix of confusion and pure disgust. There was a tiny, dried piece of kale stuck to the bottom of a bowl that had supposedly just been through a high-temp sanitizing cycle. It wasn’t just a fluke; my glasses were cloudy, and the kitchen had this lingering, sour odor I’d been blaming on the garbage disposal for weeks. I realized then that my dishwasher wasn’t actually washing anything. It was just a fancy box recirculating old food particles and grease. If you have ever pulled out a “clean” glass and found it covered in tiny, mysterious specks, you know exactly what I’m talking about. Today, I’m going to show you how to find and tackle the gunk in your dishwasher filter so you can finally get back to that “fresh out of the box” sparkle.
Stop Blaming Your Detergent for Dirty Plates
For the longest time, I thought the problem was my detergent choice. I swapped pods, tried gels, and even added those fancy rinse aids, yet why your dishwasher leaves a white film on your glasses remained a total mystery to me. I was making a classic mistake: I assumed the machine was a self-cleaning miracle. It’s not. Most modern dishwashers have a manual-clean filter at the bottom that acts like a lint trap for your food. If you don’t clean it, that trap becomes a stagnant pool of “old dinner” that sprays back onto your plates every single time you hit start. I remember the first time I actually pulled mine out—it was covered in a grey, slimy sludge that looked like something out of a horror movie. It’s a level of grime that standard daily house cleaning routines often miss until the smell becomes unbearable.
Is cleaning a dishwasher filter actually worth the effort?
You might be thinking, “Isn’t the hot water and soap enough to keep it clean?” I used to think the same thing, but the reality is much grosser. According to research published in the journal Medical Mycology, dishwashers are prime environments for fungal growth, including black yeast, which thrives in the warm, moist environment of your machine’s seals and filters. This isn’t just about aesthetics; it’s about sanitizing secrets for a safer house in 2025. If you are preparing for a move-out clean or just trying to keep your family healthy, ignoring this filter is like mopping your floors with a bucket of dirty water. Have you ever noticed that weird, damp-basement smell coming from your “clean” dishes? That’s your sign that the dust and food trap is full. It takes less than five minutes to fix, but the difference in your water quality and dish clarity is night and day. Trust me, I learned the hard way after a very embarrassing dinner party where my boss’s wine glass had a “rim” of old spinach from three nights ago. We are going to dive into the effective house cleaning secrets that pros use to keep these appliances running efficiently without the nasty buildup.To start, you need to gain access to the belly of the beast. Pull out the bottom rack completely and set it aside on your kitchen floor. It is like clearing the stage before the main act. Most modern dishwashers house their filters right in the center or the back corner of the tub floor. If you see a round plastic component with arrows indicating ‘lock’ or ‘unlock,’ you have found the treasure. You usually just need to give it a quarter-turn counter-clockwise and it should pop right out. I remember my first time doing this—I was terrified I would snap a plastic clip, but these units are built to be handled regularly. When I finally lifted mine out, a pool of murky, grey water surged up into the basin. It reminded me of a stagnant swamp. This is one of those 3 germ hotspots in your kitchen that soap alone wont fix because the detergent pods simply cannot penetrate a thick layer of physical debris trapped in a fine mesh.
Scrub Away the Sludge with These Simple Tools
Now that you have the filter assembly in your hand, take it to the sink. You will likely notice it consists of a cylindrical fine-mesh screen and potentially a secondary flat metal or plastic plate. If they are covered in a greasy, translucent film, do not panic; that is just a season’s worth of pasta sauce and butter. Use warm water and a liberal amount of degreasing dish soap. Remember, why your cleaning sponge is the dirtiest object in your house, so avoid using your everyday dish sponge for this. Instead, grab an old toothbrush or a dedicated nylon scrub brush. I once tried to use a paper towel for this task and it just shredded against the mesh—it was a total disaster. You need stiff bristles to poke through those tiny holes and eject the calcium scales and microscopic food bits.
Clear the Sump to Stop the Smell at the Source
While your filter is soaking in the sink, do not make the mistake of ignoring the hole where it lived. This is called the ‘sump,’ and it is where the heavy stuff ends up. I once pulled a whole cherry pit and a jagged piece of plastic wrap out of there. These items are too large to pass through the drain pump, so they just sit there, rattling around and rotting in the heat. If you are currently working through a move-out clean checklist to simplify your transition, this is a non-negotiable step to ensure you do not leave a lingering odor for the next tenant. Reach in (carefully, in case there is broken glass) and scoop out any solids. Use a damp cloth to wipe the housing clean. It is all about the effective house cleaning secrets that ensure your machine actually cleans rather than just moving dirt around. This is also a prime opportunity to utilize sanitizing secrets for a safer house in 2025 by wiping down the rubber gaskets around the door. These seals often collect a black, slimy mold that smells like a wet basement. Once everything is scrubbed, slide the filter back in, twist it until it clicks into place, and you will immediately notice the water drains faster and the ‘clean’ cycle actually produces results you can trust.
The soap trap that ruins your machine
Most people think the key to a sparkling kitchen is a heavy hand with the cleaning products. In my experience, the ‘more is better’ approach is a recipe for disaster. If you have been doubling up on pods because your plates look dull, you are likely just contributing to why your dishwasher leaves a white film on your glasses. Excess detergent doesn’t just disappear; it creates a sticky residue that actually attracts more food particles. This residue builds up in the spray arms and hoses, eventually leading to a mechanical failure that looks like a leak but is actually just a soap-clogged system. I have seen countless homeowners call a repairman when all they really needed was to scale back their detergent use and run a vinegar rinse.
Why your pre-rinse habit is actually making dishes dirtier
Here is a contrarian view that usually shocks my friends: stop pre-rinsing your dishes before you put them in the dishwasher. Everyone says you should scrape and rinse until the plate is nearly clean, but modern detergents are designed with enzymes specifically engineered to latch onto food proteins and fats. According to experts at the American Cleaning Institute, if those enzymes have nothing to cling to, they simply float around and can actually become abrasive, etching your glassware over time. You should scrape off the big chunks, but leave the grease—it actually helps the detergent do its job. It sounds counterintuitive, but letting the machine work as intended is one of those effective house cleaning secrets that saves you time and protects your investment.
Is a high-temp sanitize cycle actually worth the extra electricity?
For most daily loads, a standard cycle is sufficient, but there are nuances. A study by the University of Arizona found that even ‘clean’ kitchens can harbor coliform bacteria in dishwashers due to low-temperature washes that fail to break down biofilms. This is where sanitizing secrets for a safer house in 2025 come into play. If you have been sick or have dealt with raw poultry on your cutting boards, that 150-degree sanitize cycle is non-negotiable for breaking down resistant pathogens. However, do not fall into the trap of using it for every load. Constant high heat can prematurely degrade the rubber gaskets and seals, leading to the very leaks you are trying to avoid.
Avoid the chemical cocktail mistake
When people get desperate to remove odors, they often start mixing cleaners. This is the biggest ‘oops’ factor in home maintenance. Never mix bleach-based cleaners with the acidic rinses commonly used in dishwashers; the resulting fumes can be toxic in a confined kitchen space. If you are preparing for a move-out cleaning, stick to one system at a time. This logic applies to your entire home, from the kitchen to the living room. For instance, knowing how to treat s-coded upholstery fabric without ruining it is vital because the wrong solvent-based cleaner can melt synthetic fibers. Cleaning is a science, not just a chore. Have you ever accidentally ruined a finish by being ‘too’ thorough? Let me know in the comments below, and let’s troubleshoot those cleaning fails together.
The specific tools I use for maintenance
Beyond just avoiding chemical cocktails, you need a dedicated kit to keep your appliances in top shape. I personally swear by a specialized nylon detailing brush—the kind with the offset handle—and food-grade citric acid. While many suggest vinegar, technical bulletins from the Association of Home Appliance Manufacturers (AHAM) note that concentrated mineral deposits often require stronger descaling agents to protect the internal heating elements without corroding the seals. I use the brush to scrub the tiny spray arm nozzles where calcium builds up over time. If those holes are blocked, the water pressure drops, and you are back to square one with dirty plates. This isn’t just for the kitchen; I use similar detailing techniques when following my daily house cleaning routine to maintain perfection throughout the rest of the home. I have found that standard sponges simply cannot reach into the crevices of the rotating arms where mold loves to hide. Use the brush to gently agitate the edges of the filter housing too. By spending an extra two minutes on these details, you prevent the machine from overworking, which saves you hundreds in repair bills. #IMAGE_PLACE_HOLDER_D#
How do I maintain dishwasher performance over the years?
The secret to longevity is not a one-time scrub; it is a consistent rhythm. I recommend a ‘monthly reset.’ Every 30 days, run an empty cycle with a cup of citric acid crystals in the detergent cup. This dissolves the limescale you cannot see inside the pump and hoses. It is the same logic I apply when learning how to schedule a deep clean that actually lasts more than a week. If you are a renter, keeping this up is one of the smartest move-out cleaning strategies to secure your deposit because it prevents the permanent swamp smell that landlords check for immediately. Just like why your washing machine smells like a swamp and how to fix it, your dishwasher requires consistent airflow; always leave the door slightly ajar after a cycle to let the rubber gaskets dry out completely. This prevents the black yeast and pink slime from gaining a foothold.
The future of kitchen hygiene is smarter than you think
Looking ahead, I predict we are going to see a massive shift toward AI-driven sensor technology in home appliances. We are already seeing high-end dishwashers that can detect the turbidity of the water—basically how cloudy or dirty it is—and adjust the cycle time and water pressure automatically. Soon, built-in UV-C light sanitization will likely become a standard feature, integrating even more sanitizing secrets for a safer house in 2025 directly into the machine’s hardware. This means we will rely less on harsh chemicals and more on precision engineering to keep our kitchens germ-free. However, until we all have self-cleaning robots, the best tool you have is your own two hands and a bit of ‘know-how.’ I challenge you to pull out your bottom spray arm today and check the nozzles for debris—you might be surprised what has been hiding in there and how much better your next load will look once those holes are clear.
Lessons from a Recovering Pre-Rinser
After years of troubleshooting my own appliances, I have realized that the best results come from working with the machine rather than trying to do its job for it. Here are the lightbulb moments that changed my kitchen routine:
- Your nose is the best diagnostic tool: If you catch a whiff of a swampy odor when opening the door, bacteria is already winning. Don’t wait for spots to appear on your glasses.
- The Auto cycle isn’t always best: Sometimes sensors get fooled. If you have heavy grease, use the heavy-duty setting to ensure the water reaches a high enough temperature to melt fats.
- Accessibility is the key to consistency: Make checking the filter part of your 10-minute routine for a permanently tidy kitchen sink. If it’s easy to reach, you’ll actually maintain it.
The Three Tools I Use to Keep Things Running
I don’t believe in a cupboard full of specialty chemicals. Instead, I rely on a few high-impact items that make sanitizing secrets for a safer house in 2025 easy to implement. First, food-grade citric acid is significantly more effective at breaking down limescale than vinegar without the harsh smell. Second, a nylon detailing brush with stiff, angled bristles is essential for clearing spray arm nozzles. Finally, a clean microfiber cloth is superior for wiping rubber seals, as it grabs biofilm rather than just smearing it. These are the same effective house cleaning secrets pros use to keep high-end kitchens in top shape.
Take Back Control of Your Kitchen Hygiene
It is incredibly satisfying to pull a rack of glasses out and see them glinting in the light without a single speck of mystery debris. By taking five minutes once a month to clear that filter, you aren’t just cleaning a machine; you are protecting your family’s health and ensuring your house cleaning strategies for a sparkling home today actually yield results. Cleaning doesn’t have to be a mystery; it’s just a series of small, consistent habits that keep the grime at bay. Have you ever pulled your filter out and found something truly bizarre trapped in the sump? Let me know in the comments below!