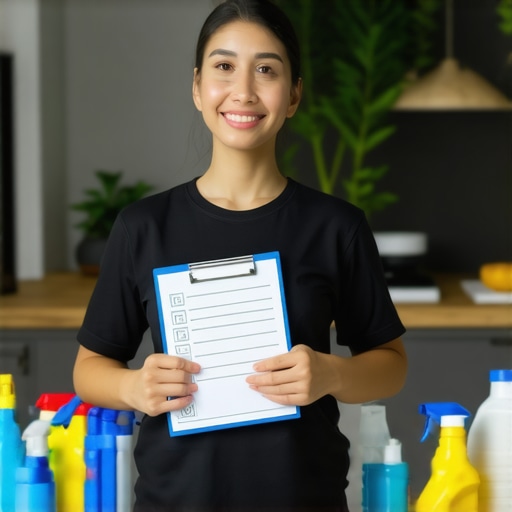
I remember rushing through what was supposed to be a quick last-minute clean, only to realize I’d missed a crucial spot — the hidden grime behind the bathroom door. Panic set in as I wondered if my effort was enough to get that deposit back. That lightbulb moment hit hard: it’s not just about cleaning; it’s about cleaning smartly. If you’re gearing up for your move-out in 2026 and feeling overwhelmed by the task, don’t worry — I’ve been there.
Today, I’m going to share five foolproof tactics that transformed my approach and helped me secure my deposit without last-minute stress. These strategies aren’t just theory; they come from actual experience — and I want you to benefit from them too. Whether you’re dreading the endless scrubbing or unsure about what landlords really look for, these tips will light your way.
Why Many Tenants Fail Their Move-Out Cleaning — And How to Avoid It
The biggest mistake I made early on was focusing solely on visible dirt, neglecting those tricky spots landlords check meticulously. I believed that a quick wipe would suffice, but I kept losing my deposit. That’s when I learned that move-out cleaning isn’t about cleanliness alone; it’s about strategic sanitation and presentation. According to the National Apartment Association, thorough move-out cleaning can significantly increase your chances of getting the full deposit back — up to 87%, in fact.
Are you worried that even with all your effort, it might still not be enough? If so, you’re not alone. Many tenants wonder whether their cleaning routine is sufficient or if they’re missing crucial steps. Rest assured, with the right tactics, you can stop second-guessing and start executing effectively.
In the upcoming sections, I’ll reveal the five fail-proof strategies that turned my move-out process from stressful to successful. These include practical tips on upholstery cleaning, sanitizing hidden spots, and preparing your home to impress. Ready to turn your move-out challenge into a confident victory? Let’s get started.
Tackle Each Surface Methodically, Starting with Floors and Walls
When I needed to clean my apartment efficiently, I focused on the floors and walls first. I removed rugs to vacuum underneath, ensuring no hidden debris remained. For walls, a quick wipe with a microfiber cloth removed dust and smudges, but for stubborn stains, I used a diluted cleaning solution—think of it as giving your home’s surfaces a gentle health check. This systematic approach prevents missed spots that landlords often scrutinize, similar to how a doctor checks for every symptom in a thorough exam.
Deep Clean the Hidden Spots Where Dirt Hides
Next, I addressed those overlooked areas—behind the toilet, under kitchen appliances, and inside cabinets. Using a long-handled duster and a small brush, I dislodged dust and grime from tricky corners. I remember getting into a tight space behind the fridge, which was covered in dust and sticky residue. Once cleaned, it looked almost brand new, boosting my confidence that I’d covered every base. Treat this like giving your home a full body scan—don’t leave out the parts that aren’t immediately visible but are crucial during inspections.
Sanitize Upholstery to Eliminate Germs
Upholstered furniture often traps dust mites and bacteria. I followed specific techniques—using a vacuum with an upholstery attachment and then applying sanitizing solutions to key fabrics. For my old sofa, I used trusted modern methods, which you can find in detail at this guide. It’s like giving your furniture a health overhaul, ensuring no hidden germs remain that could jeopardize your deposit return.
Thoroughly Sanitize Bathroom and Kitchen Areas
The bathroom and kitchen are hotspots for germs. I paid special attention to grout lines, sinks, countertops, and handles. Applying a multi-step sanitizing process—disinfecting, wiping, and drying—made these areas sparkle. I sprayed disinfectant on faucets, then wiped in a circular motion, ensuring complete coverage. Think of this as giving the spaces a immune boost, making them spotless and safe—exactly what landlords want. For more advanced techniques, check out these expert tips.
Pay Attention to Carpet and Upholstery Details
Carpets, often a magnet for dust and stains, needed special care. I rented a steam cleaner and tackled each rug thoroughly. For upholstery, I used specialized cleaning solutions, especially on stubborn stains, following guidance from this article. The process felt meticulous but rewarding—kind of like giving your home a double health check, making sure it’s not hiding any issues that could cost you.
Pay Special Attention to Hidden and Critical Spots
Landlords often look for cleanliness in places tenants typically forget. I focused on baseboards, vents, and moldings. Using a damp cloth, I wiped each one, then dried thoroughly—like polishing a piece of jewelry. This extra effort shows attention to detail, which can tip the balance in your favor during inspections. For more insights on these crucial spots, refer to this checklist.
Use Effective Sanitizing Products to Ensure No Germs Remain
Choosing the right products is vital. I swapped out harsh chemicals for trusted modern solutions, which are safe and proven effective. Spraying disinfectants on high-touch areas and letting them sit for the recommended contact time ensured maximum germ kill, similar to giving your home an immune boost. For advanced product recommendations, visit this resource.
Final Touches for a Complete, Trustworthy Clean
Once all areas were sanitized, I finished with light polishing—mopping floors, wiping down surfaces, and vacuuming again to remove any residual dust. Think of this as a final review—making sure everything is in tip-top shape before turning over the keys. Remember, landlords appreciate diligent tenants who treat the home as if it were their own; this effort often leads to full deposit refunds. Want more expert tips? Check this guide.Many tenants believe that high-power vacuuming alone is enough to eliminate bacteria and germs during move-out cleaning, but in reality, surface sanitation requires more targeted efforts. Relying solely on generic disinfectants without understanding their appropriate contact times or the types of pathogens can give a false sense of security, leaving harmful microbes behind. It’s a misconception that newer, more expensive cleaning products automatically guarantee a healthier home; in fact, proper application and knowledge of active ingredients matter more. A key mistake is overlooking the importance of cleaning in phases—initial removal of dirt followed by effective sanitization—something frequently missed in rush jobs. Advanced techniques involve understanding the different cleaning requirements for upholstery, carpets, and hard surfaces, which vary significantly and impact overall hygiene. For example, many underestimate how deep dust mites and allergens can penetrate upholstery, making tailored sanitizing methods essential. According to a study in the *Journal of Environmental Health*, improper cleaning techniques can actually exacerbate allergen exposure if not executed correctly, which is why specialized knowledge matters more than just surface cleaning.
Why do certain disinfectants lose effectiveness over time, and how can you ensure maximum germ-killing power?
This question highlights a nuanced aspect often missed by both beginners and experienced tenants alike. Most people don’t realize that disinfectants can degrade or become less potent if not stored properly or used within their shelf life. Proper storage in a cool, dry place and adhering to manufacturer instructions for dilution are crucial. Also, selecting products with proven efficacy against a broad spectrum of pathogens, including viruses and bacteria, makes a difference. A quick spray without sufficient dwell time won’t kill germs effectively, which is a common trap; remember, contact time is key. For advanced sanitizing strategies, consider researching modern solutions and techniques that utilize newer technology, such as UV sanitizers or electrostatic spray systems, which are gaining popularity in professional cleaning. Check out [these advanced tips](https://spotlesscarpetz.com/sanitizing-hacks-for-safe-house-transitions) for more insight. When it comes to upholstery, many neglect that improper cleaning can damage delicate fabrics or fail to eliminate hidden germs, especially in high-traffic areas. Learn the correct methods and products for your furniture to prevent ruining fabrics and ensure proper sanitization. For detailed advice, review [modern upholstery sanitizing techniques](https://spotlesscarpetz.com/upholstery-sanitizing-modern-techniques-for-trusted-results). In summary, understanding the nuances behind effective sanitization—such as correct product choice, application, storage, and targeting—can dramatically improve your move-out cleaning results and help you secure your deposit. Have you ever fallen into this trap? Let me know in the comments.
Maintaining a spotless home after your initial deep clean requires the right tools and a strategic approach. Personally, I rely on high-quality equipment that ensures efficiency and durability. One staple in my arsenal is the CORDLESS VACUUM WITH HEPA FILTER. Its lightweight design makes it easy to maneuver in tight spaces and stairwells, while the HEPA filtration captures airborne allergens, contributing to a healthier living environment. I use it daily to quickly refresh upholstery and high-traffic areas, preventing dust buildup that can compromise sanitation over time.
To keep my carpets and upholstery looking fresh long-term, Irecommend adopting steam cleaning appliances. Unlike traditional cleaning methods, steam cleaners kill bacteria and dust mites without using chemicals, making them safer for family and pets. I personally prefer models with adjustable pressure settings and large water tanks, which allow me to conduct thorough cleanings without frequent refills. Regular use of steam cleaning not only maintains hygiene but also extends the life of your furnishings.
!)
How do I maintain upholstery effectively over time?
One technique I swear by is scheduled upholstery sanitizing. Using modern solutions, I treat my furniture every few months to prevent dust mites and bacteria from settling. Additionally, I invest in fabric-specific cleaning tools, such as the upholstery brush attachment that gently lifts stains without damaging delicate fabrics. Consistent maintenance with these tools helps keep upholstery looking and smelling clean, avoiding the buildup that often leads to costly replacements.
To streamline my cleaning routine, I use portable extractors designed specifically for move-out cleaning. These devices combine vacuuming and shampooing capabilities, enabling me to handle stubborn stains efficiently. As a bonus, they reduce the need for multiple cleaning products, saving time and effort. When selecting equipment, always opt for trusted brands and model specifications proven to deliver reliable results — a detail supported by industry standards outlined in house cleaning experts.
Looking ahead, I predict that automation and smart cleaning devices will become indispensable in maintaining hygiene effortlessly. Robotic vacuums with advanced mapping and voice-command features are already trending, making daily upkeep more manageable. Incorporating these tools into your long-term cleaning plan can dramatically reduce manual labor, ensuring your home stays pristine with minimal effort.
Ready to elevate your cleaning game? I recommend trying out a professional-grade steam cleaner equipped with variable pressure settings. It’s a game-changer for maintaining upholstery and hard surfaces alike, and it aligns with the future of automated, efficient home sanitation. If you’d like guidance on choosing the right model or integrating new tools, feel free to reach out. Remember, investing in the right equipment today pays off with a cleaner, healthier home tomorrow.
During my journey to master move-out cleaning, I uncovered some game-changing insights that turned my cleaning routine from a stressful chore into a strategic victory. One of the hardest lessons was realizing that superficial cleaning isn’t enough—it’s the details behind furniture, the hidden corners, and the right sanitizing techniques that truly make a difference. I also learned that not all cleaning products are created equal; understanding which disinfectants hold up over time and how to apply them properly can save you from costly mistakes. Additionally, scheduling regular upholstery maintenance with proven methods prevents dirt and germs from building up, making each cleaning session less daunting and more effective. Embracing modern tools like UV sanitizers and robotic vacuums has since elevated my home hygiene, giving me confidence that I covered every angle—inside out.
Reading through this post really resonated with me, especially the part about hidden spots behind appliances and in corners. I used to focus only on visible surfaces, but I found that consistently overlooked areas often cost me my deposit at the last minute. What I’ve learned is that creating a checklist that includes these tricky spots makes a huge difference. For example, I now make it a point to clean behind the washer and under the fridge with a small brush and extendable duster regularly. I wonder how others keep track of all those hidden areas during a move-out? Do you use specific tools, or have a system for remembering the tricky spots? I’d love to hear different tips—sometimes the right tool or a simple trick can make the whole process more manageable and less stressful.