
I stood there in the middle of my living room, staring at a $25 estate sale find that was currently making my entire house smell like a dive bar from 1984. It was a stunning emerald green wingback, but the previous owner must have smoked two packs a day for forty years right in that seat. I’ll be honest: I almost threw it back on the curb that very night. My first instinct was to soak it in a heavy-duty fabric refresher I found at the grocery store, thinking more liquid meant more cleaning. I was so wrong. All I did was drive the tar deeper into the padding and create a damp, musty mess that lingered for weeks. This is exactly why your fabric sofa still smells after using store-bought deodorizers; they just don’t reach the core. Today, I’m going to show you how to bypass those amateur mistakes and actually extract those stubborn particles for good. We aren’t just masking the scent; we are performing a total upholstery cleaning revival. Have you ever brought home a beautiful piece of furniture only to realize the smell was a dealbreaker?
How I Finally Kicked the Ghost of a Thousand Cigarettes Out of My Living Room
Getting smoke out of old foam and fabric is a battle against time and chemistry. Smoke isn’t just a smell; it is a physical residue. According to the American Lung Association, thirdhand smoke is a stubborn layer of gases and particles that clings to surfaces and can actually re-emit into the air for months or even years. When you sit on that vintage chair, your body heat warms those trapped oils, which is why the smell suddenly gets stronger the longer you’re there. I learned the hard way that you cannot scrub your way out of this. In my early days, I tried to brush the velvet so hard I nearly went bald in sections, forgetting that I needed to restore the texture of the velvet rather than destroy it. If you are dealing with a move-in situation where the previous tenant left a cloud of history behind, you might even need to look into sanitizing secrets for a safer house to feel truly comfortable in your new space.
Is a smoky vintage find actually worth the effort?
I know what you’re thinking: Is it even possible to save a chair that’s been marinating in tobacco for decades? You might fear that the cost of professional supplies or the risk of ruining the fabric makes it a lost cause. I used to be a skeptic too, especially after my first few failed attempts. But once you understand how to use dry extraction and targeted pH-neutralizers, the transformation is incredible. It’s about more than just a clean house; it’s about preserving a piece of history without the health risks associated with lingering toxins. We’re going to look at the exact steps to pull that stench out of the marrow of the furniture so you can finally breathe easy.
Stop the Scents from Spreading with Heavy-Duty Vacuuming
Before you even think about applying a liquid cleaner, you have to realize that smoke is a particulate. It’s like a microscopic layer of soot that has settled into the very weave of your furniture. If you add moisture immediately, you turn that soot into a permanent ink. You need to start with a dry extraction. I remember working on an old microfiber armchair where I skipped this step and went straight for the spray bottle. The result? I spent the next three hours trying to figure out how to lift odors from microfiber without leaving a ring because I’d turned the dust into mud. Use a vacuum with a HEPA filter and go over every square inch at least three times. Move in different directions—up, down, and diagonally—to open up the fibers and pull out as much dry resin as possible.
Why your standard vacuum filter might be your worst enemy
If your vacuum has an old, clogged filter, you aren’t cleaning; you’re just redistributing the scent of 1984 throughout your current living room. This is often why your vacuum cleaner is making the house smell worse as you work. The heat from the motor warms up the trapped particles in the bag, blowing a concentrated puff of ‘stale cigarette’ back into the air. Empty your canister and wash your filters before you start this process. 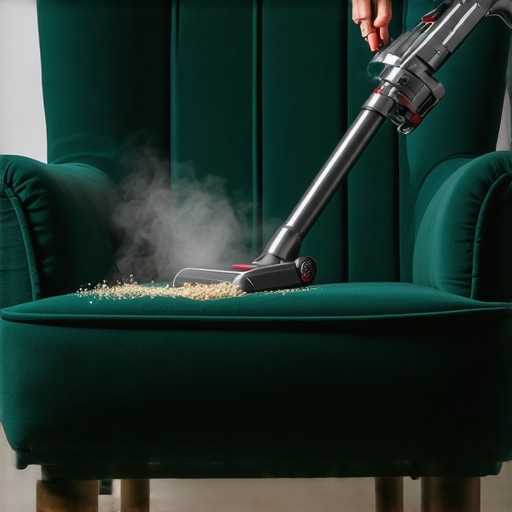
Neutralize the Resin without Drowning the Fabric
Once the loose particles are gone, you’re left with the oils that have bonded to the fibers. This is where most people reach for the bleach or heavy detergents, but that’s a recipe for disaster, especially with vintage dyes. You need a pH-balanced approach. For my emerald wingback, I used a dry-foam extraction method. This allows you to apply the cleaning agents without saturating the internal foam. If you get the foam wet, the smell will live in that damp sponge forever. In fact, many professional upholstery cleaning tips emphasize that moisture control is the difference between a successful revival and a moldy basement smell.
Handle S-coded fabrics with extreme caution
Always check the care tag. If you see an ‘S’, it means ‘Solvent Only.’ Using water on these will cause permanent puckering or water spots. Knowing how to treat s-coded upholstery fabric without ruining it is essential because these fabrics require specific dry-cleaning fluids. When I was first learning, I tried to ‘speed up’ a damp spot with a hair dryer, only to find out why you should never use hairdryers on wet fabric spills—it actually set the yellow tobacco stain into the velvet permanently.
The Secret Power of Dry Absorbents and Fresh Air
After your targeted cleaning, use an absorbent like activated charcoal or high-grade baking soda, but don’t just sprinkle it on top. Pack it into the crevices. If the piece has removable cushions, take them outside. UV rays are a natural disinfectant, and fresh air is a powerful tool for sanitizing hacks for safe house transitions. While the chair is airing out, don’t forget the rest of the room. Odors cling to everything nearby, and you might need to learn how to get that musty smell out of your curtains to ensure the chair doesn’t just re-absorb the room’s lingering scent. For a comprehensive strategy on keeping things fresh long-term, refer to the ultimate upholstery care guide for lasting freshness.Wait, I know what the rental flyers and the DIY blogs tell you. They say, ‘Rent a steam cleaner and blast it!’ But here is the truth that the pros won’t tell you: for deep-seated smoke and oils, high heat is often your worst enemy. If you apply 200-degree steam to a tobacco-stained chair, you aren’t just cleaning it; you are essentially ‘cooking’ the nicotine resins into the fabric’s molecular structure. I’ve seen beautiful pieces ruined because the owner thought heat equaled hygiene. It’s the same logic people use when they wonder is steam cleaning enough to kill bacteria on high touch surfaces—sometimes the answer is ‘yes,’ but the side effect is permanent damage to the substrate. According to a technical study by the IICRC (Institute of Inspection Cleaning and Restoration Certification), the application of heat to volatile organic compounds (VOCs) can accelerate off-gassing and cause chemical bonding with synthetic fibers that no amount of scrubbing can fix. 
Can you really sanitize a surface without saturating it?
The ‘Oops’ factor usually happens when we equate ‘wet’ with ‘clean.’ In my experience, the more moisture you introduce, the higher the risk of mold growth in the hidden depths of the padding. This is a massive issue when you are working through a move-out clean checklist to simplify your transition. You want to leave the place better than you found it, but a damp carpet or sofa is a liability, not a feature. Instead of soaking everything, focus on effective sanitizing methods for a germ free home that utilize dry-mist or low-moisture techniques. This is especially true when you are trying to impress a landlord who is looking for reasons to keep your money. They aren’t just looking at the center of the room; they are checking the 7 spots behind the toilet your landlord always checks first. If you are moving into a new place and want to purge the ghost of the previous tenant, don’t just rely on a bucket of bleach. That’s an amateur move that can damage surfaces. Instead, look into move-out cleaning strategies to secure your deposit that focus on high-impact areas without the collateral damage of harsh chemicals. Have you ever fallen into this trap of over-cleaning and accidentally making things worse? I’d love to hear your horror stories in the comments below. We’ve all been there—staring at a water ring or a bleached spot, wishing we’d just stepped back and used a lighter touch.
My Secret Weaponry for a Scent-Free Home
To keep that emerald wingback from reverting to its dive-bar roots, I had to stop thinking like a consumer and start thinking like a technician. I ditched the cheap plastic scrub brushes and invested in a natural horsehair brush. Why? Because synthetic bristles generate static and friction that can actually melt or fray delicate vintage fibers if you are too aggressive. I also started using a technique called ‘encapsulation’ for regular upkeep. This involves a specialized polymer that surrounds dirt particles and dries into a microscopic crystal, which you then simply vacuum away during your next session. It is one of those effective house cleaning secrets from cleaning experts that prevents the sticky residue left behind by traditional soapy detergents. I have found that using a high-filtration vacuum with a certified HEPA system is non-negotiable. According to the IICRC S300 Standard for Professional Upholstery Cleaning, dry soil removal should always be the most significant portion of your cleaning time because it prevents the ‘mudding’ effect when liquids are introduced. If you skip the deep vacuuming, you are essentially just washing dirt into the padding. 
How do I maintain my upholstery’s freshness for the long haul?
Maintenance is not about a once-a-year deep scrub; it is about micro-habits that prevent the build-up of oils. For my vintage pieces, I follow a daily house cleaning routine to maintain perfection, which includes a quick ‘fluff and dust’ of the cushions to prevent dust from settling deep into the weave. I also rotate the cushions every Sunday to ensure even wear and prevent ‘dead spots’ where odors might settle more heavily. If you are preparing for a transition, these small steps are vital move-out cleaning hacks to ensure your deposit refund because a well-maintained piece of furniture does not shed dander onto the carpet or leave ‘shadow marks’ against the walls. For the ultimate deep-dive into long-term preservation, you should refer to the ultimate upholstery care guide for lasting freshness.
The Rise of Probiotic Sanity
Looking toward the future, I see a major shift in how we handle sanitizing secrets for a safer house in 2025. We are moving away from ‘kill everything’ chemicals and toward probiotic cleaners. These formulas use beneficial bacteria to literally eat the organic matter—like microscopic skin cells and food oils—that cause odors in the first place. It is a more sustainable, gentler way to keep a home healthy without the harsh fumes of the past. I have already started experimenting with these on my newer velvet pieces, and the difference in air quality around the seating area is noticeable. I challenge you to try one specific thing this week: swap your plastic scrub brush for a natural horsehair one. You will be shocked at how much more dust you can lift without damaging the delicate weave of your favorite chair. Trust me, your furniture will thank you for the gentler touch.
The Hardest Lessons Learned from My Upholstery Revivals
One thing I learned the hard way is that patience is more powerful than any chemical. When you are dealing with decades of tobacco resin, you have to accept that it might take three or four rounds of dry extraction and light cleaning. If you try to do it all in one afternoon, you will likely over-saturate the fabric and cause more harm than good. Another lightbulb moment for me was realizing that the underside of the furniture—the black dust cover—often holds 50% of the smell. Most people forget to vacuum or treat the bottom, leaving a constant ghost of a scent behind. Finally, never underestimate the power of the ‘sniff test’ by someone who doesn’t live with you. We get nose-blind to our own projects, so always get a second opinion before you declare the job done and bring the piece into your main living area.
My Personal Toolkit for Odor-Free Restoration
I do not recommend products lightly, but there are a few things I never start a project without. First, a high-quality HEPA vacuum is non-negotiable for house cleaning strategies for a sparkling home today. Second, I swear by bamboo charcoal bags; I stuff them into the crevices of a chair for a full week after cleaning to pull out any remaining VOCs that might be off-gassing. Third, my natural horsehair brush has saved more velvet and delicate weave than I can count. If you are tackling this as part of a relocation, these specific tools are essential move-out cleaning hacks to ensure your deposit refund and keep your new space smelling like a fresh start rather than a stale memory.
Reclaim Your Space One Chair at a Time
Taking on a piece of furniture that smells like the past can be incredibly daunting, but the reward of sitting in a clean, fresh-smelling vintage find is worth every single vacuum pass. You are not just cleaning; you are preserving a story and making your home environment significantly healthier for everyone who enters. By using these specialized upholstery cleaning methods and focusing on dry extraction rather than drowning the fibers, you can transform even the most stubborn dive-bar finds into the centerpiece of your home. If you ever feel stuck or the smell seems too deep for a DIY approach, do not hesitate to contact us for expert advice or consult our ultimate upholstery care guide for lasting freshness. You have the tools and the knowledge now—go ahead and save that beautiful chair! Have you ever bought a piece of furniture that smelled so bad you considered leaving it on the sidewalk? Let me know your biggest upholstery cleaning victories or disasters in the comments below.