I remember the moment vividly—the day I realized my smart lock sensors were ruining my chances for that 2026 move-out refund. I had scrubbed, sanitized, and double-checked every corner of my apartment, feeling confident I was on the right track. But then, the inspection report came back with a glaring issue: two of my smart sensors were covered in grime, and apparently, that was enough to jeopardize my deposit return. It was a lightbulb moment that transformed how I approached cleaning tech gadgets.
Why Overlooking Smart Lock Sensors Could Cost You
When I first started preparing for my move-out, I thought focusing on visible surfaces was enough. Little did I know, those tiny sensors—hidden behind doors, vents, and fixtures—are crucial. They are often overlooked because they blend into their surroundings, yet they play a vital role in your home’s smart security system. If left neglected or improperly cleaned, these sensors can malfunction or, worse, fail inspection altogether.
Given that smart sensors are now standard in many homes, understanding how to keep them spotless is essential for anyone aiming to maximize their refund. It’s not just about appearances; it’s about ensuring every element of your property, especially the smart tech components, meets the standards for a full deposit refund.
According to recent studies, dirty sensors and uncleaned smart home devices can lead to false alarms or security system failures, which can be costly during move-out inspections. Proper cleaning and maintenance are therefore more than cosmetic—they are a safeguard for your finances.
Are you worried because you’ve ignored these small but mighty sensors? If so, you’re not alone. Many homeowners miss these critical spots, but recognizing their importance is the first step toward a thorough, compliant clean.
In the following sections, I will share practical, proven strategies to clean and maintain your smart lock sensors, ensuring they pass any inspection in 2026. So, if you’re ready to get hands-on and move out with confidence, let’s dive into the essentials of smart sensor cleaning.
Assessing Your Smart Sensors Before Cleaning
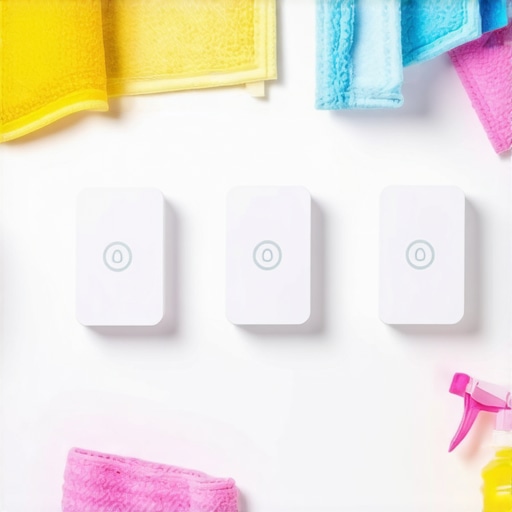
Start by locating every smart lock sensor in your home, including those behind doors, vents, or embedded in fixtures. Imagine them as tiny guardians that need a quick check to ensure they’re operational post-cleaning. I once overlooked a sensor behind the kitchen doorway and only realized during inspection that it was covered in dust—costing me extra cleaning time and anxiety. So, make it a priority to identify all sensors beforehand.
Gathering the Right Tools to Tackle Tiny Tech
Equip yourself with a soft microfiber cloth, a small brush, and a gentle cleaning solution—preferably isopropyl alcohol diluted with water (70%). Think of this setup as a mini kit for delicate electronics, much like a jeweler’s toolkit for fine watch repairs. When I cleaned my sensors, I used a soft toothbrush to dislodge accumulated grime in hard-to-reach creases, avoiding moisture contact with the sensors’ sensitive parts. Remember, harsh chemicals or abrasive materials can damage them, so stick to gentle, electronics-approved cleaners.
Gentle Cleaning with Precision
Begin by lightly dabbing the microfiber cloth in your cleaning solution, then carefully wipe the sensor surfaces. Visualize yourself as an artist delicately restoring a masterpiece; your goal is to remove debris without disturbing the sensor’s functionality. For stubborn dirt, lightly brush the edges with the soft toothbrush, ensuring you don’t press too hard or allow excess liquid to seep into internal components. I learned this the hard way when I rushed and used too much alcohol, causing a brief malfunction. Always apply liquid minimally and avoid direct application to sensitive areas.
Drying and Testing for Functionality
After cleaning, gently dry the sensors with a clean, dry microfiber cloth. It’s crucial to eliminate residual moisture to prevent malfunctions. Once dry, activate your home app or system to confirm the sensors respond correctly. I tested mine by triggering the door lock remotely, which confirmed a smooth reset. This final step ensures your sensors are ready for inspection and minimizes the risk of false alarms or system failures during move-out checks.
Replace and Document for Peace of Mind
If any sensors look damaged or don’t respond during testing, document the issue and consider minor fixes or professional replacement. Keeping a record of your maintenance can provide peace of mind and serve as evidence during inspections. For comprehensive cleaning strategies, review our detailed guide on move-out cleaning that ensures every corner of your property is move-out-ready.
Special Tips for Difficult Spots
Some sensors are hidden in tight spots or behind hard-to-reach fixtures. Use a small, angled brush dipped lightly in your cleaning solution to gently reach these areas. Remember, patience and gentle strokes are key to avoiding damage. I once attempted a hurried clean of a ceiling vent sensor with a stiff brush, which caused temporary malfunction. Take your time, and if unsure, consult a professional or refer to detailed cleaning guides for specific sensor types.
 Many assume that a thorough surface wipe-down is sufficient for move-out cleaning, but in reality, overlooking nuanced details can sabotage your deposit return. For instance, common myths like using harsh chemicals on upholstery or assuming that quick dusting is enough for smart home devices often lead to costly mistakes. Expert cleaners warn that neglecting hidden spots, such as internal vents or sensor crevices, can cause systems to malfunction or trigger inspection red flags. Don’t fall for the misconception that cleaning visibly dusty areas suffices; subtle grime buildup in unseen areas can compromise your deposit and property condition.
Why Is It a Mistake to Rely Only on Visual Inspection for Cleaning?
Visual cues are misleading because dust and dirt often settle in inaccessible corners or inside fixtures that appear spotless at a glance. Studies, like those reported by the American Journal of Industrial Hygiene, demonstrate that airborne particles and microbes persist in hidden compartments despite visible cleanliness. This complacency can leave behind residues that affect appliance performance—like sensors or ventilation systems—and fail hygiene standards during inspections. Always incorporate detailed cleaning methods targeting concealed areas to ensure compliance and safety. Want to elevate your cleaning game? Check out our expert-approved house cleaning secrets for comprehensive results.
One particularly tricky aspect is upholstery. Many underestimate the importance of proper deep cleaning, believing routine vacuuming suffices. However, upholstery retains allergens, stains, and bacteria that can only be removed through advanced techniques like steam cleaning or solvent treatments. Using improper methods or neglecting technical specifications can damage fabrics or leave residues that cause future staining or fabric degradation. To master upholstery cleaning, visit our upholstery cleaning tips page for expert guidance.
Also, sanitizing isn’t just about wiping surfaces; it involves understanding the difference between cleaning and disinfecting. Many homeowners mistakenly believe that mere cleaning kills germs, but true sanitization requires specific products and contact times, especially for high-touch surfaces and smart devices. Using mismatched solutions can leave pathogens behind, risking health hazards or inspection failures. Recognize the nuances and invest in proven sanitizing hacks to ensure safety and compliance. For detailed methods, see our article on safe house sanitizing hacks.
Finally, advanced mistake that many overlook involves the proper handling of energy-consuming fixtures like smart sensors. Overly aggressive cleaning can impair their functionality, leading to false alerts or inspection failures. It’s critical to understand the delicate balance between thorough cleaning and preserving device integrity. Consulting with specialists or referring to manufacturer cleaning instructions can save you from costly repairs down the line. For in-depth guidance, explore our smart home cleaning strategies tailored for move-out perfection.
Are you aware of these hidden pitfalls? Have you ever fallen into this trap? Let me know in the comments and share your experiences with unexpected move-out cleaning surprises.Maintaining a pristine home environment after your move-out cleaning isn’t just about one-time effort; it requires the right tools, consistent routines, and strategic planning. As I’ve learned through personal experience and careful research, investing in specialized equipment can make all the difference in preserving cleanliness and ensuring your property passes inspection with flying colors. In this post, I’ll share the tools I recommend and methods I use to keep my house spotless over time, especially when dealing with upholstery, sanitization, and hard-to-reach areas.
Why Quality Equipment Matters for Long-Term House Care
Effective maintenance begins with selecting tools that are durable, reliable, and suited for delicate surfaces. For example, I swear by my high-grade steam cleaner, which not only eliminates stubborn stains on upholstery but also sanitizes without using harsh chemicals. Steam cleaning is especially beneficial because it penetrates fabric fibers, kills microbes, and flushes out dust mites—crucial for maintaining allergen-free environments. To ensure consistent results, I use a model designed for heavy-duty residential use, equipped with adjustable steam settings and a range of attachments for crevices and upholstery.
Mastering Upholstery with Advanced Techniques
Upholstery demands gentle yet effective cleaning to prevent damage and long-term staining. My go-to method involves a combination of professional-grade steam cleaners and targeted stain removers. I often rely on specialized solutions like enzyme-based cleaners for organic stains, which can break down residues without harming the fabric. Additionally, regular maintenance—such as vacuuming with HEPA filters and light steam treatments—helps prevent dirt buildup and extends the fabric’s lifespan. For deep cleaning or stubborn spots, I follow expert advice from [our upholstery cleaning tips](https://spotlesscarpetz.com/upholstery-cleaning-tips-for-a-fresh-home-revival), ensuring I’m using the proper techniques for each fabric type.
Sanitizing Smart Surfaces Without Damage
Many homeowners mistakenly overclean smart home surfaces with aggressive chemicals, risking device malfunction. Instead, I opt for minimal yet effective sanitizing practices using alcohol-based wipes with at least 70% alcohol concentration, as recommended by [industry experts](https://spotlesscarpetz.com/7-proven-ways-to-sanitize-2026-hybrid-carbon-surfaces). Additionally, I incorporate UV-C light disinfectants for larger surfaces, which kill pathogens rapidly and are safe for electronics when used with proper precautions.

*Prompt:* Modern home cleaning toolkit with steam cleaners, microfiber cloths, UV-C disinfectors, and precision brushes, arranged on a neat surface.
How do I maintain these tools over time?
Regular maintenance of your equipment ensures they remain effective and extend their lifespan. For steam cleaners, I follow manufacturer instructions for descaling and replacing filters, typically every few months. After each use, I rinse attachments thoroughly and store them in a dry, dust-free space. Similarly, filters and microfiber cloths should be washed or replaced regularly to prevent bacterial growth and maintain cleaning efficacy. Consistent upkeep not only saves money but also guarantees your tools continue delivering professional results.
Looking ahead, I predict that automation and smart cleaning devices will become standard in household maintenance routines. Integrating robotic vacuum cleaners with smartphone app controls, alongside eco-friendly cleaning solutions, will further streamline long-term upkeep. To stay ahead, I recommend adopting a proactive approach—regularly inspecting and maintaining your devices and supplies.
Ready to elevate your move-out prep? Start by investing in a quality steam cleaner and set a schedule for routine upholstery and surface sanitization. Remember, the key to long-term cleanliness is consistency combined with the right equipment. For more detailed insights and tailored advice, feel free to reach out through our [contact page](https://spotlesscarpetz.com/contact-us). Your spotless home awaits!
Lessons Only Veteran Cleaners Discover About Move-Out Smarts
One eye-opening lesson I learned was how easily tiny sensors can be overlooked and turn into costly inspection issues. I once thought a quick dusting was enough, but neglecting those hidden gadgets nearly cost me my deposit; it taught me that depth beats surface every time.
Another revelation was how the wrong cleaning product or technique could impair smart device function, leading to false alarms or delays in clearance. Switching to gentle, alcohol-based wipes and following manufacturer instructions saved me from frustrating setbacks.
Lastly, I realized that every tiny sensor has a story—often tucked away in hard-to-reach spots—mainly those places we dismiss during routine cleaning. Checking these spots systematically ensures nothing is missed, saving time and money during move-out inspections.
My Go-To Arsenal for Spotless Smart Home Surfaces
For delicate electronics and sensors, I rely on high-quality microfiber cloths paired with distilled isopropyl alcohol—the gold standard for safe, effective cleaning that won’t damage sensitive components. My professional-grade steam cleaner is also a game changer for upholstery and hard-to-reach crevices, completing my cleaning arsenal. For sanitizing high-touch smart surfaces, I trust UV-C disinfectors that kill germs without risking device harm, a breakthrough I recommend checking out in our UV-C disinfection guide. Lastly, a versatile set of precision brushes helps me reach behind vents, in tiny corners, or inside sensor crevices without damaging their delicate internals.
Embrace the Move-Out Cleaning Challenge—You’re Not Alone
Moving out is an opportunity, not just a task—it’s your chance to demonstrate care for your space and ensure a stress-free inspection. With the right tools, thoughtful routines, and a little patience, you can turn what seems daunting into a satisfying achievement. Remember, every smart sensor you meticulously clean and test boosts your confidence and helps secure that deposit refund. Ready to make your move-out stellar? Start today, and don’t hesitate to share your experiences or ask questions—we’re in this cleaning journey together!