I’ll never forget the sinking feeling when I realized I had overlooked a tiny, grimy spot on my solar blinds during a last-minute cleaning before moving out. It was a small stain, easily ignored, but in the eyes of the landlord and inspection robots, it could mean the difference between getting back my full deposit or losing hundreds. That moment was a lightbulb for me—if I didn’t pay attention to every little corner, I risked failing the move-out inspection, especially with 2026’s new standards getting stricter every day.
Why You Can’t Afford to Miss These Solar Blind Spots
As 2026 approaches, inspections are evolving. Landlords and automated systems are now scrutinizing areas that used to go unnoticed. Solar blinds, with their intricate slats and hidden crevices, have become a critical part of this new puzzle. I learned this the hard way early on—making the mistake of assuming my regular wiping was enough. It isn’t. Even the tiniest dust or smudge can be a red flag, leading to potential deductions or even delays in your move-out process.
Is Your Clean Routine Actually Up to Par?
At first, I thought a quick wipe would suffice. It wasn’t until an inspector pointed out a stubborn film on one window that I realized my old techniques weren’t cutting it. According to cleaning experts, neglecting these hidden spots can undermine your entire cleanup effort, risking inspection failure (source: Effective House Cleaning Secrets). If you’re wondering whether your efforts are enough, you’re not alone. Many of us have made similar mistakes and learned the hard way.
So, what’s the solution? How can you ensure these overlooked areas won’t sabotage your move-out success? Stay tuned—I’m about to share proven strategies based on my experience, so you can confidently tackle those tricky solar blind spots and secure that full refund without a hitch.
.
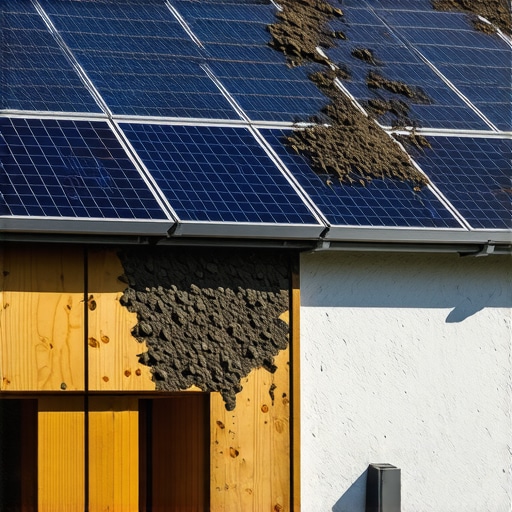
Get Closer to the Details
Start by removing all dust and debris from the blinds using a microfiber duster or a vacuum with a brush attachment. For stubborn dirt, dampen a soft cloth with a mild cleaning solution and gently wipe each slat, ensuring you reach the hidden edges and corners where dust often settles. I once used a skewered toothbrush to dislodge grime from between the slats of my old home’s blinds—that little tool made a big difference in the thoroughness of my clean.
Use the Right Cleaning Agents
Opt for a gentle, non-abrasive cleaner suited for blinds—test it on a small section first to prevent damage. If your blinds are fabric or delicate, prioritize specific cleaning methods outlined in upholstery cleaning tips. For plastic or metal blinds, a vinegar-based solution can effectively cut through grease and grime without leaving streaks. When I cleaned my solar blinds, I soaked a microfiber cloth in a mixture of water and white vinegar, then carefully wiped each slat, ensuring no residue or streaks remained.
Sanitize What’s Often Overlooked
After dusting and wiping, focus on sanitizing the most neglected spots. Switches and cords attached to the blinds can harbor germs, especially if touched frequently. Utilize a disinfectant wipe or a solution recommended in sanitizing hacks to eliminate bacteria and viruses. Remember, even a light mist with a disinfectant can make a significant difference in passing the 2026 standards, which now emphasize comprehensive cleaning.
Deep Clean with Proper Tools
For stubborn stains or sticky residues, a solution of warm water with a few drops of dish soap works wonders. Use a soft sponge or cloth, not abrasive scrubbers, to avoid scratching surfaces. When dealing with textured or patterned blinds, a soft-bristled brush or a vacuum with a HEPA filter can reach into grooves and crevices better than a regular cloth. I once used a narrow paintbrush to clean the tiny gaps in Venetian blinds, which prevented dust buildup and ensured a spotless appearance.
Pay Attention to the Hidden Spots
Focus on the corners, edges, and behind the blinds where dust and grime collect unnoticed. Regularly check for mold, mildew, or sticky residues that can cause failed inspections—especially relevant with the new standards. For example, dust accumulation around the brackets and on the backside of blinds often gets ignored but can cause inspection flags. Remember, as shown in hidden dust zones, these small yet critical areas can be the make-or-break details for your move-out success.
Maintain Consistency for Long-Term Results
Set a routine to clean your blinds periodically rather than waiting for move-out day. This proactive approach prevents grime buildup and makes thorough cleaning less daunting. I created a schedule that included quick weekly dusting and monthly deep cleaning, which kept my blinds looking pristine. Consistency not only simplifies move-out inspections but also preserves the blinds’ appearance and functionality over time.
Quick Check Before Final Inspection
Finally, walk through your space with a critical eye or ask a roommate for feedback. Look for overlooked spots, smudges, or streaks and address them promptly. Think of it as a final dry run—just like rehearsing before a presentation. A thorough walkthrough can reveal minor issues, allowing you to correct them before the inspector arrives, ensuring your deposit is protected.
Many homeowners assume that a quick wipe-down is sufficient for a thorough clean, especially when it comes to move-out requirements. However, this oversimplification can backfire, as some cleaning myths lead even seasoned cleaners astray. For instance, the belief that regular dusting alone can prevent inspection flags overlooks hidden dust accumulation in vents, behind appliances, or within complex fixtures like solar blinds—areas that often harbor grime and allergens unaddressed by basic routines. According to cleaning experts, neglecting these nuances increases the risk of failing inspections, potentially costing you your security deposit. Moreover, common myths about sanitizing suggest that using aggressive chemicals automatically ensures breakdown of germs, but overuse can damage sensitive surfaces and create streaks or residues that inspectors notice. Advanced mistakes, such as using abrasive tools on delicate upholstery or neglecting to sanitize touchpoints like light switches and smart home interfaces, compromise the very standards inspectors are tightening with each passing year. A sophisticated approach involves understanding the material-specific cleaning protocols—trust me, a one-size-fits-all method often causes more harm than good. Curious about how to elevate your cleaning game? Dive into comprehensive strategies that avoid these pitfalls and align with evolving standards, and you’ll find yourself steps ahead in securing that full deposit refund. Want to learn more? Check out effective house cleaning secrets from cleaning experts to ensure nothing is missed. Have you ever fallen into this trap? Let me know in the comments.
Maintaining a pristine home, especially before a move-out inspection, requires more than just effort—it demands the right tools. Personally, I swear by a combination of specialized equipment and smart cleaning strategies that ensure consistent results over time. One of my go-to devices is the Dyson V11 Torque Drive cordless vacuum. Its powerful suction and intelligent filtration system make quick cleans effortless, especially in tricky areas like behind appliances or inside vents. I rely on it weekly to keep dust and debris in check, preventing buildup that could trip inspection in 2026.
Another indispensable tool is a microfiber steam mop. Unlike traditional mopping, steam effectively sanitizes surfaces without chemicals, perfect for kitchen and bathroom floors. I prefer models with adjustable steam settings and swivel heads, which let me reach into tight corners and under furniture, maintaining long-term hygiene without damaging delicate finishes. Regular use of the steam mop not only preserves the cleanliness but also prolongs the life of your flooring—saving you hassle and money.
For detailed work like cleaning blinds or vents, I turn to narrow paintbrushes and compressed air cans. These inexpensive yet precise tools help dislodge dust and grime from hard-to-reach spots that often go unnoticed. In fact, the effective house cleaning secrets emphasize the importance of targeted tools to avoid missed spots—especially critical with the emerging inspection standards.
In addition to physical tools, I incorporate smart cleaning apps like Tody, which helps schedule regular routines and monitors when specific areas need attention. Automated reminders keep me consistent, ensuring no corner, vent, or switch is neglected over weeks and months—crucial for maintaining compliance with upcoming standards.
Looking into the future, I predict a shift towards more integrated cleaning systems—think robotic vacuums paired with AI-driven air purifiers. These innovations will simplify maintenance and enhance overall home hygiene, making long-term cleanliness more manageable. For now, however, leveraging high-quality manual tools combined with smart routines is your best bet.
How do I maintain my cleaning effectiveness over time?
Consistent scheduling is key. I set weekly quick cleans with my cordless vacuum and monthly deep cleaning with my steam mop. Additionally, I routinely inspect hidden dust zones, such as behind blinds or inside vents—areas shown in this guide—to prevent buildup and avoid surprises during inspection. Developing a personalized cleaning calendar not only keeps my home pristine but also reduces last-minute stress before move-outs. If you want to adopt this approach, start by choosing tools that fit your space and routine, then commit to a regular schedule. Try integrating a narrow brush for vents next—it’s a game-changer for thoroughness and will save you time in the long run.
The Hidden Lessons That Changed My Cleaning Routine
One of the toughest truths I uncovered was that superficial cleaning isn’t enough—hidden spots can undermine your entire effort. I used to think a quick wipe was sufficient until I realized grime lurked behind the slats and tucked into corners, which could easily flag inspections. This lightbulb moment emphasized the importance of paying close attention to details I once ignored, like the tiny gaps and the backside of blinds. Learning this taught me that meticulousness is more beneficial than brute force cleaning, especially as standards tighten.
Another insight was understanding that different materials demand tailored cleaning methods. Using generic solutions or tools on delicate blinds can cause harm and leave residues that inspectors notice. Personal experiences showed me that patience and the right supplies—like microfiber cloths and gentle cleaners—are crucial for a thorough, safe clean that meets 2026 standards.
Lastly, I realized that maintaining a cleaning routine isn’t a one-time effort but a long-term strategy. Regularly inspecting and caring for my blinds prevented future grime buildup and minimized last-minute stress before inspection day. This proactive approach reinforced that consistency, combined with the right tools and methods, is the key to securing your deposit and avoiding surprises.
My Favorite Tools That Helped Me Stay Ahead
Investing in the right equipment made a significant difference. The Dyson V11 Torque Drive cordless vacuum became my go-to for quick, efficient dust removal over the years, especially in hard-to-reach areas. Its power and filtration helped me maintain a consistently clean home without much hassle. Additionally, a microfiber steam mop proved invaluable for sanitizing floors and surfaces gently yet effectively, aligning perfectly with the stricter standards.
For detailed work on blinds and vents, I rely on narrow paintbrushes and compressed air cans. These inexpensive yet effective tools help me dislodge stubborn dust from tight spots, ensuring nothing gets overlooked. Incorporating a smart cleaning app like Tody kept me on schedule, reminding me when to deep clean or spot check specific areas, which drastically improved my routine over the months.
Altogether, these tools equipped me to stay prepared for any inspection and to act swiftly if something needs extra attention. They underscore that prioritizing quality and precision over shortcuts makes all the difference in achieving a move-out clean that passes even the most demanding standards.
Stay Driven to Keep Your Home Inspection Ready
Remember, the key to mastering the art of house cleaning, sanitizing, upholstery, and move-out preparation isn’t about frantic last-minute efforts; it’s about cultivating a habit of thoroughness that lasts. Every tiny detail matters—hidden dust zones, overlooked edges, or forgotten touchpoints can trip even seasoned homeowners up with the new 2026 standards. By integrating specific routines, utilizing trusted tools, and adopting a proactive mindset, you can confidently navigate the move-out process and secure your deposit.
If you’re committed to elevating your cleaning game, I encourage you to explore detailed strategies and expert tips — like those found in effective house cleaning secrets — and tailor them to your space. This is your chance to turn cleaning from a chore into a success story. Are you ready to take the reins and ensure nothing gets missed? Share your thoughts or ask questions below, and let’s keep the conversation going!