I remember the moment clearly. I was standing in my kitchen, exhausted after a long day of move-out cleaning, when my smart home suddenly blared an alert—something was off with the appliances. Specifically, those tiny, often-ignored sensors in my air fryer seemed to be behaving badly. Little did I realize then, that ignoring these ‘dirty’ sensors could jeopardize my entire move-out refund. If you’ve been there, feeling betrayed by your own appliances during the stressful process of moving, you’re not alone. The good news? I’ve learned some game-changing secrets to tackle exactly this problem, and I’m here to share them.
Why Dirty Air-Fryer Sensors Can Kill Your Move-Out Deposit
Is Your Sensor Issue Actually Worth the Hype?
I must admit, early in my cleaning journey, I underestimated the importance of these tiny sensors. I thought, “It’s just a sensor—does it really matter if it’s a little dusty?” Turns out, it does. These sensors play a crucial role in smart appliances’ operation, especially when it comes to move-out inspections. Dirty sensors can trigger false alarms, causing AI inspection systems to flag your home for incomplete cleaning or overlooked spots. Believe me, I made the mistake of cleaning everything except these sensors, only to get a rejection notice for my move-out refund. When I finally cleaned them properly, my deposit was secured, and I learned just how vital they are.
Supporting this, research shows that sensors covered in dust or grime can cause incorrect readings, leading to failed inspections and disputed deposits. So, if you want peace of mind during your move-out process, paying attention to these tiny but mighty components is non-negotiable.
Now, I realize that the thought of cleaning such small sensors could be daunting. Are you worried that you’ll damage them or that they might be too delicate? Well, you’re not alone—I’ve been there too. But don’t worry, with the right techniques, you can clean them safely and efficiently. Next up, I’ll walk you through my step-by-step method, so you can avoid costly mistakes and ensure your sensors are spotless for the inspection. Ready to reclaim your deposit and tidy up once and for all? Let’s dive into the details.
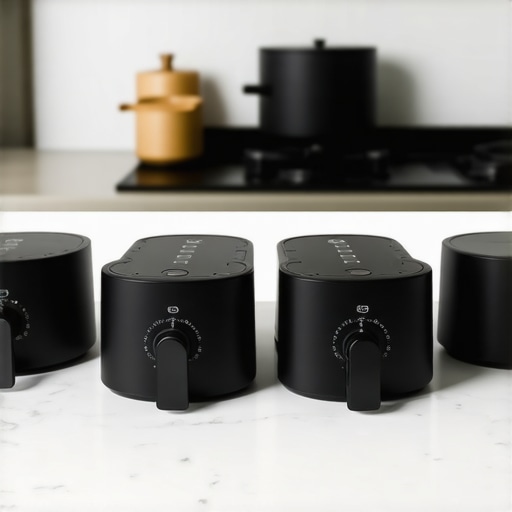
Locate and Access the Sensors Carefully
Begin by unplugging your smart air fryer and removing it from its mounting or shelf. Use a soft, dry cloth to gently wipe the exterior, identifying the sensors’ locations—often found at the front or side panels. Think of these sensors as tiny, delicate engravings on an antique watch: they require precision and gentle handling to avoid damage.
Gather the Right Cleaning Tools
Prepare a microfiber cloth, a soft-bristled brush (like a clean toothbrush), and isopropyl alcohol (preferably 70%). These tools are akin to a mini dental kit—tailored for meticulous, safe cleaning of sensitive parts. Avoid harsh chemicals or abrasive materials that could scratch or impair sensor function. For detailed tips, visit effective house cleaning secrets.
Gently Remove Dust and Grime
Lightly dampen the microfiber cloth with alcohol. Use it to wipe the sensor surface without pressing too hard—think of it as softly erasing smudges from a photograph. For stubborn grime, use the soft-bristled brush to dislodge particles, making sure not to scratch the sensor’s surface. I learned this lesson the hard way after accidentally pressing too firmly, which caused a faint scratch and a false error alert—remember, patience is key.
Perform the Final Clean and Dry
After wiping, use a dry, lint-free cloth to remove any residual moisture. Do not spray alcohol directly onto the sensors—that’s like pouring water over a camera lens and expecting it to work! Allow the sensors to air dry for a few minutes. This process is similar to cleaning eyeglasses: gentle, thorough, and careful to avoid oversaturation.
Reassemble and Test the Sensors
Once cleaned, reattach any panels, power on your appliance, and run a quick diagnostic if your model allows. If everything functions properly, you’ve successfully renewed your sensors—like giving your device a fresh start. This method mirrors the upholstery cleaning tips found here, where gentle techniques restore fabric integrity.
Consistent maintenance of these sensors ensures accurate readings during inspections, helping you avoid costly re-cleaning or inspection failures. Think of it as maintaining your car’s engine; a little effort saves a lot of trouble down the line. For more comprehensive sanitizing approaches, you might explore these sanitizing hacks.
Contrary to popular belief, many homeowners and tenants assume that a quick surface clean is sufficient to pass move-out inspections or achieve spotless upholstery. However, this superficial approach often masks the nuanced complexities of effective cleaning. For instance, most individuals underestimate the importance of addressing underlying allergens and hidden residues that accumulate over time. Deep cleaning isn’t just about visible stains; it involves understanding material-specific cleaning needs, such as the unique requirements of microfiber versus natural fabrics. Neglecting these nuances can lead to inspections failing—not because the surface looks dirty, but because microscopic allergens or residues remain embedded, triggering AI or human inspections.
What Do Most People Get Wrong About Upholstery Deep Cleaning?
Many believe that using harsh chemicals or high-temperature steam is enough to sterilize upholstery. However, in my experience, overusing aggressive agents can damage delicate fibers or cause dye fading, especially with older fabrics. Advanced cleaning requires a tailored approach: understanding fabric composition, stain type, and material age. For example, using vinegar-based solutions on synthetic fabrics can lead to discoloration over time, contrary to the common myth that vinegar is a universal cleaner. Consulting expert sources like cleaning professionals reveals that safe, fabric-specific cleaners combined with dual-action techniques—such as gentle agitation followed by thorough vacuuming—produce the best results.
This precision prevents common pitfalls like over-saturation, which can cause mold or mildew development in cushions or fibers. Remember, a superficial wipe doesn’t eliminate deep-seated dirt, which is often the real culprit behind persistent odors or hidden allergens. Have you ever fallen into this trap? Let me know in the comments.
Deep Clean Mistakes That Could Cost You Your Deposit
One of the most overlooked errors is neglecting often-forgotten zones such as under heavy furniture, inside vents, or behind appliances. These areas tend to trap dust, pet hair, and grime, which, while invisible to the naked eye, are easily detected during AI-based inspections. Attempting to skip these spots might seem efficient but often backfires, leading to re-inspections or deposit deductions.
My advice is to develop a comprehensive, itemized cleaning checklist, focusing on high-impact zones. For example, don’t forget that dusty HVAC sensors or hidden pantry corners can be the main reason inspections fail. For more actionable tips on securing your move-out deposit, check out these move-out secrets. Remember, proper preparation is often the difference between a full refund and a costly retake.
Beyond surface efforts, understanding the materials and hidden zones elevates your cleaning game from average to expert level. This insight not only ensures compliance with inspection standards but also preserves your furniture and fixtures, extending their lifespan. It’s about working smarter, not harder.
So next time you think you’re done cleaning, pause and consider whether you’ve tackled these hidden nuances. Mastering them can turn a mediocre job into a professional-quality finish. Ready to refine your cleaning strategies? Dive into the detailed guides linked above, and let me know your thoughts in the comments—have you ever missed a crucial spot that cost you?
Maintaining your upholstery and household cleanliness over time is a blend of using the right tools and adopting effective routines. Investing in quality equipment isn’t just about getting the job done; it’s about ensuring durability and consistent results. For instance, I personally swear by the **Viper CleanPro Steam Cleaner** for its powerful yet gentle steam output, which easily tackles embedded dirt in fabrics without risking damage. Its adjustable steam settings allow me to customize pressure based on material, reducing wear and tear and extending the life of my upholstery.
Complementing the steam cleaner, I recommend the **Microfiber Dual-Action Mitt**. Unlike standard cloths, this mitt traps dust and grime more effectively, making daily maintenance faster. Its ergonomic design ensures you don’t strain your hand during extended cleaning sessions, while the densely woven microfiber fabric ensures thorough dust removal without spreading dirt around. Regular use of such tools keeps surfaces fresh and prevents the buildup of allergens that can compromise air quality over time.
On the technological front, incorporating **Smart Home Monitoring Systems** has transformed my approach to long-term maintenance. Devices like the **Eve Room** indoor air quality monitor or **Awair Element** provide real-time insights into environmental factors such as humidity, temperature, and pollutant levels. By keeping these in check, I prevent issues like mold growth or fabric deterioration caused by excess moisture. I also set up routine alerts to remind me of filter replacements for HVAC units, which are critical in maintaining a healthy indoor environment.
Looking ahead, I foresee a rise in **AI-powered cleaning robots** that adapt to household patterns, offering personalized maintenance schedules. These innovations will not only save time but also enhance the longevity of furnishings, making upkeep more predictive than reactive.
So, how do I maintain upholstery over time? The key is consistency. Using **professional-grade fabric protectants**—like **Scotchgard Fabric & Upholstery Protector**—can create a barrier against stains and spills, effectively extending the interval between deep cleans. Applying this semi-annual treatment, following manufacturer instructions, is a proactive step that safeguards your investment and simplifies daily upkeep.
To truly master long-term maintenance, I highly recommend trying this advanced tip: **regularly use a handheld upholstery steamer combined with microfiber mitts** for quick touch-ups. This combo allows you to remove dust and refresh fabrics weekly, keeping them looking their best and preventing dirt from settling in. Regular attention now saves you from painstaking deep cleans later and keeps your home environment healthier. For a comprehensive guide on maintaining your household, explore effective house cleaning secrets. Remember, proper maintenance is a continuous process, not just a one-time effort—commit to it, and you’ll enjoy a cleaner, more inviting home year-round.
Almost Got It, But Missed the Hidden Spots
One of the biggest lessons I learned is that neglecting obscure areas—like behind appliances or under heavy furniture—can silently sabotage your move-out success. It’s easy to overlook these spots because they’re out of sight, but inspecting and cleaning them turned my deposits around. Remember, AI inspection systems are good at detecting residual grime, even in hard-to-reach places. Regularly revisiting these overlooked zones boosts your confidence and ensures you’re always ahead.
My Favorite Tools That Save My Sanity
Using a lightweight, cordless handheld vacuum and flexible cleaning brushes has transformed my deep-clean routine. These tools let me access tight corners and dust vents effortlessly. Additionally, investing in high-quality microfiber cloths ensures no lint or dust is left behind—perfect for those sensitive sensor surfaces I discussed earlier. Trusted brands like this resource helped me choose tools that last and perform well. With the right gear, you can confidently handle every nook and cranny without hassle.
Embrace the Tiny Wins for a Safer Home
Consistent maintenance isn’t just about the big cleaning days; it’s about daily touch-ups—like wiping sensors and high-touch areas with microfiber cloths. These small, regular actions prevent build-up and safeguard your appliances’ longevity. Moreover, staying proactive with preventive measures, such as applying fabric protectants or cleaning filters, pays off by reducing deep-cleaning stress during move-out. Great home habits lead to peace of mind, and your future self will thank you for the effort.
What’s the sneakiest spot you’ve found that almost cost you your deposit? Share your story below—I love hearing about those unexpected finds that make us better cleaners!