Ever experienced that sinking feeling when you’re rushing to finish your move-out cleaning, only to spot a stubborn stain on your sofa or armchair? I remember the first time I overlooked a coffee spill on my vintage couch. No matter how much I scrubbed, the stain wouldn’t budge, and it haunted me during my inspection. That frustrating moment was a lightbulb moment. I realized how crucial it is to tackle upholstery stains effectively before leaving a home, especially to secure that full deposit or leave a good impression.
Why Upholstery Stains Can Make or Break Your Move-Out Success
Upholstery stains are more than just eyesores. They can significantly impact your ability to get your full deposit back, especially since landlords and property managers scrutinize every detail. A clean, fresh-looking sofa or chair not only boosts the overall appearance but also shows you’re a responsible tenant. But here’s the catch: many people underestimate the importance of proper stain removal or fall for quick fixes that only make things worse.
Is Over-the-Counter Cleaning Enough To Guarantee Your Deposit?
In my early days, I made the mistake of relying solely on generic sprays and fancy wipes, assuming they’d handle every stain effortlessly. Spoiler alert: they didn’t. The stain on my favorite upholstery lingered stubbornly, and I learned the hard way that rushing can lead to more damage or even fabric fraying. Genuine upholstery cleaning requires understanding the fabric type and employing proven techniques. Want trusted results? It’s worth investing in expert-approved tactics and knowing what to avoid.
If you’re facing similar challenges or worried about missing those tiny spots, don’t despair. In the upcoming sections, I’ll share four professional tactics that help you eliminate upholstery stains efficiently and confidently. Whether it’s pet hair, coffee, or other stubborn marks, these strategies are game-changers.
Ready to become your home’s upholstery hero? Let’s dive into the world of pro tactics and restore your furniture to its best condition!
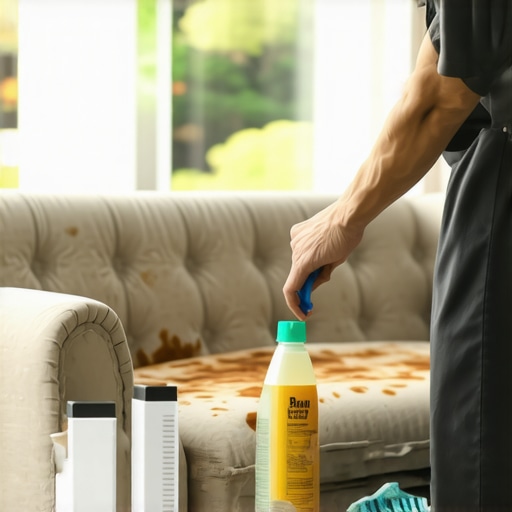
Choose the Right Cleaning Solution for Your Fabric
Start by identifying your furniture’s fabric type—whether it’s velvet, cotton, or synthetic. I once tried using harsh bleach on a delicate velvet sofa, which instantly ruined the texture. Instead, I learned to use gentle, fabric-specific cleaners. For synthetic fabrics, a mix of mild dish soap and water often suffices, while natural fibers may require specialized upholstery cleaners. Always test a small hidden area first to prevent discoloration.
Prepare Your Workstation and Gather Essentials
Equip yourself with clean microfiber cloths, soft-bristled brushes, a spray bottle, and a vacuum. Before addressing the stain, vacuum the area thoroughly to remove loose debris—this prevents rubbing dirt deeper into the fibers. I once skipped this step with disastrous results; the stain spread as I scrubbed, highlighting the importance of preparation. Having everything ready saves time and avoids hurried mistakes.
Apply Corrective Techniques to Eliminate Stains
Dab—don’t rub—the stain with a damp cloth soaked in your cleaning solution. For stubborn coffee or wine stains, applying a small amount of baking soda paste can help lift them. Remember, patience is key. I vividly recall spending an hour gently working on a stubborn mustard stain, which finally responded after repeated gentle dabs. Using a clean dry cloth afterward to absorн excess moisture helps prevent water spots and fabric damage.
Address Pet Hair and Odors
Pet fur can cling stubbornly to upholstery. Use a damp rubber glove to lift pet hair effectively—gently running your hand over the fabric. For odors, a half-cup of white vinegar mixed in water works wonders. I once used this method on a dog-urine stained chair, and it restored freshness without leaving a vinegary smell. Repeat as necessary, then follow with airing out the furniture.
Dry and Sanitize to Ensure Complete Cleaning
Allow your furniture to air dry completely, preferably in sunlight, which also helps disinfect. Afterward, spray with a fabric-safe sanitizer—consider using solutions proven effective in upholstery sanitation [see here](https://spotlesscarpetz.com/upholstery-sanitizing-modern-techniques-for-trusted-results). I once missed this step and noticed lingering pet odors weeks later. Incorporating proper drying and sanitizing guarantees your furniture will look and smell fresh, impressing landlords and ensuring deposit recovery.
Final Inspection and Touch-Ups
Inspect your work with a critical eye—look for missed spots or uneven cleaning. Use a clean brush or cloth to touch up areas as needed. Remember, clean furniture isn’t just about removing stains but also restoring the original look and feel. I once overlooked a faint lipstick mark that only appeared after prolonged inspection, emphasizing the need for patience and attention to detail.
For a comprehensive guide to effective move-out cleaning, including upholstery, explore this resource. Properly executed upholstery cleaning not only enhances your space’s appearance but also signals responsibility—key to securing your full deposit and leaving a positive impression.
Many tenants believe that a quick wipe-down with standard household cleaners will suffice for move-out cleaning, but this common misconception can cost you your full deposit. The truth is, superficial cleaning often leaves hidden germs, residues, and stains that landlords scrutinize closely. According to cleaning expert advice, relying solely on surface-level efforts neglects the importance of deep sanitization and fabric-specific treatments, which are crucial for a thorough job. An often-overlooked nuance is the significance of understanding fabric and surface material nuances, as using the wrong cleaning agents can damage upholstery or leave behind harmful residues. For example, using bleach on delicate velvet or natural fibers can result in irreversible damage, while improper disinfectants may not eliminate pathogens effectively. This misstep not only jeopardizes your deposit but can also affect your health, especially with ongoing concerns about household germs and viruses. Experts emphasize that advanced move-out cleaning requires a strategic approach, combining proper cleaning solutions, sanitizing techniques, and appropriate equipment. Ignoring these details can lead to overlooked spots, lingering odors, and unprocessed bacteria, which standard cleaning routines may miss. A common myth is that aggressive chemical use ensures cleanliness; however, overusing harsh agents can weaken fabric fibers and pollute indoor environments. Instead, modern cleaning advocates recommend eco-friendly and fabric-safe disinfectants, which are proven to be effective while preserving material integrity. For a comprehensive understanding, see how professional strategies integrate science-backed methods—delving into effective solutions, proper tools, and sanitizing hacks for safe house transitions. Remember, a meticulous move-out cleaning not only helps secure your deposit but also leaves a positive impression on your landlord, reducing potential disputes or deductions. To master this process, gain insights from trusted resources and avoid typical pitfalls that most tenants overlook. Have you ever fallen into this trap? Let me know in the comments. For detailed guidelines, explore tips on [effective house cleaning secrets from cleaning experts](https://spotlesscarpetz.com/effective-house-cleaning-secrets-from-cleaning-experts), which highlight the importance of tailored cleaning and sanitization strategies.
Investing in Reliable Equipment Makes All the Difference
To ensure your move-out cleaning efforts stand the test of time, investing in high-quality tools is non-negotiable. Personally, I swear by a steam cleaner with adjustable settings, like the Bissell PowerFresh. Its versatility allows me to sanitize carpets, upholstery, and even sealed hardwood floors without harsh chemicals. I also rely on a cordless handheld vacuum for quick cleanups of pet hair and debris, which saves me hours during those last-minute inspections. When selecting tools, opt for models with durable attachments and easy-to-clean filters—these features extend the lifespan of your equipment and maintain optimal performance.
Maintaining Your Tools for Peak Performance
Regular maintenance is the secret to longevity and reliable results. After each deep cleaning session, I always rinse and dry my steam cleaner’s water tank to prevent mold buildup. Similarly, replacing vacuum filters every few months ensures consistent suction and avoids circulating dust. A good practice is to schedule quarterly checkups for your equipment—clean hoses, inspect brushes, and replace worn parts. This proactive approach reduces unexpected breakdowns and keeps your cleaning routine seamless. Additionally, storing tools in a dry, organized space prevents unnecessary wear and damage over time.
The Future of Cleaning Technology
Advancements in automation and smart devices hint at a future where cleaning becomes even more effortless. Robots like the iRobot Braava are already gaining popularity for floor maintenance, and integration with home assistants could soon allow voice-activated cleaning schedules. As technology progresses, expect tools to be more efficient, eco-friendly, and capable of remote diagnostics—making long-term maintenance simpler and more effective. Staying ahead of these trends means investing in adaptable equipment now that can integrate with the smart homes of tomorrow.
How do I maintain my cleaning tools over time?
The key is consistency. Establish a routine of cleaning, inspecting, and replacing parts as needed. Keep tools in a designated, dry space to prevent rust and deterioration. Follow manufacturer guidelines for maintenance and consider subscribing to official replacement parts to ensure compatibility. Remember, well-maintained equipment not only prolongs its lifespan but also guarantees superior results during every cleaning session. For more detailed advice on upholstery-specific tools and techniques, visit this guide. Try implementing one advanced maintenance tip today—like switching to a microfiber brush attachment— and notice the difference in your cleaning efficiency.
Lessons That Changed My Upholstery Cleaning Game
- I’ve realized that rushing through stain removal can do more harm than good—gentle patience wins every time.
- Understanding fabric types saves me from applying the wrong cleaning solution, preventing irreversible damage.
- The importance of thorough preparation, like vacuuming first, cannot be overstated—it sets the foundation for success.
- Sanitizing in addition to cleaning is key—residual germs are hidden threats that can defeat your efforts.
- Investing in quality tools isn’t optional; reliable equipment makes the difference between a good job and an outstanding one.
Tools and Resources That Elevate My Upholstery Care
- Ultimate Upholstery Sanitizing Strategies: This guide kept me ahead with modern, eco-friendly techniques backed by science.
- Modern Upholstery Cleaning Tools: Investing in a high-quality steam cleaner like the Bissell PowerFresh revolutionized my cleaning routine.
- Expert Move-Out Tips: These tips helped me navigate tricky stains and strict landlord inspections confidently.
- advanced cleaning strategies ensure I leave no trace of stains or odors, making my move smoother.
Step Into Your Cleaning Power Today
Taking control of upholstery cleaning isn’t just about avoiding deposit deductions—it’s a chance to genuinely refresh your living space and boost your confidence. Every stain you erase is a step toward creating a home environment that you’re proud of. Don’t wait for the next spill or stain—start implementing these expert tips today and experience the transformation firsthand. Remember, the best way to guarantee trusted results is to stay informed, invest in quality tools, and approach each challenge with patience and curiosity. Your furniture—and your peace of mind—deserve that extra effort. So, what stubborn upholstery stain will you conquer first? Share your stories or questions below; I’d love to hear about your cleaning victories.