It was a Tuesday afternoon when I looked around my messy living room, realizing that no matter how many weekend cleaning sprees I scheduled, the clutter seemed to multiply overnight. Then it hit me—my upcoming move-out was looming, and I hadn’t even started packing, let alone the daunting task of cleaning. I vividly recall the panic setting in, feeling overwhelmed by the mountain of chores ahead. But what truly changed everything was a simple realization: a thorough, strategic move-out cleaning isn’t just about tidying up—it’s about ensuring you leave on good terms with your landlord, securing your deposit, and stepping into your new home feeling fresh and stress-free.
Welcome, fellow home mover! If you’ve ever faced that sinking feeling of dread when thinking about the cleaning marathon before moving out, you’re not alone. I’ve been there, and over the years, I’ve discovered effective techniques that transform the chaos into confidence. Today, I promise to share some tried-and-true move-out cleaning tips that will help you achieve a spotless exit and avoid costly deposits deductions.
Why Moving Out Clean Should Be Your Top Priority
Having moved multiple times, I learned that neglecting the cleaning process can lead to surprises—like withheld deposits or disputes with landlords. A comprehensive move-out clean can make or break your rental experience. But beyond the financial aspect, it’s about starting fresh and leaving behind a space someone else can immediately enjoy. A study by the National Rental Home Council suggests that tenants who perform a thorough cleaning are 80% more likely to receive their full deposit back, emphasizing how crucial it is to prioritize this step.
Late early errors, like missing the details—especially in kitchens and bathrooms—can cost quite a bit when it comes to security deposits. My initial mistake was underestimating the power of professional cleaning; I thought a quick sweep was enough. Turns out, detailed cleaning, especially of neglected spots, saves headaches later. To ensure your move-out is truly spotless, I’ll guide you through effective strategies that combine DIY effort with expert tips, helping you avoid common pitfalls.
If you’ve ever wondered whether a deep clean really makes a difference or if professional help is worth it, I’ll address that doubt in the next section. Believe me, taking the right steps now will pay off later—both financially and emotionally. Ready to discover the secrets to a stress-free, spotless move? Let’s dive into the essential strategies you can implement today to leave your old place sparkling and start fresh in your new home.
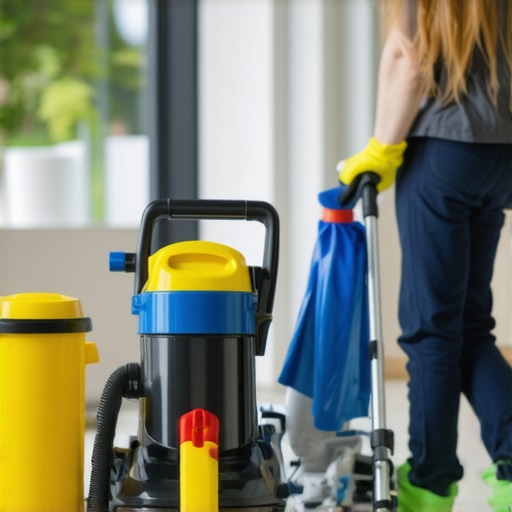
Get Your Supplies Ready
Before diving into cleaning, gather all necessary tools: microfiber cloths, scrub brushes, vacuum cleaner, bucket, all-purpose cleaner, disinfectants, rubber gloves, and trash bags. My trick was to create a dedicated cleaning caddy, which minimized trips and kept everything within reach. This prep step accelerates the process and reduces frustration.
Tackle the Kitchen First
Start with countertops, appliances, and cabinets. Spray a degreaser on the stove, scrub away grime with a brush, and wipe surfaces with microfiber cloths. For stubborn stains in the oven or microwave, apply a baking soda paste—let it sit for 15 minutes before scrubbing. Think of this as carving away layers of dirt, like peeling an onion, revealing a clean surface underneath. When I did this in my previous apartment, I noticed grease spots vanished faster than I expected, saving me hours in the end. For detailed guidance, consider reviewing expert cleaning secrets.
Sanitize Bathrooms Effectively
Use a disinfectant spray and let it sit for at least five minutes to kill bacteria. Focus on the toilet, sink, shower, and tiles. Use a scrub brush for grout lines—these often hide soap scum and mold. Applying a vinegar and baking soda mixture can boost cleaning power and reduce harsh chemical use. I remember tackling my bathroom with this approach; the grout brightened considerably, making the entire space look new. Don’t forget to clean mirrors with a glass cleaner for a streak-free finish—perfect for those last-minute photos for your move-out inspection.
Deep Clean the Floors
Vacuum carpets thoroughly before applying carpet cleaner or steam cleaning. For hardwood, laminate, or tile floors, sweep first to remove loose dirt, then mop with an appropriate cleaner. I once rented a steam cleaner for my carpet, and the difference was shocking—residual odors and stains disappeared, leaving the carpet fresh and vibrant. This step can be the difference between a deposit refund or disputes. For detailed carpet cleaning strategies, visit trusted carpet cleaning techniques.
Address Upholstery with Precision
Upholstered furniture often collects dust, hair, and stains. Use a vacuum with an upholstery attachment to remove surface debris. For stains, apply a fabric-safe cleaner—test on a hidden spot first. If your furniture looks worn or stained, consider professional upholstery cleaning, which can restore its appearance dramatically. I once had a sofa with stubborn wine stains; after a specialized cleaning, it looked brand new. See upholstery cleaning tips for more insights.
Clear Out Trash and Personal Items
Finally, remove all personal belongings, trash, and any leftover debris. Use trash bags to quickly gather discarded items. This step not only prepares the house for inspection but also keeps you organized for your move. I found that discarding unnecessary items as I cleaned prevented clutter from piling up, making the final cleaning less stressful.
Finishing Touches for a Showroom Finish
Wipe down light switches, door handles, and window sills with disinfectant. Consider polishing fixtures to restore shine. Open windows to air out the space and let sunlight remove any lingering odors. These final details demonstrate your respect for the property and can influence your landlord’s impression, increasing the chances of deposit return. For sanitizing techniques, explore effective sanitizing hacks.
When it comes to house cleaning and sanitizing, many assume that more bleach or harsher chemicals automatically mean a better job. But in reality, this common misconception can lead to ineffective sanitation and even damage to your surfaces. Experts like those from the National Sanitation Foundation emphasize that proper cleaning involves targeted approaches rather than brute-force chemical applications. Overusing disinfectants can also create resistant bacteria strains, making your efforts futile in the long run, as highlighted in recent microbiology studies. Many think that scrubbing vigorously always results in a cleaner home, but often, it just spreads germs around or damages surfaces, especially upholstery and delicate finishes. Instead, understanding the nuances—like contact time, pH levels, and material compatibility—is crucial for effective sanitation. For advanced cleaning, combining chemical disinfectants with physical removal techniques yields the best results, especially during move-out cleaning when every detail counts. When cleaning upholstery, for example, using the wrong cleaners can weaken fabric fibers or trap residues, diminishing the furniture’s lifespan. Visiting trusted resources such as expert cleaning secrets reveals that surface prep and attention to material-specific cleaning methods are game-changers. Always test cleaning solutions on a small hidden area before full application and avoid over-saturating fabrics. Did you know that many professional cleaners use microfiber cloths instead of sponges to trap bacteria more effectively? This simple adjustment dramatically improves sanitation quality.
How Do You Know When You’re Truly Sanitizing and Not Just Cleaning?
Achieving genuine sanitation involves more than surface appearances. It requires understanding pathogen lifecycles, appropriate disinfectant dwell times, and correct equipment use. For example, proper contact time for disinfectants—often 10 minutes or more—is critical; short sprays won’t eliminate bacteria or viruses effectively. Moreover, incorrect dilution ratios dilute disinfectants, rendering them ineffective. Following guidelines from organizations like the CDC ensures you’re not just moving dirt but actively reducing microbial presence. To optimize your efforts, consider integrating sanitation strategies into your move-out cleaning checklist, focusing on high-touch areas, and avoiding common pitfalls like missing hidden spaces behind appliances or neglecting upholstery fibers. Remember: superficial cleaning does little to stop germs; true sanitizing takes intentionality and knowledge. Have you ever fallen into this trap? Let me know in the comments.
Keep It Running with Precision Tools
Ensuring a pristine home during cleaning and maintenance requires the right equipment. I personally swear by a high-quality cordless stick vacuum like the Dyson V11, which combines powerful suction with portability, making quick cleanups effortless in tight corners and hard-to-reach spots. Its intelligent sensor recognizes floor types, automatically adjusting suction, saving time and energy. For upholstery, I rely on a handheld SteamVac, which uses hot steam to loosen dirt and kill germs without harsh chemicals—ideal for sensitive fabrics. Regular use of a steam cleaner not only extends the lifespan of furniture but also maintains hygienic standards, aligning with experts’ advice found at trusted upholstery cleaning strategies.
How do I maintain my cleaning tools over time?
Maintenance is crucial for prolonged efficiency. For vacuum cleaners, I recommend emptying the bin after each use to prevent loss of suction and replacing filters every 3-6 months. For steam cleaners, descale regularly using a vinegar solution to prevent mineral buildup, ensuring consistent steam output. Remember to inspect brushes for hair or debris that could hamper performance. Properly maintained tools perform better and last longer, simplifying your cleaning routines and preserving their value.
Advancing Your Cleaning Game with Software and Apps
Beyond hardware, I utilize chore management apps like Tody to schedule and track cleaning tasks. These apps send reminders and enable you to customize routines based on room or task frequency, turning cleaning into an achievable, less overwhelming activity. In the future, I predict integrated smart home systems will play a bigger role, automatically initiating cleaning cycles or notifying homeowners of maintenance needs—think of it as a house that cares for itself. Staying ahead with technological innovations keeps your home environment healthier and reduces long-term repair costs.
What’s the best way to keep up with routine maintenance?
Creating a routine checklist is vital. Break down weekly, monthly, and quarterly tasks—like vacuuming carpets, deep cleaning upholstery, and inspecting appliances—so nothing slips through the cracks. Consistency prevents dirt buildup and prolongs the life of your furnishings and fixtures. I recommend setting calendar alerts on your phone or integrating maintenance schedules into smart home apps for automation. This proactive approach ensures your home stays in top shape without last-minute scrambles or costly repairs.
Tools That Future-Proof Your Home Maintenance
Looking ahead, I see robotic vacuums, such as the Roomba i7, becoming ever more intelligent, capable of mapping your space and avoiding obstacles while cleaning automatically. Coupled with data-driven maintenance sensors on appliances, these tools can predict failures before they happen, saving money and downtime. Incorporating these advanced devices now can give you peace of mind and keep your cleaning routines efficient. As technology advances, staying informed through outlets like expert cleaning secrets will help you select the best solutions for your home.
Try setting up a regular schedule with your vacuum and upholstery cleaners, and see the difference it makes in maintaining a fresh, healthy environment. Regular maintenance isn’t just about cleanliness—it’s about extending the life of your investment and simplifying future chores.
When I Realized the Power of Routine in Move-Out Cleaning
One of my biggest lightbulb moments was understanding that consistent small efforts—like weekly spot-cleaning and inspecting high-touch areas—compound into remarkable cleanliness. Routines help catch issues early, saving time and stress during move-out. Embracing habits like pre-move checks on appliances and fixtures means I’ll never face a last-minute scramble, and it instilled confidence that my home was always ready for inspection.
Tools Are Your Secret Allies for Lasting Results
Investing in quality tools—like microfiber cloths, steam cleaners, and a reliable vacuum—transformed my cleaning game. These tools aren’t just gadgets; they’re strategic assets enabling me to reach tricky spots and ensure sanitation at a microbial level. Trusted brands like Dyson and commercial-grade steam cleaners have been worth every penny, helping me achieve professional-level results without the recurring costs of hiring pros. For in-depth reviews, explore expert cleaning tips.
There’s a Hidden Art to Combining Chemical and Physical Cleaning
It’s tempting to rely solely on chemical disinfectants, but I learned that physical removal—scrubbing, vacuuming, wiping—is equally vital. Proper contact times for disinfectants, like letting them sit for recommended dwell periods, are crucial; rushing diminishes their effectiveness. Using eco-friendly solutions like vinegar and baking soda in tandem with traditional disinfectants not only enhances sanitation but also protects surfaces and the environment. This nuanced approach drastically cuts down bacteria and mold, making sure your move-out cleaning passes the toughest inspections. Check out trusted sanitizing strategies to elevate your cleaning routine.
Mini-Habits That Keep Your Upholstery and Floors Fresh Daily
Routine chores like vacuuming upholstery and mopping floors weekly prevent dirt buildup. I set calendar reminders for these tasks, which keeps my home looking—and smelling—fresh and reduces the workload during big cleaning days. Incorporating quick touch-ups with microfiber cloths on light switches and handles daily ensures I’m actively reducing germs and allergens. These small habits compound, turning what once felt overwhelming into manageable, even enjoyable, tasks. Discover simple daily habits that maintain a pristine space with less effort.
What Moving Out Taught Me About Respecting Spaces
The biggest lesson I’ve learned is that move-out cleaning isn’t just about safeguarding my deposit—it’s about respecting the next occupant’s experience and honoring the home I lived in. It’s a chance to leave behind a space that’s healthier, more inviting, and ready for new memories. Taking the time to properly sanitize and document my cleaning efforts also gives me peace of mind, knowing I did my part responsibly. If you want a detailed checklist to guide your move-out, visit comprehensive cleaning strategies.
Hit Play on Your Next Cleaning Routine
Now that you know the secrets behind effective, trust-worthy move-out cleaning and sanitizing, it’s time to take action. Start small—tackle one room at a time, use the right tools, and apply expert techniques. Remember, the goal isn’t perfection but a level of cleanliness that reflects your respect for the space and ensures your deposit is safe. Your effort today sets the stage for a fresh start in your new home—don’t wait for that perfect moment; begin now. Curious about my favorite cleaning hacks? Reach out through my contact page and let’s get your home move-zero stress again.
I can definitely relate to the feeling of being overwhelmed during a move. One thing I found particularly helpful was creating a detailed cleaning checklist for each room, which broke down the tasks into manageable steps. I also invested in a good steam cleaner for upholstery and floors, which really made a difference in deep cleaning without harsh chemicals. It’s interesting how much value professional-grade tools add—have others found certain brands or models that stand out for move-out cleaning? Also, I’ve noticed that maintaining some routines, like quick daily wipe-downs of high-touch areas, keeps the space in better shape long-term and makes the final move-out cleaning much less stressful. What are some of your favorite habits or tools that make move-out cleaning easier and more efficient? Would love to hear others’ strategies for tackling those last-minute cleaning marathons!”,