
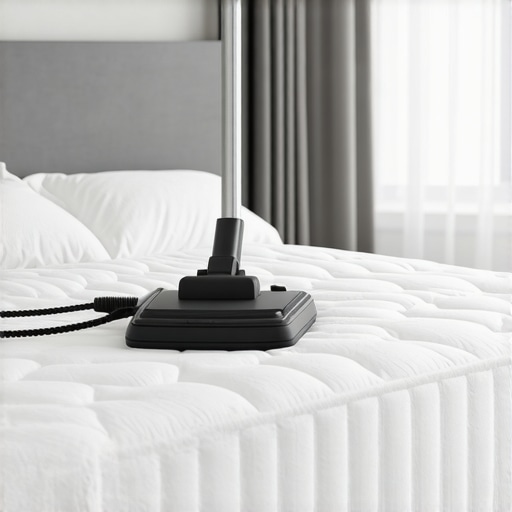
I woke up at 3:00 AM on a Tuesday, rubbing my burning eyes and sneezing for the tenth time in a row, and stared at my mattress in absolute betrayal. I am a clean person. I stick to a tight daily house cleaning routine to maintain perfection, wash my sheets weekly, and sweep under the bed. Yet, there I was, suffering. That was my lightbulb moment. I realized that while my sheets were sparkling, the actual mattress beneath them had become a thriving, invisible metropolis for microscopic pests. If you are waking up congested, itchy, or just feeling like your bed isn’t truly fresh, you aren’t alone. Today, we are going to fix this once and for all. I will show you how to reclaim your bed, eradicate those microscopic invaders, and finally breathe easy at night using real, field-tested methods.
The Invisible Sleep Stealers in Your Bedroom
Let’s be honest with each other. We spend a third of our lives pressing our faces and bodies against our mattresses, shedding millions of dead skin cells every single night. To dust mites, your cozy bed is an all-you-can-eat buffet. These tiny creatures don’t bite, but their microscopic waste contains proteins that trigger major allergies, asthma flare-ups, and skin irritation. According to researchers at the American Lung Association, a single mattress can be home to hundreds of thousands of these microscopic pests, making simple surface cleaning completely ineffective. Early in my cleaning journey, I made the classic mistake of thinking a quick spray of lavender water would solve it. All I did was create a damp, fragrant paradise for them to multiply. True eradication requires deep sanitizing and moisture control.
Are DIY Mattress Cleaning Methods Actually Worth the Hype?
It is completely normal to be skeptical. Can some basic kitchen pantry ingredients and a household vacuum really beat a persistent dust mite population? The short answer is yes, but only if you use them correctly. You do not need to buy expensive, toxic chemical sprays that ruin your delicate mattress fibers. Simple, natural agents like baking soda work beautifully because they draw out deep moisture—which is exactly what these pests need to survive. When you combine moisture elimination with targeted heat and high-filtration suction, you disrupt their entire life cycle. It is a highly effective, budget-friendly approach that matches the results of expensive professional services, provided you do not make the mistake of over-saturating the fabric.
Why Surface Vacuuming is Not Enough
If you just run a standard vacuum over your bed during your regular house cleaning session, you are barely scratching the surface. Dust mites cling tightly to the inner fibers of the fabric. To pull them out, you need to combine a dry neutralizing agent with specialized suction techniques. It is very similar to how you would approach ultimate upholstery care for lasting freshness; you must draw the embedded debris out of the deep padding rather than just clearing the top layer. Have you ever woken up with a stuffy nose and wondered if your mattress was secretly the culprit? Tell me about your bedroom struggles in the comments below! Next, we are going to dive straight into the step-by-step process to eliminate them completely using simple tools you already have in your closet.
My turning point arrived when I finally decided to stop treating my mattress like an ordinary piece of furniture. It isn’t a couch cushion or a rug; it is a giant sponge that absorbs humidity and skin oils every single night. To get these microscopic invaders out, you have to use a scientific approach: dehydrate, neutralize, and extract. Think of your mattress as a delicate wool coat. If you drench it in water, you will ruin it. Instead, you must use dry extraction methods that lift the particles without creating a damp breeding ground. This is the exact strategy I perfected after a terrible week of morning allergy attacks, and the relief was almost instant.
The Three-Step Deep Clean Protocol
Before you start, strip your bed completely and throw your sheets, mattress protector, and pillowcases into the washing machine on the hottest cycle permitted by the fabric care label. High heat is your primary weapon for killing active mites on bedding. While the machine does the heavy lifting, you can focus on the mattress itself using a dry-dehydration method.
Dehydrate the Fabric First
Moisture is the lifeblood of dust mites. To dry them out at the microscopic level, you need a powerful desiccating agent. Sift a generous, even layer of baking soda over the entire surface of your mattress. I like to add three drops of organic lavender or eucalyptus essential oil to the baking soda beforehand, mixing it thoroughly in a jar to prevent clumping. Let this mixture sit on the mattress for at least two hours. During this time, the baking soda acts like a thousands of tiny sponges, drawing out bodily oils and deep moisture from the top layers of the padding. I remember the first time I tried this; my bedroom smelled clean for days, and the fabric felt noticeably crisper under my fingers.
Extract the Debris with Targeted Suction
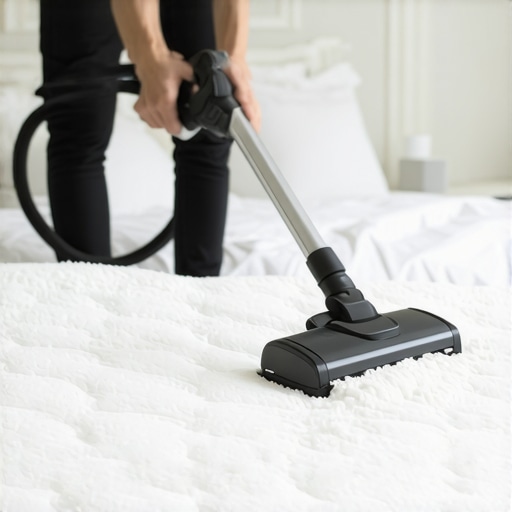
Once the baking soda has done its job, it is time to vacuum. This is where most people fail because they use the wrong attachment. Do not use a rolling brush head that has rolled across your dirty floors. Instead, use a clean upholstery attachment with high suction. Press the nozzle firmly against the mattress, moving in slow, overlapping grids. You must move slowly—about three inches per second—to allow the vacuum’s airflow to pull the micro-particles through the dense weave of the ticking. If you feel your machine losing power, you might need to check the filter, as fine baking soda can quickly clog older models. Learn why your vacuum isn’t picking up dirt like it used to if you notice a drop in performance.
Sanitize the Surface Safely
With the bulk of the dust mites and skin cells removed, you want to apply a light sanitizing layer to prevent them from coming back quickly. Lightly mist the mattress with a solution of equal parts isopropyl alcohol and distilled water. Do not soak the fabric. A fine mist is all you need because alcohol evaporates rapidly, killing surface bacteria without leaving deep dampness behind. This dry sanitizing approach is a staple of professional maintenance and is highly effective for keeping sleeping environments healthy. It is very similar to how you would execute effective sanitizing methods for a germ-free home, ensuring that you target the biology of the pest rather than just spraying perfume over the problem.
Now that we have established the basic physical removal protocol, let’s dig deeper into the actual chemical and biological dynamics at play. When it comes to effective sanitizing methods for a germ-free home, there is a massive difference between making something smell clean and actually neutralizing micro-invaders. Most people assume that if a mattress smells like lavender, the job is done. In reality, you might have just masked a thriving ecosystem. If we want to truly maintain a healthy sleep environment, we have to look past the surface-level marketing of commercial sprays and understand the science of textile care.
The Great Moisture Trap Everyone Falls Into
The single biggest mistake I see amateur cleaners make is over-saturating the mattress fabric with liquid disinfectants or steam. Everyone says a steam cleaner is the ultimate sanitizing weapon, but in my experience, bringing high-temperature moisture into a thick, multi-layered memory foam mattress is a recipe for disaster. While heat does kill dust mites, the dense foam layers trap that steam moisture deep inside. This creates a humid, dark cave that actually accelerates the growth of mold spores and new dust mite colonies within forty-eight hours.
Instead of relying on heavy wet methods, professional restorers use dry vapor or low-moisture sanitizing compounds. If you do use a liquid mist, it must contain a high percentage of rapidly evaporating solvents, like isopropyl alcohol, which sanitize the fibers and flash off into the air before sinking into the core padding. Have you ever fallen into this trap and ended up with a musty-smelling mattress? Let me know in the comments below!
Why Do Fabric Softeners and Chemical Sprays Make Dust Mite Allergies Worse?
It sounds completely counterintuitive, but spraying your bed with commercial fabric refreshers or using heavy fabric softeners on your mattress protector actually makes your allergy symptoms worse. According to research published by the National Institutes of Health (NCBI), the synthetic chemical residues left behind by these products coat the fabric fibers, trapping organic debris like skin cells and dust mite feces instead of letting them be vacuumed away. This sticky coating acts like a magnet for micro-particles, making future vacuuming sessions highly ineffective.
Furthermore, these chemical coatings break down the natural breathability of mattress ticking. This trapped humidity is the exact environmental trigger that allows microscopic pests to thrive. For genuine ultimate upholstery care for lasting freshness, you should always aim to leave the textile fibers completely free of sticky chemical residues. Stick to simple, high-evaporating sanitizers and dry desiccating agents like baking soda, which can be entirely removed from the weave. When you keep the fibers clean and residue-free, you allow the mattress to breathe, naturally keeping the environment inhospitable to pests.
Once you understand the science of textile biology, the focus shifts naturally from frantic emergency cleaning to effortless, long-term preservation. You cannot expect a one-time clean to protect you forever. I managed to break my cycle of midnight sneezing fits only when I committed to a structured, low-effort maintenance plan that starves these pests before they can start a colony.
How Do I Maintain a Dust Mite Free Mattress Over Time?
The secret to keeping your bed pristine lies in environmental control and having the right tools on hand. First, invest in a fully zippered, laboratory-tested mattress enclosure rather than a simple fitted protector. A high-quality enclosure acts as a physical barrier that permanently seals existing microscopic allergens inside while preventing new ones from nesting in the deep layers of foam. I personally wash my zippered protector every three weeks on a high-temperature sanitizing cycle, ensuring that the bed remains completely inhospitable to pests. This simple strategy is just as critical for maintaining clean textiles as following the the upholstery care secret for keeping your sofa looking new.
Second, we must discuss the extraction equipment. Standard household vacuums often lack the specialized filtration needed to trap microscopic proteins, which is often why your vacuum isn’t picking up dirt like it used to and instead just blows allergens back into your bedroom air. I strictly use a vacuum equipped with a certified HEPA filter and an integrated UV-C light attachment. This specialized hand tool is my secret weapon; the ultraviolet light damages the DNA of microscopic pests, while the high-power suction pulls them cleanly from the fibers. It is a highly effective combination that forms the backbone of a successful daily house cleaning routine to maintain perfection.
Looking ahead, I predict we will see a major shift toward smart bedroom textiles. Manufacturers are already beginning to experiment with self-sanitizing mattress fabrics woven with active silver-ion threads, which naturally disrupt bacterial and microscopic life cycles without the use of chemical sprays. Until those become standard, my challenge to you tonight is to implement just one advanced tip from this guide: strip your bed, apply a dry baking soda dehydration layer, and let it sit for two hours before performing a slow, targeted vacuum extraction. You will be amazed at how much deeper you sleep when your air is truly clear.
My turning point arrived when I finally decided to stop treating my mattress like an ordinary piece of furniture. It isn’t a couch cushion or a rug; it is a giant sponge that absorbs humidity and skin oils every single night. To get these microscopic invaders out, you have to use a scientific approach: dehydrate, neutralize, and extract. Think of your mattress as a delicate wool coat. If you drench it in water, you will ruin it. Instead, you must use dry extraction methods that lift the particles without creating a damp breeding ground. This is the exact strategy I perfected after a terrible week of morning allergy attacks, and the relief was almost instant.
The Three-Step Deep Clean Protocol
Before you start, strip your bed completely and throw your sheets, mattress protector, and pillowcases into the washing machine on the hottest cycle permitted by the fabric care label. High heat is your primary weapon for killing active mites on bedding. While the machine does the heavy lifting, you can focus on the mattress itself using a dry-dehydration method.
Dehydrate the Fabric First
Moisture is the lifeblood of dust mites. To dry them out at the microscopic level, you need a powerful desiccating agent. Sift a generous, even layer of baking soda over the entire surface of your mattress. I like to add three drops of organic lavender or eucalyptus essential oil to the baking soda beforehand, mixing it thoroughly in a jar to prevent clumping. Let this mixture sit on the mattress for at least two hours. During this time, the baking soda acts like a thousands of tiny sponges, drawing out bodily oils and deep moisture from the top layers of the padding. I remember the first time I tried this; my bedroom smelled clean for days, and the fabric felt noticeably crisper under my fingers.
Extract the Debris with Targeted Suction
Once the baking soda has done its job, it is time to vacuum. This is where most people fail because they use the wrong attachment. Do not use a rolling brush head that has rolled across your dirty floors. Instead, use a clean upholstery attachment with high suction. Press the nozzle firmly against the mattress, moving in slow, overlapping grids. You must move slowly—about three inches per second—to allow the vacuum’s airflow to pull the micro-particles through the dense weave of the ticking. If you feel your machine losing power, you might need to check the filter, as fine baking soda can quickly clog older models. Learn why your vacuum isn’t picking up dirt like it used to if you notice a drop in performance.
Sanitize the Surface Safely
With the bulk of the dust mites and skin cells removed, you want to apply a light sanitizing layer to prevent them from coming back quickly. Lightly mist the mattress with a solution of equal parts isopropyl alcohol and distilled water. Do not soak the fabric. A fine mist is all you need because alcohol evaporates rapidly, killing surface bacteria without leaving deep dampness behind. This dry sanitizing approach is a staple of professional maintenance and is highly effective for keeping sleeping environments healthy. It is very similar to how you would execute effective sanitizing methods for a germ-free home, ensuring that you target the biology of the pest rather than just spraying perfume over the problem.
Now that we have established the basic physical removal protocol, let’s dig deeper into the actual chemical and biological dynamics at play. When it comes to effective sanitizing methods for a germ-free home, there is a massive difference between making something smell clean and actually neutralizing micro-invaders. Most people assume that if a mattress smells like lavender, the job is done. In reality, you might have just masked a thriving ecosystem. If we want to truly maintain a healthy sleep environment, we have to look past the surface-level marketing of commercial sprays and understand the science of textile care.
The Great Moisture Trap Everyone Falls Into
The single biggest mistake I see amateur cleaners make is over-saturating the mattress fabric with liquid disinfectants or steam. Everyone says a steam cleaner is the ultimate sanitizing weapon, but in my experience, bringing high-temperature moisture into a thick, multi-layered memory foam mattress is a recipe for disaster. While heat does kill dust mites, the dense foam layers trap that steam moisture deep inside. This creates a humid, dark cave that actually accelerates the growth of mold spores and new dust mite colonies within forty-eight hours.
Instead of relying on heavy wet methods, professional restorers use dry vapor or low-moisture sanitizing compounds. If you do use a liquid mist, it must contain a high percentage of rapidly evaporating solvents, like isopropyl alcohol, which sanitize the fibers and flash off into the air before sinking into the core padding. Have you ever fallen into this trap and ended up with a musty-smelling mattress? Let me know in the comments below!
Why Do Fabric Softeners and Chemical Sprays Make Dust Mite Allergies Worse?
It sounds completely counterintuitive, but spraying your bed with commercial fabric refreshers or using heavy fabric softeners on your mattress protector actually makes your allergy symptoms worse. According to research published by the National Institutes of Health (NCBI), the synthetic chemical residues left behind by these products coat the fabric fibers, trapping organic debris like skin cells and dust mite feces instead of letting them be vacuumed away. This sticky coating acts like a magnet for micro-particles, making future vacuuming sessions highly ineffective.
Furthermore, these chemical coatings break down the natural breathability of mattress ticking. This trapped humidity is the exact environmental trigger that allows microscopic pests to thrive. For genuine ultimate upholstery care for lasting freshness, you should always aim to leave the textile fibers completely free of sticky chemical residues. Stick to simple, high-evaporating sanitizers and dry desiccating agents like baking soda, which can be entirely removed from the weave. When you keep the fibers clean and residue-free, you allow the mattress to breathe, naturally keeping the environment inhospitable to pests.
Once you understand the science of textile biology, the focus shifts naturally from frantic emergency cleaning to effortless, long-term preservation. You cannot expect a one-time clean to protect you forever. I managed to break my cycle of midnight sneezing fits only when I committed to a structured, low-effort maintenance plan that starves these pests before they can start a colony.
How Do I Maintain a Dust Mite Free Mattress Over Time?
The secret to keeping your bed pristine lies in environmental control and having the right tools on hand. First, invest in a fully zippered, laboratory-tested mattress enclosure rather than a simple fitted protector. A high-quality enclosure acts as a physical barrier that permanently seals existing microscopic allergens inside while preventing new ones from nesting in the deep layers of foam. I personally wash my zippered protector every three weeks on a high-temperature sanitizing cycle, ensuring that the bed remains completely inhospitable to pests. This simple strategy is just as critical for maintaining clean textiles as following the the upholstery care secret for keeping your sofa looking new.
Second, we must discuss the extraction equipment. Standard household vacuums often lack the specialized filtration needed to trap microscopic proteins, which is often why your vacuum isn’t picking up dirt like it used to and instead just blows allergens back into your bedroom air. I strictly use a vacuum equipped with a certified HEPA filter and an integrated UV-C light attachment. This specialized hand tool is my secret weapon; the ultraviolet light damages the DNA of microscopic pests, while the high-power suction pulls them cleanly from the fibers. It is a highly effective combination that forms the backbone of a successful daily house cleaning routine to maintain perfection.
Looking ahead, I predict we will see a major shift toward smart bedroom textiles. Manufacturers are already beginning to experiment with self-sanitizing mattress fabrics woven with active silver-ion threads, which naturally disrupt bacterial and microscopic life cycles without the use of chemical sprays. Until those become standard, my challenge to you tonight is to implement just one advanced tip from this guide: strip your bed, apply a dry baking soda dehydration layer, and let it sit for two hours before performing a slow, targeted vacuum extraction. You will be amazed at how much deeper you sleep when your air is truly clear.
The Hardest Lessons I Learned About Restoring Sleep Sanctuary Fabrics
When I first started tackling bedroom hygiene, I made my fair share of errors that actually made my allergies worse. Here are the core realizations that shifted my approach from generic cleaning to scientific mattress care:
- Scent does not equal clean: Dousing a bed in lavender fabric spray only masks odors while providing the liquid moisture that dust mites need to multiply.
- Friction is your enemy: Scrubbing mattress ticking aggressively with a wet brush ruins the delicate woven barrier, making it easier for skin flakes to fall deep inside the inner core.
- Airflow is more important than raw power: If your vacuum has poor filtration, you are simply lifting the micro-allergens from the mattress and blasting them directly into the air you breathe. Always use a sealed HEPA system.
My Essential Toolkit for Textile Preservation
To maintain a clean sleeping environment without using toxic commercial chemicals, I strictly rely on a handful of trusted tools and resources:
- A Certified True HEPA Vacuum: Specifically with an upholstery hand tool. I trust this to capture 99.97% of microscopic particles down to 0.3 microns, ensuring the allergens are actually removed from the room.
- Pure Isopropyl Alcohol (70%): I keep this on hand because it acts as an incredibly fast-evaporating sanitizer. It does its job and disappears before sinking into memory foam layers.
- Laboratory-Tested Zippered Encasements: A solid physical barrier is worth more than fifty deep cleanings. Look for options certified to block dust mite allergens.
- The American Lung Association Guidelines: I regularly check their educational resources to stay updated on the latest scientific research regarding indoor air quality and allergen mitigation.
Step Into a Cleaner Sleep Era Today
Taking control of your indoor air quality does not require expensive gear or exhausting daily chores. By committing to dry sanitizing methods, keeping moisture far away from your bed, and establishing a regular extraction routine, you can turn your bedroom back into a true sanctuary. Reclaiming your bed through a disciplined daily house cleaning routine to maintain perfection is one of the most rewarding upgrades you can make for your overall well-being. Have you ever struggled with chronic morning congestion or tried a mattress cleaning method that failed? Let me know in the comments below!