
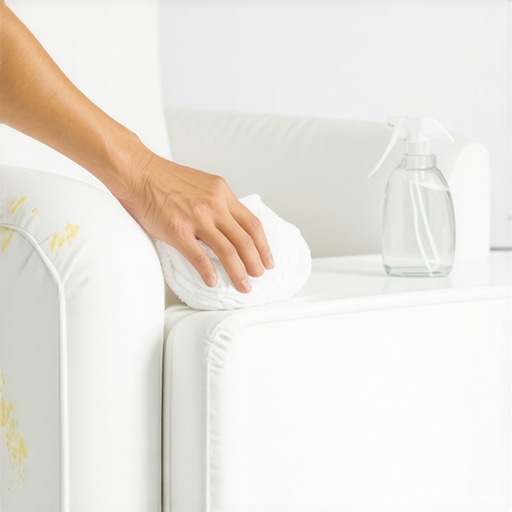
I still remember the sinking feeling in my stomach when I moved my reading lamp and saw it: a dingy, yellowish ring right on the headrest of my pristine white linen chair. It wasn’t spilled coffee or a muddy paw print. It was worse. It was the slow, cumulative result of a hundred humid afternoons and my own stubborn refusal to turn on the AC. My beautiful ‘cloud chair’ suddenly looked like it belonged in a frat house basement. I spent the next hour frantically Googling, and honestly, I nearly ruined the thing by reaching for the wrong chemicals. We’ve all been there, right? You try to keep a ‘clean’ house, but life literally leaves its mark on the furniture. Today, I’m going to share exactly how I saved that chair—and how you can do the same without losing your mind or your security deposit.
Stop Blaming Your Laundry Detergent for the Yellowing
It’s easy to think you just aren’t cleaning enough, but the chemistry of perspiration is a beast. When sweat reacts with the fibers of your upholstery, it’s not just water; it’s salts, oils, and proteins that bond to the fabric. If you’ve been following my ultimate upholstery care guide for lasting freshness, you know that timing is everything. I made the classic rookie mistake of letting the stain sit for an entire season, thinking it was just ‘shadows.’ By the time I addressed it, the proteins had oxidized. This is why standard soap often fails—you need to break down the organic matter.
Is This Actually Worth the DIY Effort?
Many people worry that they’ll just make the ‘tide mark’ larger or cause the fabric to pucker. I’ve seen it happen. I once used too much water and a blowdryer, which is exactly why you should never use hairdryers on wet fabric spills; it just ‘sets’ the stain and shrinks the weave. But if you follow a methodical approach using these upholstery cleaning tips for a fresh home revival, you can absolutely restore that crisp, white look. According to the American Cleaning Institute, protein-based stains like those from skin contact require an enzymatic cleaner or a specific pH-balanced solution to truly disappear rather than just fading. Have you ever looked at your furniture in the direct sunlight and realized it’s a totally different color than when you bought it? If you’re nodding your head, stick with me, because we’re about to get those whites bright again.
Start With a Bone-Dry Surface
The biggest mistake most people make is grabbing a wet rag the second they see a stain. Before you introduce any moisture, you need to remove the loose debris that’s just waiting to turn into mud. Think of it like this: you wouldn’t mop a floor before sweeping it, right? Use a high-quality upholstery attachment to get into the crevices. However, be careful with your equipment; I’ve found that why your vacuum cleaner is actually making your house dustier is often due to a neglected HEPA filter that just blows fine particles back onto your clean white linen.
Vacuum Away the Invisible Abrasives First
Spend at least five minutes just vacuuming the affected area. You are trying to pull out the dried skin cells and dust that have settled into the weave. If you skip this, the liquid cleaner will grab that dust and pull it deeper into the padding, creating a permanent greyish hue that is much harder to fix than a simple yellow sweat ring.
Whip Up a Solution That Targets Body Oils
Since sweat is a cocktail of lipids and minerals, a generic ‘all-purpose’ spray won’t cut it. You need something that emulsifies oil. I personally swear by a mixture of lukewarm water, a drop of clear (not blue!) dish soap, and a pinch of salt. This mimics the logic of how to remove yellow sweat stains from your mattress naturally, where the salt helps draw the moisture out of the fibers while the soap breaks the surface tension of the oils.
Test Your Fabric Code Before Proceeding
Before you go all in, check the tag for a ‘W’, ‘S’, or ‘WS’ code. If you see an ‘S’, stop immediately. You need to know how to treat s-coded upholstery fabric without ruining it using solvent-based cleaners rather than water. For my white linen chair, it was a ‘W’, so I was safe to proceed with my DIY mix. I remember the first time I tried this on a vintage thrift store find—I was so nervous I’d turn the whole thing orange with too much lemon juice, but the key is the dilution.
The Blotting Dance to Prevent Water Rings
This is where the magic (or the tragedy) happens. Never, ever scrub. Scrubbing frayed the delicate fibers of my favorite ottoman once, and it never looked ‘crisp’ again. Instead, use a white microfiber cloth—colored ones can bleed dye onto your white chair, which is a whole new nightmare. Dip the cloth, wring it until it’s barely damp, and press it firmly into the stain.
Lift the Stain from the Outside In
Work from the outer edges of the yellow ring toward the center. This prevents the ‘tide mark’ from spreading outward. I used this exact method during a stressful move-out clean checklist to simplify your transition, and it saved me from losing a $300 furniture deposit. You aren’t trying to soak the chair; you are trying to transfer the yellow proteins from the chair to the cloth. Keep switching to a clean section of the rag as you see the yellow transfer over.
Dry the Fabric Without Creating New Problems
Once the stain is gone, you’re left with a damp patch. This is the danger zone. If it dries too slowly, mold can form; if it dries too fast with heat, the fabric can shrink. If you’ve been using sanitizing secrets for a safer house in 2025, you know that airflow is your best friend.
Use a Fan Instead of a Hairdryer
Set up a small desk fan pointed directly at the spot. Avoid the temptation to use a blowdryer, as the heat can ‘cook’ any remaining microscopic proteins into the fabric, making them permanent. I once tried to rush the process on a suede-effect cushion and ended up with a stiff, crunchy texture that took hours of brushing to fix. Just let the air do the work while you move on to other tasks, like implementing a daily house cleaning routine to maintain perfection throughout the rest of your home.I still remember the sinking feeling in my stomach when I moved my reading lamp and saw it: a dingy, yellowish ring right on the headrest of my pristine white linen chair. It wasn’t spilled coffee or a muddy paw print. It was worse. It was the slow, cumulative result of a hundred humid afternoons and my own stubborn refusal to turn on the AC. My beautiful ‘cloud chair’ suddenly looked like it belonged in a frat house basement. I spent the next hour frantically Googling, and honestly, I nearly ruined the thing by reaching for the wrong chemicals. We’ve all been there, right? You try to keep a ‘clean’ house, but life literally leaves its mark on the furniture. Today, I’m going to share exactly how I saved that chair—and how you can do the same without losing your mind or your security deposit.
Stop Blaming Your Laundry Detergent for the Yellowing
It’s easy to think you just aren’t cleaning enough, but the chemistry of perspiration is a beast. When sweat reacts with the fibers of your upholstery, it’s not just water; it’s salts, oils, and proteins that bond to the fabric. If you’ve been following my ultimate upholstery care guide for lasting freshness, you know that timing is everything. I made the classic rookie mistake of letting the stain sit for an entire season, thinking it was just ‘shadows.’ By the time I addressed it, the proteins had oxidized. This is why standard soap often fails—you need to break down the organic matter.
Is This Actually Worth the DIY Effort?
Many people worry that they’ll just make the ‘tide mark’ larger or cause the fabric to pucker. I’ve seen it happen. I once used too much water and a blowdryer, which is exactly why you should never use hairdryers on wet fabric spills; it just ‘sets’ the stain and shrinks the weave. But if you follow a methodical approach using these upholstery cleaning tips for a fresh home revival, you can absolutely restore that crisp, white look. According to the American Cleaning Institute, protein-based stains like those from skin contact require an enzymatic cleaner or a specific pH-balanced solution to truly disappear rather than just fading. Have you ever looked at your furniture in the direct sunlight and realized it’s a totally different color than when you bought it? If you’re nodding your head, stick with me, because we’re about to get those whites bright again.
Start With a Bone-Dry Surface
The biggest mistake most people make is grabbing a wet rag the second they see a stain. Before you introduce any moisture, you need to remove the loose debris that’s just waiting to turn into mud. Think of it like this: you wouldn’t mop a floor before sweeping it, right? Use a high-quality upholstery attachment to get into the crevices. However, be careful with your equipment; I’ve found that why your vacuum cleaner is actually making your house dustier is often due to a neglected HEPA filter that just blows fine particles back onto your clean white linen.
Vacuum Away the Invisible Abrasives First
Spend at least five minutes just vacuuming the affected area. You are trying to pull out the dried skin cells and dust that have settled into the weave. If you skip this, the liquid cleaner will grab that dust and pull it deeper into the padding, creating a permanent greyish hue that is much harder to fix than a simple yellow sweat ring.
Whip Up a Solution That Targets Body Oils
Since sweat is a cocktail of lipids and minerals, a generic ‘all-purpose’ spray won’t cut it. You need something that emulsifies oil. I personally swear by a mixture of lukewarm water, a drop of clear (not blue!) dish soap, and a pinch of salt. This mimics the logic of how to remove yellow sweat stains from your mattress naturally, where the salt helps draw the moisture out of the fibers while the soap breaks the surface tension of the oils.
Test Your Fabric Code Before Proceeding
Before you go all in, check the tag for a ‘W’, ‘S’, or ‘WS’ code. If you see an ‘S’, stop immediately. You need to know how to treat s-coded upholstery fabric without ruining it using solvent-based cleaners rather than water. For my white linen chair, it was a ‘W’, so I was safe to proceed with my DIY mix. I remember the first time I tried this on a vintage thrift store find—I was so nervous I’d turn the whole thing orange with too much lemon juice, but the key is the dilution. #IMAGE_PLACE_HOLDER_B#
The Blotting Dance to Prevent Water Rings
This is where the magic (or the tragedy) happens. Never, ever scrub. Scrubbing frayed the delicate fibers of my favorite ottoman once, and it never looked ‘crisp’ again. Instead, use a white microfiber cloth—colored ones can bleed dye onto your white chair, which is a whole new nightmare. Dip the cloth, wring it until it’s barely damp, and press it firmly into the stain.
Lift the Stain from the Outside In
Work from the outer edges of the yellow ring toward the center. This prevents the ‘tide mark’ from spreading outward. I used this exact method during a stressful move-out clean checklist to simplify your transition, and it saved me from losing a $300 furniture deposit. You aren’t trying to soak the chair; you are trying to transfer the yellow proteins from the chair to the cloth. Keep switching to a clean section of the rag as you see the yellow transfer over.
Dry the Fabric Without Creating New Problems
Once the stain is gone, you’re left with a damp patch. This is the danger zone. If it dries too slowly, mold can form; if it dries too fast with heat, the fabric can shrink. If you’ve been using sanitizing secrets for a safer house in 2025, you know that airflow is your best friend.
Use a Fan Instead of a Hairdryer
Set up a small desk fan pointed directly at the spot. Avoid the temptation to use a blowdryer, as the heat can ‘cook’ any remaining microscopic proteins into the fabric, making them permanent. I once tried to rush the process on a suede-effect cushion and ended up with a stiff, crunchy texture that took hours of brushing to fix. Just let the air do the work while you move on to other tasks, like implementing a daily house cleaning routine to maintain perfection throughout the rest of your home.
Why Heat Is Often the Enemy of a Truly Clean Couch
A common misconception I see all the time is the boil it to clean it mentality. If it is good for a baby bottle, it must be good for a couch, right? Wrong. According to the Institute of Inspection Cleaning and Restoration Certification (IICRC), excessive heat on organic stains like sweat can permanently alter the molecular structure of the protein, essentially cooking it into the fiber. This is why I often tell people that while is steam cleaning enough to kill bacteria on high-touch surfaces, it might actually be the reason your yellow sweat stains never come out. You need a cold-start approach for biological stains. If you are prepping for a transition, you should look into sanitizing secrets for a safer house in 2025 that prioritize chemical action over thermal destruction.
The Hidden Risk of Pantry-Style DIY Solutions
The oops factor often comes from what we think is the safest place: the kitchen cabinet. I have seen more upholstery ruined by well-intentioned green hacks than by actual dirt. One major trap is wicking. Have you ever noticed how a stain looks gone while wet, only to reappear like a ghost three days later? That is wicking. It happens when the padding underneath is still wet, and as the moisture evaporates, it pulls deep-set soil back to the surface. Using effective house cleaning secrets from cleaning experts means knowing that saturation is your enemy.
How Do You Balance Deep Sanitization and Fabric Safety?
The nuance lies in dwell time, not volume. Most people spray and immediately wipe. To actually sanitize, the surface needs to stay damp for a specific dwell time (usually 3 to 10 minutes depending on the product) without soaking the underlying foam. I learned this the hard way while perfecting my move-out cleaning hacks to ensure your deposit refund. If you soak the foam, you are trading a surface stain for a deep-seated mold problem. Furthermore, be wary of the natural label. For instance, the truth about castile soap and its cleaning power is that on synthetic blends, it can leave a gummy residue that attracts dust like a magnet.
Avoid the Deadly Chemistry Combo
Honestly, the DIY movement has led to some dangerous habits. I have heard of people mixing cleaning agents to create a super-solution. Never do this. I wrote a detailed warning about the danger of mixing bleach and vinegar in small bathrooms because the resulting chlorine gas is toxic. Expert cleaning is about chemistry, not just elbow grease. If you’re moving and want to ensure the next tenant isn’t walking into a chemical cloud, use targeted solutions rather than cocktails. Have you ever fallen into this more is better trap with cleaning products? Let me know in the comments below, I would love to hear your horror stories—we have all got them!
Invest in a Real Horsehair Brush Instead of a Plastic One
The secret weapon in my utility closet isn’t a $500 steamer; it is a humble horsehair brush. I personally use this because the natural proteins in the hair are softer than synthetic nylon, meaning I can groom my white linen without fraying the delicate weave. If you use a standard plastic-bristled brush, you are essentially micro-shredding the fabric every time you scrub. To keep your home looking its best, these upholstery cleaning tips for a fresh home revival suggest that mechanical action—the way you move the brush—is just as important as the chemical you use. I always brush in a single direction to align the fibers, which helps the light reflect evenly and hides those tiny imperfections that usually scream ‘dirty chair.’
How do I maintain my upholstery over the long run?
Consistency is the only thing standing between a beautiful home and a cluttered mess. I’ve integrated my furniture care into my daily house cleaning routine to maintain perfection. Every Sunday, I don’t just vacuum the floors; I do a ‘light mist’ of distilled water and a micro-fiber blot on the armrests. This prevents the cumulative buildup of skin oils before they have a chance to oxidize into those dreaded yellow rings. If you wait until you see the stain, you’ve already waited too long. Maintenance is about microscopic management.
The Truth About Why Fabric Protectors Often Fail
I used to think a quick spray of a store-bought protector made my sofa invincible. It doesn’t. In fact, why most fabric protectors don’t work on cheap upholstery often comes down to the surfactant load in the fabric’s factory finish. If the protector can’t bond to the fiber, it just sits on top and rubs off on your clothes within a week. For high-end linen, the AATCC (American Association of Textile Chemists and Colorists) Test Method 130 suggests that ‘soil release’ is only effective if the treatment is applied to a perfectly neutral pH surface. This means if you have leftover soap residue in your chair, the protector will actually trap the dirt rather than repel it.
Scale Your Cleaning Strategy for a Stress-Free Move
When you move from cleaning a single chair to prepping an entire house for an inspection, you need to think like a professional. I recommend using effective sanitizing methods for a germ-free home that focus on high-touch zones first. My prediction for the future of home care is a shift toward ‘bio-reactive’ surfaces—fabrics infused with silver or copper that naturally kill bacteria without the need for harsh sprays. Until then, we rely on smart habits. If you are in the middle of a transition, implementing sanitizing hacks for safe house transitions will ensure you don’t carry the previous tenant’s allergens into your new space. I challenge you to try this today: take a soft-bristled brush to one cushion you haven’t touched in months. You’ll be shocked at how much ‘invisible’ dust is actually dulling your furniture’s shine.
The Reality of What Finally Saved My White Linen
After years of trial and error, I realized that the biggest barrier to a clean home isn’t the lack of expensive machines, but the misunderstanding of fabric chemistry. First, I stopped treating all stains the same; body oils are unique and require emulsifiers, not just soap. Second, I learned that the ‘W’ on a cleaning tag is your permission slip for moisture, but it isn’t a license to soak. Finally, I discovered that the most effective tool isn’t a chemical at all—it’s air. By using a fan instead of heat, I avoided the dreaded ‘protein-set’ that turns yellow rings into permanent scars. If you’re currently in the middle of a transition, these move-out cleaning strategies to secure your deposit can help you apply these principles to your entire living space.
Tools I Use to Keep My Upholstery Looking New
I don’t believe in hoarding every cleaning gadget on the market. Instead, I rely on a small, curated toolkit that ensures my fabrics stay intact while the dirt disappears. I always keep a bottle of distilled water handy to avoid the mineral deposits that tap water can leave behind. I also swear by high-gsm white microfiber cloths because they are the only things soft enough to blot linen without causing pilling. If you want a deep dive into the specifics, check out my ultimate upholstery care guide for lasting freshness. For those aiming for medical-grade cleanliness, integrating effective sanitizing methods for a germ-free home into your weekly chores is a game-changer. These tools don’t just clean; they preserve the lifespan of your investment pieces.
#IMAGE_PLACEHOLDER_E#
Give Your Furniture a Second Life Today
There is a profound sense of peace that comes from sitting down in a room that feels truly refreshed. You don’t need a huge budget or a professional crew to achieve that ‘cloud chair’ look—you just need the right sequence of steps and a bit of patience. By implementing a daily house cleaning routine to maintain perfection, you can catch those minor oils before they become major problems. Don’t let a few yellow spots discourage you from loving your white furniture. You have the knowledge now; all that’s left is to grab your brush and start. Have you ever managed to save a piece of furniture you thought was a goner? Let me know your success stories in the comments below!