
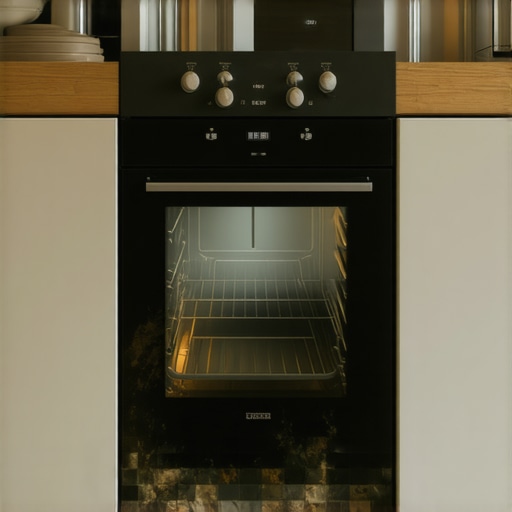
I still remember the sound of my landlord’s heavy boots echoing in my empty studio apartment. I was confident. I had spent all night scrubbing baseboards and polishing the sink. But then, he grabbed the handle of the stove and gave it a firm, practiced tug. My stomach dropped. As the appliance slid forward, it revealed a sticky, dark abyss of ancient crumbs, petrified vegetable peels, and a layer of grease that had essentially become a permanent part of the linoleum floor. That five-second reveal cost me exactly $180 of my deposit. It was a visceral lesson in the one area most of us neglect. We think if we can’t see it, the landlord won’t either. We are wrong. Today, I am going to show you how to tackle this grime-fest so you can walk away with every penny of your refund.
That Hidden Grease Trap Behind Your Stove
It is a mistake we all make during a move-out clean. We scrub the countertops until they shine and we even tackle the upholstery in the living room, but we ignore the gaps. The problem is that kitchen grease is airborne. When you cook, microscopic oil droplets float, settle, and act like a magnet for every bit of dust and pet hair that drifts into the kitchen. Over a year-long lease, this creates a thick, fuzzy sludge that is incredibly hard to remove with a simple mop. If you are preparing for a transition, you need solid move-out cleaning strategies to secure your deposit before the final walkthrough.
Is Cleaning Behind the Oven Really Worth the Effort?
You might think a few hidden crumbs shouldn’t matter, but for a landlord, that space is a primary indicator of how well you cared for the property. Plus, it is a genuine safety issue. According to the National Fire Protection Association (NFPA), accumulated grease is a leading cause of kitchen fires, which is why inspectors are so remarkably strict about it. I learned the hard way that ignoring these hidden dust traps renters forget is the fastest way to trigger a cleaning fee. Have you ever pulled back your stove and gasped at what was lurking there? Early in my renting days, I tried to ‘sweep’ the gap with a yardstick and a wet rag, thinking I was clever. All I did was shove the grime further into the corner, making it ten times harder to remove. To truly pass an inspection, you have to move the big stuff and use the right degreaser. It is about working smarter, not harder, to ensure you get your full security deposit back. Let’s get into the step-by-step process of de-gunking that floor without scratching the tiles.
Move the Beast Without Ruining the Floor
Before you can even think about scrubbing, you have to get the appliance out of its cubby. Think of this like a surgical extraction. If you just yank it, you risk tearing the linoleum or scratching the hardwood, which is an even faster way to lose your deposit than leaving a few crumbs. I remember a rental in South Ogden where I rushed this process and left a deep, jagged gouge in the vinyl flooring. It was a $200 mistake that could have been avoided with five minutes of preparation. This is one of those essential move-out cleaning hacks ensure your deposit refund because it prevents structural damage.
The Cardboard Trick for Heavy Appliances
The secret to moving a heavy stove is to reduce friction. I always keep a few flattened cardboard boxes or some heavy-duty felt sliders in my cleaning kit. Lift the front of the stove slightly—just enough to slide the cardboard under the front feet—and then do the same for the back if you can reach. If the stove is truly stuck, a little bit of glass cleaner sprayed on the floor in front of the feet can act as a temporary lubricant to help it glide. Once you have it moving, pull it out slowly and straight. Avoid twisting it, which is how most floor damage happens. 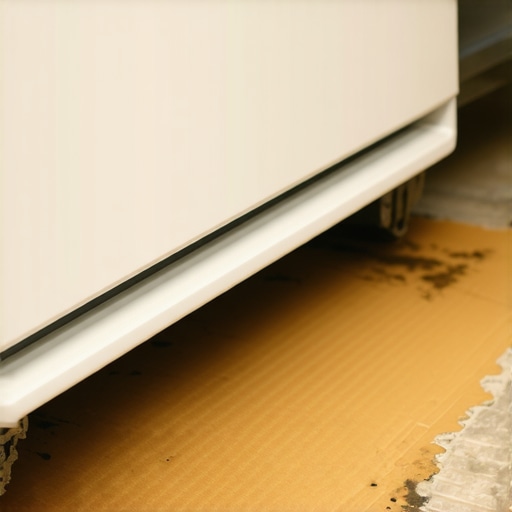
Melt the Sludge with Heavy-Duty Degreasing
Once the stove is out, you are going to see a literal history of your meals. This isn’t just dust; it is a polymer of oil and debris. To tackle it, you need to understand that kitchen grease is like a stubborn stain on a delicate fabric; you can’t just scrub it away with water. You need a chemical reaction. Much like the dish soap trick for spot cleaning grease stains on upholstery, using a high-quality grease-cutting agent is non-negotiable here. I usually start by vacuuming up the loose ‘petrified’ bits so I’m not just moving mud around.
Dissolve the Sticky Film on Every Surface
Spray the floor and the sides of the cabinets with a powerful degreaser. If you want to avoid harsh chemicals, a concentrated mix of white vinegar, dawn dish soap, and very hot water can work, but for the thickest sludge, you might need something stronger. Let it sit for at least ten minutes. This is the ‘working smarter’ part of effective house cleaning secrets from cleaning experts. While the chemicals are breaking down the bonds of the oil, you can focus on the sides of the stove itself. Use a plastic scraper to gently lift the thickest layers of gunk before wiping with a microfiber cloth. You should use similar techniques to how to get grease off kitchen cabinets without removing the finish to ensure you don’t strip any paint from the adjacent cabinetry.
Clean the Walls and Baseboards Properly
Don’t stop at the floor. The walls behind the stove are often coated in a fine mist of yellow oil that catches every piece of floating lint. This is why you should always dust your walls before a move-out clean, as it prevents that dust from turning into a muddy mess when it hits the degreaser. Scrub the baseboards using a long-handled brush if you want to save your back; it is truly the only way to clean your baseboards without bending over for an hour. Once the wall and floor are sparkling, do a final pass with a damp cloth to remove any chemical residue. If the surface feels even slightly tacky, the grease isn’t gone yet. Repeat the soak-and-wipe process until the surface is smooth to the touch. This level of detail is what separates a ‘good enough’ clean from a ‘deposit-guaranteed’ clean.Let’s dig deeper into what it actually means to leave a property in ‘pristine’ condition. Most people assume that if a room smells like bleach or lemons, it is a job well done. In reality, that ‘clean’ smell is often just a mask for underlying issues. One of the biggest mistakes I see—and I have made it myself—is the obsession with scalding hot water. We have been conditioned to think heat equals hygiene, but learning why you should stop mopping with hot water and use this instead is a conversation every renter needs to have. On certain luxury vinyl or laminate floors, excessive heat can actually break down the adhesive or warp the core, leading to damage that is far more expensive than a simple cleaning fee.
The Myth of the Squeaky Clean Surface
A common belief is that the more a surface ‘squeaks,’ the cleaner it is. However, that sound often indicates that you have stripped away protective finishes. In my experience, a slightly matte, residue-free finish is a better indicator of success. A study by the National Sanitation Foundation (NSF) found that the kitchen sponge is often the filthiest item in the home, yet people use it to ‘clean’ surfaces, effectively cross-contaminating the entire room. This is why effective sanitizing methods for a germ-free home require a fresh microfiber cloth for every zone. If you are using the same sponge for the baseboards that you used for the countertops, you are just moving bacteria into new neighborhoods.
Can You Actually Sanitize Delicate Upholstery Without Leaving Water Rings?
Most people think steam is the answer for everything, but is steam cleaning enough to kill bacteria on high-touch surfaces when it comes to delicate fabrics? Not always. If you have an ‘S-coded’ sofa, using water-based cleaners—even steam—will leave permanent rings. You need to know exactly how to treat s-coded upholstery fabric without ruining it to avoid a massive replacement bill. Have you ever fallen into this trap and ruined a piece of furniture by using the wrong cleaning agent? Let me know in the comments.
Avoid the Deadly Chemical Trap
The biggest ‘oops’ factor in a move-out clean is the mixing of chemicals in a desperate attempt to lift a stubborn stain. I have seen renters try to boost their cleaning power by mixing bleach and vinegar, which creates toxic chlorine gas. Please, check the danger of mixing bleach and vinegar in small bathrooms before you start your next deep clean. It is not just a cleaning mistake; it is a serious health hazard. 
The Nuance of Dwell Time
The nuance that separates a pro from an amateur is ‘dwell time.’ If you spray a disinfectant and immediately wipe it off, you have not sanitized anything. Most EPA-registered disinfectants require at least 3 to 10 minutes of contact time to actually kill pathogens. This is one of those sanitizing secrets for a safer house in 2025 that pros use to ensure a space is truly medical-grade clean. If you are rushing, you are just moving dirt around. Furthermore, ignoring the 7 hidden dust traps renters forget during move-out inspections can be the difference between a full refund and a $100 deduction. Focus on the dwell time and the right tools for each surface to ensure your house cleaning strategies for a sparkling home today actually work for the final walkthrough.I have spent countless hours scrubbing until my knuckles were raw, only to see the dust return three days later. It is soul-crushing. The secret to scaling your cleaning efforts is not about working more; it is about the precision of your maintenance. Most people treat a deep clean like a one-off event, but if you want to avoid that landlord-panic next time, you need a daily house cleaning routine to maintain perfection. I personally use a three-tier system: high-touch surfaces daily, floors twice a week, and the gaps like behind the stove every quarter. This prevents kitchen oil from ever turning into that petrified sludge I mentioned earlier.
How can I keep my house in move-out condition every single day?
It comes down to friction. The less friction there is between you and your tools, the more likely you are to use them. I keep my deposit-saver kit in a portable caddy under the sink—microfiber cloths, a heavy-duty degreaser, and a handheld plastic scraper. If you leave your supplies in the garage or a basement closet, you simply will not use them. For your furniture, following an ultimate upholstery care guide for lasting freshness ensures that spills never become permanent resident stains.
The Tool That Actually Makes or Breaks Your Air Quality
Your vacuum is likely your most expensive cleaning tool, and yet it is the one most people neglect until it starts screaming. I once read a technical manual from a leading manufacturer that even a 10% reduction in airflow due to a clogged filter can double the heat on the motor, leading to catastrophic failure. If you notice a metallic or burning scent, understanding why your vacuum smell might mean the motor is dying is critical before your carpet gets ruined. You are not just cleaning the floor; you are filtering the air. If you are not using a HEPA-certified machine, why your vacuum filter is actually spreading dust around your home becomes a very real problem that affects your respiratory health. 
Smart Cleaning and the Future of House Maintenance
Looking ahead, I suspect we are moving toward smart surfaces. We are already seeing hydrophobic coatings for showers and antimicrobial fabrics for sofas. These are not just gimmicks; they are the future of sanitizing hacks for safe house transitions. In five years, your floor might even tell you via an app exactly where the bacteria density is highest. Until then, you have to rely on your eyes and your nose. According to the IICRC (Institute of Inspection Cleaning and Restoration Certification) S100 standards, professional-grade cleaning is not just about appearance; it is about the removal of soils to a level that supports the health of the occupants. If you want a pro-level result, stop thinking about the shine and start thinking about the science of soil removal. I challenge you to pull out your vacuum filter today—if it is grey or black, replace it immediately. You will be shocked at how much easier the rest of your cleaning becomes when your equipment actually works with you.
The Hardest Lessons I Learned Facing My Landlord
Thinking that “sparkling” is the same as “sanitized” is a dangerous trap I fell into early in my renting days. I have seen many neighbors lose hundreds because surfaces looked great but felt sticky or smelled faintly of old cooking oil. The “hidden” factor is incredibly real; landlords often ignore the middle of the floor but go straight for the top of the fridge or those 7 spots behind the toilet your landlord always checks first. I learned that professional cleaners do not necessarily work harder; they just let the chemicals do the heavy lifting by respecting dwell time. Keeping a detailed move-out clean checklist to simplify your transition is your best legal defense if a cleaning dispute arises. I once had a landlord try to charge me for a “dirty” microwave, but showing my timestamped photos and checklist shut that argument down in minutes.
The Gear I Never Move Out Without
To get a professional result, you need more than just an old rag. Here is what I always keep in my caddy: 1. Heavy-duty microfiber cloths: Unlike sponges, which are often the dirtiest objects in the house, these actually trap microscopic debris. 2. A quality HEPA vacuum: This is essential to avoid why your vacuum cleaner is actually making your house dustier during that final sweep. 3. Plastic scrapers: These are life-savers for removing petrified grease from the top of the stove without scratching the finish. 4. A handheld steamer: Perfect for sanitizing hacks for safe house transitions on non-porous surfaces. These tools are the backbone of any daily house cleaning routine to maintain perfection even after you have settled into your new place.
#IMAGE_PLACEHOLDER_E#
Reclaim Your Time and Your Refund
Deep cleaning should not feel like an impossible punishment. Once you master the “science of the grime,” you stop fearing the final inspection walkthrough. Whether you are refreshing your current space or prepping for a major move, solid house cleaning strategies for a sparkling home today will save you thousands of dollars over your renting life. You have the knowledge now, so do not be afraid to pull out that stove, tackle the hidden dust, and get what is yours. What is the one “hidden” spot you always dread cleaning when moving out? Let me know in the comments below!