
I still remember the afternoon I stood in my hallway, staring at the floor where the sunlight used to bounce off like a polished diamond. Instead, I saw a cloudy, hazy mess that looked more like an old chalkboard than the expensive oak I fell in love with. It’s a gut-punch, isn’t it? You spend hours on your knees, yet the more you clean, the worse it seems to get. I’ve been right where you are, frantically trying every “miracle” spray in the grocery aisle, only to realize I was actually burying the beauty of my home under layers of gunk. Today, I’m going to pull back the curtain on why your wood floors are losing their shine and show you exactly how to get that “just installed” glow back without ruining the grain.
The Stealthy Culprits Behind That Cloudy Film
Believe it or not, the biggest enemy of your floor’s finish might be sitting in your cleaning closet right now. For the longest time, I was obsessed with the idea of a “sterile” home. I even fell into the trap of thinking heat was my best friend. I used a steam mop religiously for nearly a year, convinced I was doing the right thing. It wasn’t until I noticed the edges of my planks starting to swell that I realized I was literally cooking the finish off. Most people don’t realize that wood is a living material; it breathes, and it definitely hates excessive moisture and high-heat blasts. According to experts at the National Wood Flooring Association, using the wrong pH-level cleaner can actually chemically etch the finish over time, leading to permanent dullness. It’s not just about the “dirt” you see; it’s about the microscopic layers of residue that build up every time you use those oily “polishing” soaps. They promise a temporary shine, but they act like a magnet for dust and hair. If you’ve ever noticed your floors feeling slightly tacky even after a deep clean, you’ve got a residue problem. This is a common hurdle whether you’re doing a daily house cleaning routine or a deep move-out clean.
Is your floor cleaner actually making things worse?
The answer is probably yes if you’re reaching for the “orange-scented” or “oil-based” products. I learned the hard way that these don’t actually clean the wood; they just add a layer of grease on top. Think of it like putting lotion on dirty hands. You aren’t clean; you’re just slippery and soon-to-be-grimy. I once spent an entire weekend trying to “buff” out a haze that was actually just three years of wax buildup I’d applied myself! Have you ever looked at your floors and felt like you were fighting a losing battle against the smudge? You aren’t alone. We need to stop the cycle of adding more “stuff” and start focusing on stripping back to the original seal. Before you try another store-bought fix, it might be time to listen to some house cleaning secrets from the pros who know that less is almost always more when it comes to hardwood.
Stop adding more wax and start stripping it off
To get that glow back, you have to break the chemical bond of the old product. Think of it like a facial for your house; you can’t just keep layering heavy makeup on top of clogged pores. You need a deep, restorative cleanse. First, we need to talk about temperature. Why you should stop mopping with hot water and use this instead is the first lesson every homeowner needs to learn. Hot water opens the pores of the wood, allowing residue and dirty water to sink deeper into the grain. Instead, use room-temperature distilled water mixed with a tiny drop of pH-neutral cleaner. I once spent four hours on my hands and knees in my small foyer with a bottle of isopropyl alcohol and a microfiber cloth. I thought I’d ruined the floor because as the alcohol evaporated, a thick white slurry appeared. It looked like I’d spilled milk everywhere, but it was actually the years of “shine” products finally detaching from the wood. It was messy and exhausting, but for the first time in five years, I saw the actual oak grain again.
The secret to the no-bucket method
Forget the heavy bucket of sloshing water. It is an invitation for warping and water damage. Instead, use a simple spray bottle. This gives you total control over the moisture, ensuring you aren’t drenching the planks. Mist a small 3×3 section at a time and work in a circular motion first, then with the grain. This precision is just as important when you are learning how to get grease off kitchen cabinets without removing the finish. You want enough liquid to break down the surface grime, but not enough to saturate the material. Use a high-quality microfiber pad that actually traps the particles rather than pushing them around like a standard cotton mop. #IMAGE_PLACE_HOLDER_B#
Mastering the pH-balanced strip
If your floors have a heavy build-up, you might need a dedicated residue remover rather than a simple cleaner. Look for something that mentions “zero residue” or is labeled as a “stripper” specifically for polyurethane finishes. Avoid anything containing ammonia or bleach, as these are way too aggressive and will turn your finish brittle. If you are worried about bacteria, stick to effective sanitizing methods for a germ-free home that use stabilized hydrogen peroxide or alcohol-based solutions rather than harsh household oxidizers. When I finally cleared that white haze off my foyer, the floor didn’t just look cleaner; it felt different under my feet. No more sticking, no more squeaking. It felt smooth and cool, exactly the way real wood is supposed to feel.
Coordinate your floor care with your furniture
Once your floors are stripped and clean, the last thing you want is a dirty sofa or rug leaking dust and oils back onto the fresh surface. It is like wearing muddy shoes on a fresh bed. Take a moment to check your ultimate upholstery care guide for lasting freshness to make sure your fabric isn’t the source of the “magnet effect” that is attracting dust to your floor. A clean home is a system, not a series of isolated tasks. By treating the floor as a clean slate, you set the foundation for a much easier maintenance schedule moving forward.
The mistake most homeowners make is thinking that more pressure and more chemicals equals a cleaner result. In reality, the most effective house cleaning secrets from the pros revolve around chemistry and dwell time, not muscle. I’ve seen countless people panic during a move-out, scrubbing their baseboards with abrasive sponges, only to realize they’ve stripped the paint and guaranteed a deduction from their security deposit. If you are in the middle of a transition, you need to stop focusing on the obvious and look at the technical details, like why you should always dust your walls before a move-out clean. If you wipe a damp cloth over a dusty wall, you aren’t cleaning; you are creating a thin layer of mud that dries into a permanent streak. This is the ‘Oops Factor’ that catches even the most diligent tenants off guard.
The sanitizing myth that could be hurting your air quality
We’ve been conditioned to believe that the smell of bleach equals safety, but this is a dangerous misconception. In my experience, over-sanitizing with harsh oxidizers often does more harm than good by triggering respiratory issues and damaging delicate finishes. A landmark study published by the American Thoracic Society suggests that long-term exposure to certain cleaning sprays can be as damaging to lung function as smoking. This is why I always advocate for effective sanitizing methods for a germ-free home that prioritize pH-neutral solutions and proper ventilation over aggressive bleach-bombing. Have you ever noticed your eyes watering while cleaning the bathroom? That is a sign that you have reached a toxic threshold, not a cleanliness milestone.
Is your sofa fabric secretly ‘un-cleanable’ by standard methods?
Upholstery is another area where ‘common sense’ usually leads to disaster. Most people think a little soap and water can fix anything, but if you have ‘S-coded’ fabric, water will leave a permanent ring that looks worse than the original stain. You must know how to treat s-coded upholstery fabric without ruining it by using solvent-based cleaners instead. Furthermore, never reach for the blow dryer to speed things up; why you should never use hairdryers on wet fabric spills is a lesson in protein-setting. High heat can ‘cook’ a stain into the fibers, making it a permanent part of your furniture’s DNA. #IMAGE_PLACE_HOLDER_C#
Don’t let these invisible traps steal your security deposit
If you are preparing to leave a rental, you need a strategy that goes beyond the surface. Landlords aren’t just looking at the floors; they are looking at 7 spots behind the toilet and checking the secret trap under your refrigerator. These are the nuances that separate a ‘clean’ house from a ‘professionally restored’ one. It is about removing the layers of life that have accumulated in the cracks and crevices. Have you ever fallen into the trap of cleaning for hours only to have a landlord point out a single dusty vent? Let me know in the comments if you’ve had a ‘hidden’ spot cost you money. To avoid this, follow a strict move-out clean checklist to simplify your transition and ensure you are hitting the technical areas like the window track cleaning hack that keeps the sliders moving smoothly. When you stop fighting the dirt and start understanding the material you are cleaning, the entire process becomes less of a chore and more of a restoration.
Keep the grit outside where it belongs
Maintenance isn’t about scrubbing harder; it’s about being smarter with your energy. After I finally stripped the wax off my foyer, I realized that my daily house cleaning routine needed a serious upgrade to prevent that haze from returning. I stopped using ‘disposable’ pads that just smear dirt and invested in 480 GSM (grams per square meter) microfiber. If you aren’t looking at the GSM of your cloths, you’re likely just moving bacteria from the kitchen to the living room. According to the IICRC (Institute of Inspection Cleaning and Restoration Certification) S100 standards, physical removal of soil is 90% of the battle. A high-density microfiber pad acts like a thousand tiny hooks, grabbing grit before it can scratch your finish or dull the surface. This is why I always emphasize house cleaning strategies for a sparkling home today that focus on the quality of your textiles over the quantity of your soap.
How do I maintain my floor’s shine for the long haul?
Consistency is your best friend here. I personally use a ‘dry-first’ rule. Never, ever put a damp mop on a floor that hasn’t been thoroughly vacuumed or dust-mopped. If you do, you’re just making mud. I’ve found that using a vacuum with a dedicated hard-floor attachment—one without a beater bar—is the only way to get the fine dust out of the bevels. For those following an ultimate upholstery care guide for lasting freshness, you know that dust is an abrasive; it’s the same for wood. If you leave dust on the floor, every footstep acts like a piece of sandpaper. In the future, I expect we will see ‘smart floors’ with integrated moisture sensors that alert our phones when the wood’s humidity levels drop too low or when a spill has penetrated a seam, but for now, your best sensor is a high-quality microfiber mop and a keen eye.
The specialized gear that actually lives up to the hype
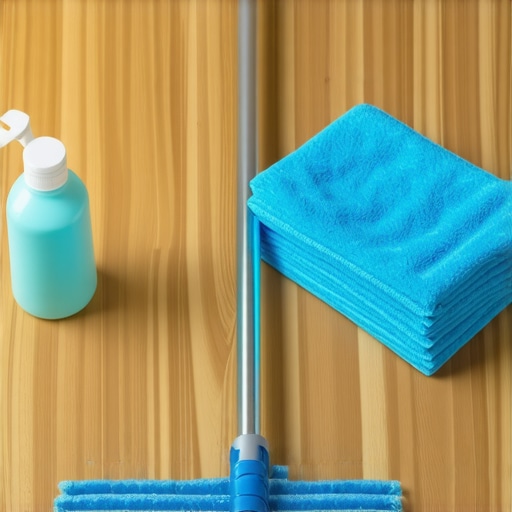
I’ve tested dozens of mops, and the one I keep in my own closet is a 18-inch professional swivel mop with a telescopic handle. Why? Because it allows me to apply even pressure without leaning over, saving my back and ensuring the pad stays flat against the wood. When it comes to chemicals, I’ve ditched the grocery store sprays for a pH-neutral concentrate that I mix myself with distilled water. It costs pennies per gallon and leaves absolutely zero residue. This same focus on pH-neutrality is vital when you are looking for effective sanitizing methods for a germ-free home without damaging your expensive surfaces. I also recommend keeping a ‘spot kit’—a small bottle of your cleaner and a clean cloth—under the sink for immediate spill response. This prevents you from having to do a full-room clean just because of one coffee drop.
If you really want to see a difference, I challenge you to try this today: swap your generic ‘shine’ spray for a simple pH-neutral cleaner and a high-GSM microfiber pad. Use the ‘spray and wait’ method—let the cleaner sit for 30 seconds to break down oils before wiping. You’ll be shocked at how much dirt comes up even on a ‘clean’ floor. For more technical advice on reviving your living space, check out these upholstery cleaning tips for a fresh home revival and start treating your home like the investment it is.
The Hardest Lesson I Learned About My Cloudy Floors
When I first started this journey, I thought the white haze appearing after a deep scrub was a disaster. I now know that’s actually the sound of victory—it means the old, suffocating wax is finally letting go of the wood grain. It taught me that true restoration isn’t about what you add to the surface; it’s about what you successfully strip away. If you’re currently prepping for a transition, applying this level of detail is exactly how you master move-out cleaning strategies to secure your deposit without the stress.
- Chemistry beats muscle every time: You can scrub for hours, but if the pH of your cleaner isn’t neutral, you’re just etching the finish rather than cleaning it.
- Distilled water is a non-negotiable: Mineral deposits found in standard tap water are the silent killers of a streak-free shine.
- The ‘spray and wait’ technique: Giving your cleaner just 30 seconds to emulsify surface oils saves you minutes of physical scrubbing and protects the wood from abrasion.
My Essential Toolkit for Maintaining That Factory Glow
I’ve pared my cleaning closet down to the essentials that actually live up to the hype. I trust a professional 18-inch swivel mop because it maintains even pressure across the planks, unlike the floppy mops you find in grocery stores. I combine this with 480 GSM microfiber pads that act like tiny hooks for dust and grit. To keep my overall home maintenance sharp, I frequently revisit house cleaning secrets from cleaning experts to ensure I’m not falling back into old, lazy habits. My cleaning kit also includes a pH-neutral concentrate mixed in a simple spray bottle—it’s far more cost-effective and safer for your floor’s long-term health than pre-mixed grocery store sprays. I’ve found that implementing these house cleaning strategies for a sparkling home today is the most efficient way to keep the grit at bay before it ever becomes a problem.
Ready to See Your Reflection in the Grain Again
Your home is your sanctuary, and a glowing hardwood floor provides the literal foundation for that peace of mind. Don’t let years of product buildup discourage you from trying. Start in a small corner, be patient with the chemical reaction, and remember that you’re restoring an investment. Once you get the floors right, you’ll find that maintaining your daily house cleaning routine becomes an act of pride rather than a chore. Whether you are focusing on your floors or looking into upholstery cleaning tips for a fresh home revival, the goal is always a cleaner, healthier space for you and your family. #IMAGE_PLACEHOLDER_E#
Have you ever tried a ‘miracle’ floor product only to find it made the haze even worse? Let me know your experiences in the comments below!