
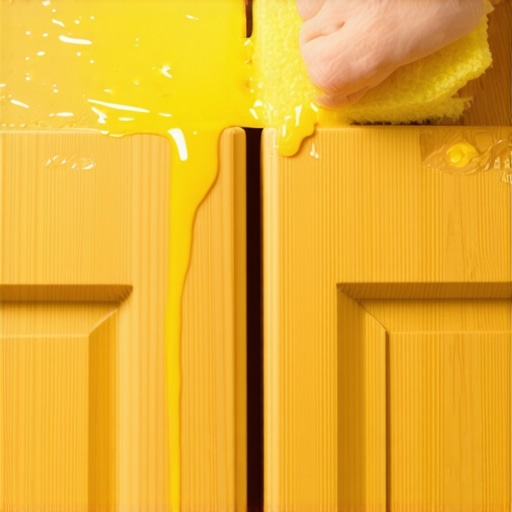
I climbed up a ladder last weekend to change a lightbulb and my hand accidentally grazed the top of my kitchen cabinets. I nearly gagged. It wasn’t just dust; it was a thick, furry, amber-colored sludge that felt like I’d touched a giant piece of used flypaper. If you have ever felt that sickening tackiness, you know exactly what I am talking about. It’s the hidden shame of even the cleanest kitchens. My first instinct years ago was to go at it with a heavy-duty abrasive sponge, a mistake that cost me a perfectly good finish and left the wood looking dull and scratched. Today, I want to show you how to avoid my early failures and reclaim those surfaces. We are going to dive into the exact methods for cleaning sticky grease off kitchen cabinets without needing a professional crew.
Why standard cleaners fail against the kitchen sludge
The stuff on top of your cabinets isn’t just ‘dirt.’ It is a scientific byproduct of your cooking. Every time you sauté or fry, tiny droplets of oil go airborne, eventually settling on the highest flat surfaces. Over time, these oils undergo a process called polymerization, essentially turning into a soft plastic or varnish. According to researchers at the Science History Institute, organic fats oxidize and cross-link when exposed to air and heat, creating a bond that resists simple soap and water. I learned the hard way that simply spraying more water on it just makes a slurry of mess. You need to understand how to get grease off kitchen cabinets by breaking that chemical bond rather than using brute force. If you are preparing for a bigger project, you might even want to learn how to prep your kitchen for a professional deep clean to ensure every nook is covered. Have you ever reached up there and felt like you needed to scrub your hands for twenty minutes? I want to hear about your worst ‘grease discovery’ in the comments!
Is it actually possible to clean this without ruining the wood?
Many homeowners fear that any chemical strong enough to cut through years of aerosolized bacon fat will also eat through their expensive cabinet stain or paint. It is a valid concern. I’ve seen people use industrial degreasers that left white cloudy marks on beautiful oak. However, the secret isn’t more power; it’s the right chemistry and a little bit of patience. We are going to use some household staples that act as solvents rather than corrosives to melt the gunk away safely.
The gentle chemistry of dish soap and heat
Most people reach for the harshest chemical they can find, but for 90% of cabinet grease, a concentrated grease-cutting dish soap and very warm water is the safest bet. Think of the soap like a microscopic crowbar; it wedges itself between the grease molecules and the cabinet surface. You aren’t just wiping; you are emulsifying. I found that the dish soap trick for spot cleaning grease stains on upholstery works on wood too, provided you don’t drench the material. Heat is your biggest ally here. Cold water just makes the grease harder and more stubborn, like trying to wash a buttery pan with ice water.
Use microfiber to lift rather than smear
A regular paper towel is too smooth; it just skates over the polymerized oil. You need the tiny hooks of a microfiber cloth to grab the softened sludge. When I was doing a move out clean last year, I wasted three rolls of paper towels before switching to microfiber and finishing the job in twenty minutes. Microfiber doesn’t just push the dirt; it traps it within its fibers so you aren’t just spreading the amber sludge to the next cabinet door. #IMAGE_PLACE_HOLDER_B#
Fight oil with oil to soften the bond
This sounds counterintuitive, but if the grease is hard and brittle, you need to re-moisturize it to remove it. ‘Like dissolves like’ is a fundamental rule of chemistry. Applying a small amount of clean vegetable oil or mineral oil to a soft cloth and rubbing it into the sticky spots can break down the cross-linked bonds of the old grease. I remember working on a set of 1970s oak cabinets that were practically orange with grime. After applying fresh oil and letting it sit for five minutes, the old ‘varnish’ of grease turned back into a liquid state that I could just wipe away. It felt like a magic trick. This is one of those house cleaning secrets from cleaning experts that preserves the wood’s integrity while destroying the dirt.
Avoid the abrasive sponge trap
Whatever you do, put down the green scrubby side of the sponge. It’s tempting to use it when the grease is stubborn, but why you should never use abrasive sponges on your bathtub applies to your cabinets as well. You will leave microscopic scratches that will catch more dust and grease in the future, making the problem even harder to manage. Scratched wood is also prone to moisture damage, which can lead to peeling paint or warped grain.
The precision paste for stubborn corners
If you have grease trapped in the decorative grooves of your cabinet doors, create a paste using two parts baking soda and one part water. Use a soft-bristled toothbrush to work it in gently. This provides just enough friction to lift the grime without the damage caused by steel wool. It’s much like applying upholstery cleaning tips for a fresh home revival where you treat delicate fibers with specific, non-corrosive mixtures. Just remember that while baking soda is great here, you should never use baking soda on your marble countertops nearby, as it can be too abrasive for softer stone. This methodical approach ensures you aren’t just moving dirt around but actually restoring the surface to its original state without the need for a professional sanding machine.While the baking soda paste is a lifesaver for grooves, let’s talk about the biggest myth currently circulating in the DIY cleaning world: the idea that vinegar is the ‘ultimate’ solution for everything. I see it on every blog—mix vinegar and water and spray it on your wood. Honestly, stop doing that. While vinegar is great for glass, it’s an acetic acid. Over time, that acid can eat through the clear coat of your cabinets, leaving the wood vulnerable to the very moisture you’re trying to use to clean it. If you’re following a daily house cleaning routine to maintain perfection, you’re better off using a pH-neutral cleaner or the soap method we discussed earlier.
Vinegar is not the magic potion Pinterest claims
The problem with using straight vinegar or even a heavy dilution is that it lacks surfactants. According to the American Cleaning Institute, surfactants are critical because they lower the surface tension of water, allowing it to actually penetrate and lift grease. Vinegar just sits on top of the grease or, worse, dissolves the finish underneath it. I’ve seen beautiful cherry wood cabinets lose their luster within a year because the owner thought they were being ‘eco-friendly’ with vinegar. If you really want to keep things fresh without the harsh chemicals, you should look into an ultimate upholstery care guide for lasting freshness to see how experts balance pH levels on delicate surfaces.
The saturation trap that leads to expensive repairs
Here is the ‘oops’ factor that most beginners miss: gravity. When you spray a liquid cleaner directly onto the cabinet face, it runs down into the joints and the seams of the raised panels. This is where the wood is most vulnerable. Once moisture gets into those raw edges, the wood swells, and the finish begins to crack or peel. Instead of spraying the cabinet, always spray your cloth. This prevents the liquid from pooling in the ‘valleys’ of the woodwork. It’s similar to how why your vacuum filter is actually spreading dust around your home if you don’t maintain it—improper technique often creates a bigger problem than the one you started with. #IMAGE_PLACE_HOLDER_C#
Can you really sanitize grease-laden surfaces without steam?
Many people ask if they need to bring out the heavy machinery for a deep clean. If you are preparing move out cleaning strategies to secure your deposit, you might be tempted to use a steam mop on your cabinets. Be extremely careful. While you might wonder is steam cleaning enough to kill bacteria on high-touch surfaces, the high heat and pressure can actually force moisture deep into the grain of the wood, causing permanent warping. For true sanitation, you need to remove the physical layer of grease first. Bacteria and mold spores thrive in that sticky amber sludge, using it as a protective shield against disinfectants. Once the grease is gone, then—and only then—can you apply effective sanitizing methods for a germ-free home. A mistake I see often is people trying to use disinfecting wipes on top of a layers of grease. The wipes never actually touch the surface because the polymerized oil acts as a barrier. For those moving into a new place, I always recommend the the move-in checklist for people who hate other peoples germs to address these layers systematically. Have you ever fallen into the ‘vinegar trap’ or accidentally warped a cabinet door by being too aggressive? Let me know in the comments below!Now that we’ve tackled the immediate mess, let’s talk about how to stop that orange sludge from ever coming back. I don’t want to spend my weekends on a ladder, and I’m sure you don’t either. To keep things manageable, I’ve integrated a daily house cleaning routine to maintain perfection that includes a quick wipe-down of high surfaces once a month. My personal favorite hack? Parchment paper. I lay thin sheets on top of those hard-to-reach cabinets. The grease settles on the paper, not the wood. Every few months, I just toss the old sheets and lay down new ones. It’s one of those house cleaning secrets from cleaning experts that saves you from exhausting deep-scrubbing sessions.
Why I Swear by Professional Detailing Brushes
When it comes to tools, I’ve moved away from standard hardware store sponges. I now use automotive detailing brushes with flagged bristles. Why? Because the split ends of the bristles are soft enough to reach into the intricate grooves of crown molding without scratching the finish. I also recommend a high-quality pH-neutral concentrate that you can dilute yourself; it prevents the sticky residue left behind by many supermarket-brand cleaners. If you’re dealing with delicate furniture, I suggest checking out upholstery cleaning tips for a fresh home revival to see why specialized tools are worth the investment. #IMAGE_PLACE_HOLDER_D#
How do I maintain these clean surfaces over time?
Maintenance is 90% air quality and 10% wiping. I noticed that my cabinets stayed cleaner much longer after I replaced my range hood filter and checked my vacuum system. If your equipment is failing, you’re just moving molecules around. For instance, why your vacuum filter is actually spreading dust around your home is a major factor in how fast that sticky feel returns. A HEPA filter captures the fine particulates that like to stick to grease droplets. I also suggest running your exhaust fan for five minutes after you finish cooking; most people turn it off as soon as the stove is cool, but the aerosolized oils are still hanging in the air, looking for a place to land.
A Peek at the Future of Low-Maintenance Kitchens
The cleaning industry is shifting toward prevention. Researchers at the Fraunhofer Institute for Surface Engineering and Thin Films (IST) are perfecting photocatalytic coatings. These thin layers use light to break down organic compounds—meaning the grease literally decomposes on its own. In the future, we might only need a damp cloth for everything. If you are preparing move out cleaning strategies to secure your deposit, these advanced tools and preventive steps ensure your kitchen stays pristine until the final walkthrough. Try the parchment paper trick this weekend—it takes five minutes and will save you hours of work next year!
Lessons Learned from a Decade of Fighting Kitchen Sludge
Over years of managing various kitchen environments, I have realized that the hardest lesson isn’t about the scrubbing itself, but about the chemical patience required. I used to think that ‘harder is better,’ but the real secret lies in allowing the cleaning agent to break the polymerized bonds. If you rush, you risk the finish. Another lightbulb moment was realizing that house cleaning secrets from cleaning experts often involve the ‘like dissolves like’ principle; using a clean oil to soften old, hard grease is far safer than any abrasive sponge. Finally, never underestimate the power of air quality. Maintaining a daily house cleaning routine to maintain perfection helps, but if your range hood isn’t venting properly, you are fighting a losing battle against physics.
My Essential Cabinet Cleaning Toolkit
I don’t rely on generic sponges anymore. Instead, I keep a dedicated set of tools that treat wood with the respect it deserves. First, I highly recommend flagged-bristle automotive brushes; they are designed for delicate car interiors but work wonders on intricate cabinet molding. Second, I always keep a stash of high-quality microfiber cloths because they actually lift the sludge rather than just smearing it across the surface. For those preparing for a move, following move out cleaning strategies to secure your deposit often requires these specific tools to ensure the wood looks factory-new without damage. I also trust pH-neutral wood cleaners over vinegar-based solutions to protect the long-term integrity of the sealant.
#IMAGE_PLACE_HOLDER_E#
Take Back Your Kitchen Atmosphere
You do not have to settle for a kitchen that feels tacky to the touch. By understanding the chemistry of polymerization and choosing the right surfactants, you can master cleaning sticky grease off kitchen cabinets and restore the warmth of your home. Remember that cleaning is as much about preservation as it is about aesthetics. Once the grease is gone, you can apply effective sanitizing methods for a germ-free home to a surface that is truly clean, not just covered in a fresh-smelling film. Don’t be afraid to start small with just one cabinet door this weekend. What is the most ‘stuck-on’ mess you have ever encountered in your kitchen, and did you manage to get it off without ruining the finish? Let me know in the comments below!