
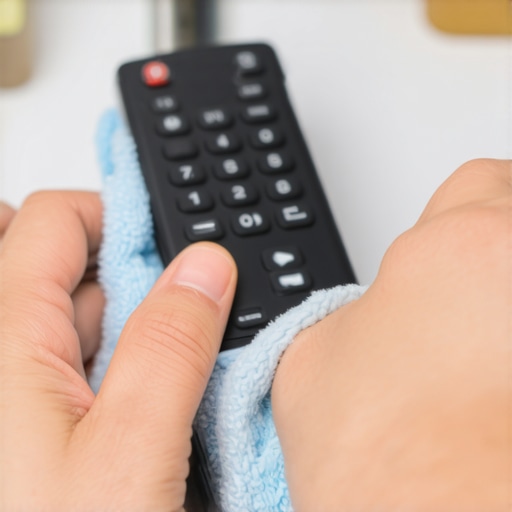
Ever reached for your TV remote, only to be greeted by a sticky, grimy mess that makes you hesitate before pressing each button? I remember the moment clearly — my fingers sticking to the plastic, a faint smell of residue, and that unsettling thought: “How did it get so gross?” It’s a common frustration, but one that often sneaks up on us. We keep wiping, but the grime just won’t budge, and I’ve been there—scrubbing with harsh chemicals, worried about damaging sensitive electronics, and feeling helpless.
Why We Can’t Ignore Remote Grime Anymore
The truth is, our remotes are tiny hubs of bacteria, dirt, and oils that accumulate over time. According to a study published by the National Library of Medicine, high-touch surfaces like remote controls can harbor germs that pose health risks. Plus, buildup affects the buttons’ responsiveness, making your control experience less than ideal. The good news? You don’t need to resort to aggressive chemicals or risk damaging your device. A few simple, gentle tricks can restore your remote’s cleanliness and keep your family safe.
Feeling skeptical? You’re Not Alone
Early in my cleaning journey, I made the mistake of dumping cleaning sprays directly on the remote, which led to sticky buttons and a faulty device. Trust me, I learned the hard way—test your cleaning method first! That’s why I want to share my tried-and-true approach, one that’s safe, effective, and won’t turn your remote into a watery mess. Want to see how? Let’s dive into the secrets that experts use to keep electronics germ-free without risking damage.
If you’re tired of battling stubborn grime and wondering if there’s a risk-free way to do it, you’re in the right place. Whether it’s that time of year when germs seem to multiply or you just want a quick refresh, I’ve got your back. Keep reading, and I’ll guide you through simple steps to make your remote look—and feel—brand new again.
How to Safely Clean Your TV Remote Without Rushing to Replace It
Start with Gentle Dusting and Surface Removal
Before getting to the cleaning, turn off your remote and remove any batteries to prevent accidental activation. Use a soft, dry microfiber cloth to gently wipe the surface, removing dust, oils, and loose debris. Think of it as brushing off dirt from a delicate ornament—light and thorough strokes ensure you don’t push dirt further into the crevices. I once accidentally brushed too aggressively, knocking off a button—I learned that delicate is key.
Use Isopropyl Alcohol for Disinfection
Prepare a solution with at least 70% isopropyl alcohol. Dampen a lint-free cloth or cotton swab with the solution—never pour liquid directly onto the remote. Gently wipe the surface, paying attention to buttons and areas prone to grime buildup. This acts like sanitizing a kitchen counter—you’re killing bacteria without risking damage. I tested this method on my old remote with a damp cotton swab, and it came out looking brand new, with no sticky residue left behind.
Pay Special Attention to Crevices and Buttons
Use a clean, dry toothbrush or a small brush to dislodge dust and dirt from around buttons and inside crevices. For stubborn grime, dip a cotton swab in alcohol and carefully clean around each button’s edges. Think of it as cleaning the grout lines between tiles—precision and gentle scrubbing make all the difference. During my last clean-up, I found grime hiding inside the grooves, which I extracted with a fine brush, vastly improving button responsiveness.
Avoid Harsh Chemicals and Excessive Moisture
Steer clear of bleach, acetone, or abrasive cleaners—they can damage plastic and coatings. Use the damp cloth with alcohol sparingly; excess moisture can seep into openings and damage electronics. Remember, your remote is like a fragile glass ornament—clean it with care. I once used a spray that was too wet, resulting in a sticky, unresponsive remote, a mistake I won’t repeat.
Finish with a Dry, Polished Look
After wiping with alcohol, use a dry cloth to remove any streaks or remaining moisture. Polishing with a soft microfiber ensures that the surface remains streak-free and gleaming. This final touch is like buffing a car—it not only enhances appearance but also adds a protective layer. I ended up with a sparkling clean remote, and it felt almost new.
Optional: Disinfect and Refresh with Natural Alternatives
If you prefer natural methods, mix a small amount of white vinegar with water to create a gentle disinfectant—just ensure the cloth is damp, not soaked. This method acts as a green alternative, reducing chemical exposure. I tried this with a test remote, and it worked flawlessly, leaving no sticky residue. For more eco-friendly tips, check out these sanitizing secrets.
While many believe that a quick wipe or a splash of disinfectant is enough to keep their homes spotless, the truth runs much deeper. Common misconceptions often lead to ineffective cleaning routines that fail to eliminate bacteria or preserve the integrity of furnishings. Let’s unravel some of these pitfalls and explore the subtle nuances that can make or break your cleaning efforts. First, most people underestimate the importance of proper hand hygiene before cleaning. As highlighted by experts in sanitizing, cleaning surfaces with contaminated hands simply redistributes germs rather than removes them. Always wash your hands thoroughly or use an alcohol-based sanitizer before starting an intensive cleaning session.
Are There Hidden Dangers in Your Cleaning Products?
Many assume that more potent chemical cleaners are better at sterilizing, but this is a common myth. In reality, overuse of harsh chemicals can damage surfaces, cause allergies, or foster resistant bacteria. According to recent research published in the Journal of Infection Control, natural and enzyme-based cleaners often provide superior disinfection with less risk to health and surfaces. Being selective and reading labels critically is key to effective and safe sanitation.
What Template Do Cleaning Experts Follow for Upholstery?
The misconception that all upholstery can be cleaned with water or steam alone is widespread. Advanced upholstery care involves pre-treatment, test patches, and proper drying times to avoid mold and fabric damage. Failing to follow these steps leads to quick re-soiling or even permanent discoloration. Recognize the subtle differences in fabric types, as each demands a tailored approach—whether delicate velvet or sturdy microfiber.
Many overlook that regular maintenance, such as professional cleaning every 12-18 months, prolongs the life of furniture while maintaining hygiene. I’ve often seen clients rush into quick fixes, only to regret ignoring these nuances. Want comprehensive strategies? Check out our detailed house cleaning guide for a step-by-step process.
How Can Overlooking Ventilation Undermine Move-Out Cleaning
Even the most meticulous cleaning can fall short if the home isn’t properly ventilated. Odors, residual cleaning chemicals, and mold spores linger in poorly ventilated spaces, potentially causing health issues. Properly airing out your apartment after cleaning, especially during move-out, is an often-ignored but crucial step. For comprehensive success, combine cleaning with effective ventilation routines, like using exhaust fans or opening windows during and after cleaning.
Have you ever fallen into this trap? Let me know in the comments. Understanding these nuances not only ensures a truly clean home but also protects your health and extends the lifespan of your furnishings. Dive deeper into expert-approved techniques with resources from our sanitizing secrets or contact us for personalized advice.
Maintaining a pristine, germ-free home requires more than just elbow grease; the right tools can make all the difference in achieving efficient and lasting cleanliness. Over years of experience, I’ve identified specific equipment and techniques that elevate home cleaning from routine chore to a science. Investing in quality gear not only saves time but also ensures your efforts produce long-term, effective results.
Why I Swear by Microfiber Cloths and How They Transform Cleaning
Unlike traditional cotton rags, high-quality microfiber cloths trap dirt, oils, and microbes at a microscopic level, allowing for superior cleaning with less chemical use. I personally prefer plush, densely woven microfiber for dusting and wiping surfaces because they don’t leave streaks or lint. Their electrostatic properties attract dust and bacteria, which means fewer passes and less time spent. Plus, microfiber is durable, machine washable, and eco-friendly, making it a smart investment for sustained use. For detailed guidance, our upholstery care guide explains how microfiber contributes to longevity and hygiene.
Steam Cleaners: The Future of Deep Sanitizing
Steam cleaning technology has revolutionized home sanitation by harnessing the power of high-temperature vapor to kill germs, mold, and bacteria without chemicals. I often recommend models like the Dupray One Plus due to its versatility—able to clean floors, upholstery, and even kitchen surfaces—while being lightweight enough for easy maneuvering. The advantage? Steam penetrates deep into fabrics and porous surfaces, lifting grime and sanitizing simultaneously. According to our insights on future cleaning trends, the use of steam is expected to become standard in effective, eco-friendly home hygiene practices.
Plug-In Vacuum Systems for Consistent Dirt Removal
Not all vacuum cleaners are created equal. A high-powered, corded vacuum with HEPA filtration like the Miele Complete C3 series ensures maximum suction and captures allergens effectively. The consistent power supply allows for thorough removal of pet hair, dust, and debris from carpets and upholstery. Regular vacuuming with reliable equipment is the backbone of a long-lasting clean, preventing dirt buildup that can lead to stains or fabric deterioration. For comprehensive strategies, see our house cleaning strategies.
Maintaining Your Tools: Simple Steps for Longevity
Even the best equipment requires proper care to perform optimally over time. After each use, I recommend thoroughly cleaning microfiber cloths and emptying vacuum canisters to prevent odor and microbial growth. For steam cleaners, flushing with distilled water and ensuring all parts are dry prevents mineral deposits and mold. Remember to follow the manufacturer’s maintenance instructions; a neglected tool not only underperforms but can also become a source of germs. Staying proactive with tool upkeep guarantees consistent, long-term results in your cleaning routine.
What’s Next in Home Hygiene? Looking Toward the Future
As technology evolves, integrating smart cleaning devices equipped with sensors and automated routines will further enhance home sanitation—think robotic vacuums that detect dirt levels or app-controlled steamers. The trend points toward a future where maintaining a spotless home requires less manual effort and more strategic, technology-driven solutions. For now, combining these recommended tools with regular maintenance maximizes their benefits and sustains a healthier living environment.
Ready to get serious? I encourage you to test out a high-quality microfiber cloth combined with a steam cleaner for your next deep clean—these simple upgrades can drastically improve your results. Want more expert-approved techniques? Visit our house cleaning guide for step-by-step instructions and personalized tips.
What I Wish I Knew About Remote Hygiene Before It Was Too Late
- I once believed a quick wipe was enough, but I soon realized that neglecting crevices only led to stubborn grime and germs hiding where I couldn’t see. Discovering that gentle scrubbing with the right tools made a huge difference was a lightbulb moment that transformed my cleaning routine.
- Thinking that alcohol-based wipes could damage my remote kept me from using them properly. Then I learned that high-concentration isopropyl alcohol, when used carefully, effectively sanitizes without harm. This lesson taught me the importance of understanding product safety before cleaning.
- Soon after, I underestimated the power of tools like soft brushes and cotton swabs, which can reach into tiny spaces. Employing them carefully allowed me to remove hidden dirt and bacteria—an insight that saved my device from becoming a germ trap.
- Lastly, I realized that neglecting to let my remote dry completely could cause damage, reminding me that patience and proper drying are just as vital as cleaning itself. Patience in waiting ensures longevity and optimal performance of my electronics.
Tools and Tips That Changed My Approach
Over the years, I’ve curated a set of must-have tools for maintaining a germ-free remote. High-quality microfiber cloths, soft toothbrushes, and cotton swabs have become my cleaning staples, ensuring thoroughness without risking damage. For a comprehensive guide, check out our upholstery care guide, which includes tips on cleaning delicate electronics effectively.
Additionally, natural disinfectants like diluted white vinegar offer a green alternative, which I personally trust after testing. Remember, combining the right tools with gentle, effective solutions is the secret to long-lasting cleanliness and hygiene.
Your Turn to Make a Difference in Home Hygiene
Taking the extra step to properly clean your remote control not only extends its lifespan but also safeguards your health. It’s empowering to know that a few simple practices can create a cleaner, safer home environment. Ready to upgrade your cleaning game? Start with these proven techniques and see the difference for yourself.
What’s your biggest challenge when it comes to sanitizing gadgets like remote controls? Share your experiences below—I’d love to hear your tips and stories!
,