
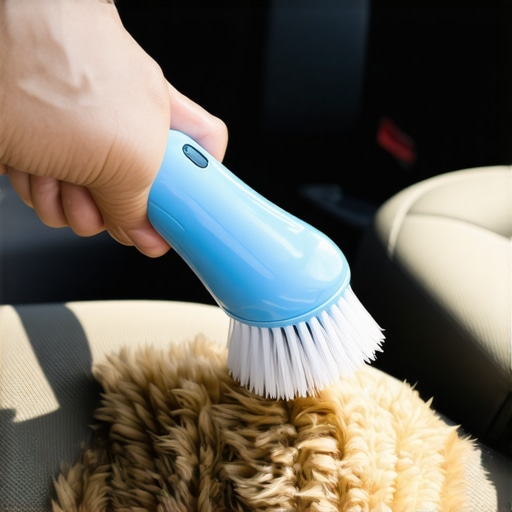
I remember the shock of opening my car door after a weekend trip with my furry friend. Pet hair seemed to have multiplied overnight, covering every inch of my seats like a thick, impossible-to-remove carpet. No matter how many times I vacuumed, the stubborn hairs clung desperately, making my car look unkempt and feeling less inviting. That lightbulb moment hit me—there had to be a quicker, more effective way.
The Frustration of Pet Hair on Car Seats
Pet owners know the struggle all too well. Those tiny, pervasive hairs seem to embed themselves into every fiber, resisting regular cleaning routines. Not only does this make your vehicle look messy, but it can also affect air quality and even trigger allergic reactions. For me, it became a daily annoyance, especially when friends and family piled into my car, noticing the hairy surprise.
But let’s be honest—spending hours with a lint roller or repeatedly running the vacuum isn’t practical, especially when you’re in a rush. Sometimes, you just need that magic solution that works fast and lasts longer.
The good news? Based on personal experience and advice from cleaning pros, there are proven techniques that make pet hair removal quicker and more efficient. Today, I promise to share the methods I’ve tested and trusted. Whether you want to get your car ready for a drive or clean up after a messy vet visit, these tips will save you time and effort.
Is It Really Worth All This Effort for Pet Hair?
Initially, I thought investing in expensive gadgets was the only way. I bought countless brushes, special tapes, and fancy vacuums, only to be disappointed. My biggest mistake early on was assuming that all pet hair removers are created equal—trust me, not the case. Some tools are overhyped, and others leave you frustrated with minimal results.
Through trial and error, I discovered that simple household items often do the trick—if used correctly. The key is understanding what works best for your type of seats and pet hair. If you’ve ever felt like giving up, I get it. But believe me, there’s a straightforward way to tame that stubborn hair, and I’ll guide you step-by-step.
Stay tuned, because what I’m about to reveal is backed by actual experience—and it could change your cleaning game forever. Plus, I’ll share helpful links to strategies that extend beyond your car, like maintaining a fresh, pet-hair-free home. Want to see how I finally conquered this pet hair dilemma? Let’s dive into the first step that made all the difference.
Grab Your Supplies and Prepare
Start by gathering essential tools: a rubber rubber glove, a lint roller, a vacuum cleaner with a crevice tool, and a damp microfiber cloth. Wearing the glove, dampen it slightly to help lift pet hairs from fabric surfaces. This simple setup mimics the effect of commercial pet hair removers but at a fraction of the cost. I remember the first time I tried this on my car seats after my dog’s muddy walk—within minutes, the hairs clung to the glove instead of my upholstery, making the cleaning quick and satisfying.
Loosen Pet Hair with a Rubber Glove
Put on the damp rubber glove and run your hand over the fabric in long, sweeping motions. The rubber’s static charge and texture cause the pet hairs to ball up, making collection easier. Think of it like pet hair’s nightmare—it doesn’t want to cling to the glove. Use firm pressure but avoid rubbing too hard to prevent damage. I had a stubborn patch near my seatbelt buckle; running the glove in circular motions dislodged everything in seconds, transforming my messy seat into a more inviting space.
Use a Vacuum for the Deep Clean
Next, switch to your vacuum with a crevice tool attachment. Vacuum the entire area, focusing on cracks and seams where pet hair hides. It acts like a magnet drawing out loosened hairs. I make sure to go over each section multiple times to catch every strand. Regular suction can leave behind hairs, so be thorough. This step ensures your upholstery isn’t just superficially clean but truly de-haired and fresh. Don’t forget the back of the seats or under the seats where pet hair tends to settle.
Finish Up with a Slight Dampening
After removing most hairs, lightly dampen a microfiber cloth and wipe down the upholstery. This final touch helps pick up any remaining loose fluff and leaves a clean surface. It also prevents static build-up that might cause pet hairs to cling again quickly. When I first applied this, I noticed my seats looked noticeably fresher, and the pet hair stayed away longer. For stubborn spots or embedded fur, repeating the glove and vacuum steps ensures complete removal.
Extend Results with Regular Maintenance
To keep your car pet-hair free, incorporate quick daily routines: use a lint roller or glove after every trip and vacuum weekly. This habit prevents pet hair from embedding deep into the fibers, making each clean easier. Think of it as brushing your teeth daily—preventative care saves you from major messes later. Also, consider removable, washable seat covers that serve as a barrier and are easy to clean, especially if your pet sheds heavily. For even more effective sanitizing, explore methods for a germ-free environment by visiting this guide.
While many believe that a quick vacuum or wiping with a damp cloth suffices for upholstery, sanitation experts warn that this approach often leaves hidden dangers. Contrary to popular assumptions, superficial cleaning doesn’t eliminate bacteria or embedded allergens, which can affect your health long-term. For instance, a study from the Environmental Protection Agency highlights that common household methods may reduce surface dirt but fall short in microbial eradication, especially in areas like sofas or mattresses.
A common misconception is that using scented sprays or air fresheners can mask odors and provide a clean feel. However, these products don’t address the root source of mold, bacteria, or dust mites, which thrive within fabric fibers. Overlooking these nuances risks health issues, particularly for allergy sufferers. Incorporate effective sanitizing strategies like steam cleaning or disinfectant-based treatments recommended by professional cleaners, such as those outlined in our germ eradication guide.
Be cautious of the trap where homeowners assume that move-out cleaning is complete after a surface wipe-down. Residual grime and microbes lurk behind baseboards, inside vents, or within upholstery fibers. This oversight can jeopardize deposit refunds or lead to health hazards. Advanced cleaning techniques involve targeting these hidden areas — for example, deep sanitizing of upholstery using methods discussed in our comprehensive upholstery cleaning tips.
What about house cleaning myths that perpetuate inefficient habits? Many think that frequent use of harsh chemical detergents guarantees cleanliness. In reality, overuse can damage fabrics and contribute to indoor air pollution, especially if ventilation isn’t optimal. Instead, opting for eco-friendly, effective cleaning solutions that are safe for both your family and the environment proves more sustainable.
Finally, be wary of the assumption that regular vacuuming alone maintains a healthy home. Embedded allergens, bacteria, and mold spores can persist despite superficial cleaning, particularly in carpets and upholstery. For a truly thorough cleanse, integrating specialized sanitizing routines is crucial. Implementing such advanced practices not only preserves your furniture but also ensures a safer living space.
Are you guilty of any of these misconceptions? Share your experiences below. When it comes to deep cleaning, recognizing and avoiding these pitfalls can make all the difference in achieving a truly healthy environment.
Invest in Reliable Equipment for Effective Cleaning
When it comes to maintaining your upholstery and ensuring a sanitary environment, having the right tools is crucial. I’ve found that high-quality extraction vacuum cleaners, like the RIDGID Wet/Dry Vacuums, offer the power and durability needed for deep-cleaning upholstery, removing embedded dirt and allergens effectively. Their robust motors and adjustable settings allow me to tailor cleaning routines, ensuring long-term results and preventing recurring issues. Predicting future trends, the integration of smart technology into cleaning devices suggests we’ll see more AI-powered vacuums capable of analyzing dirt levels and adjusting suction dynamically, making home maintenance more effortless.
How do I maintain my cleaning tools over time?
Long-term upkeep of your cleaning tools, especially upholstery steamers and vacuum attachments, involves regular maintenance like descaling, replacing filters, and ensuring proper storage. For instance, always rinse your steam cleaner’s boiler after use and allow it to dry completely to prevent mold growth. Also, inspecting hoses and seals periodically can prevent leaks and maintain optimal performance. For comprehensive sanitization, pair your tools with proven cleaning agents from trusted sources, such as our sanitizing methods guide.
Streamlining Routine Maintenance
Establishing a consistent cleaning schedule helps maintain the effectiveness of your tools. Use a daily routine to prevent dirt buildup, and schedule deep cleans every few months. This proactive approach extends the lifespan of your equipment and keeps upholstery looking and feeling fresh. Remember, investing in quality tools today saves time and money in the long run, and embracing newer, technologically advanced tools will make future maintenance even easier.
Upgrade Your Cleaning Arsenal for Better Results
If you’re serious about maintaining pristine furniture, consider tools like the professional-grade upholstery cleaners. These devices offer deeper penetration and sanitization beyond typical household equipment. Regularly updating your toolkit ensures you stay ahead of stains, pet hair, and bacteria, reducing the need for frequent replacements. Stay tuned to emerging innovations—future cleaning solutions are expected to be more integrated with smart home systems, providing automated and optimized maintenance routines.
Don’t hesitate to try out advanced tips like combining a microfiber cloth dampened with a disinfectant spray for quick touch-ups between deep cleans. A well-maintained set of tools is your secret weapon for a healthier, longer-lasting home environment. Visit our contact page for expert advice on choosing the right equipment for your needs.
Lessons That Changed My Cleaning Approach
One of the toughest lessons I learned was that relying solely on regular vacuuming isn’t enough to keep pet hair at bay. Incorporating simple tools like a damp rubber glove made an immediate difference, transforming my cleaning routine from hours of frustration to minutes of satisfaction. I realized that understanding the static and texture interactions between tools and fabrics is key. Also, investing in quality equipment, such as a reliable crevice vacuum, significantly prolonged the freshness of my upholstery. Lastly, consistency beats intense cleaning sessions—regular maintenance prevents pet hair from becoming entrenched, saving me time and effort in the long run.
Tools That Elevate Your Cleaning Game
My go-to toolkit includes a high-quality rubber glove, a sturdy crevice vacuum with attachments, and microfiber cloths designed for upholstery. The rubber glove is inexpensive but powerful—its static charge helps lift pet hair effortlessly. I trust brands like trusted cleaning equipment providers because of their durability and effectiveness. For in-depth techniques, I consult resources such as the ultimate upholstery care guide, which offers expert insights into maintaining a pet-hair-free environment. Combining these tools and knowledge creates a cleaning routine that’s efficient, thorough, and gentle on fabrics.
Embracing the Journey of a Clean, Pet-Hair-Free Car
Taking control of pet hair on your car upholstery isn’t just about aesthetics; it’s about health and comfort. Each effort you put into regular maintenance adds up—preventing allergen buildup and extending the life of your seats. Remember, every small step counts, from quick after-trip wipe-downs to deep weekly cleans. Embrace the learning curve, celebrate your progress, and don’t be discouraged by setbacks. The journey toward a spotless, pet-hair-free vehicle is ongoing, but with the right mindset and tools, it’s entirely achievable. Dive into these practical strategies, and watch your efforts transform your car into a fresh, inviting space for everyone.