
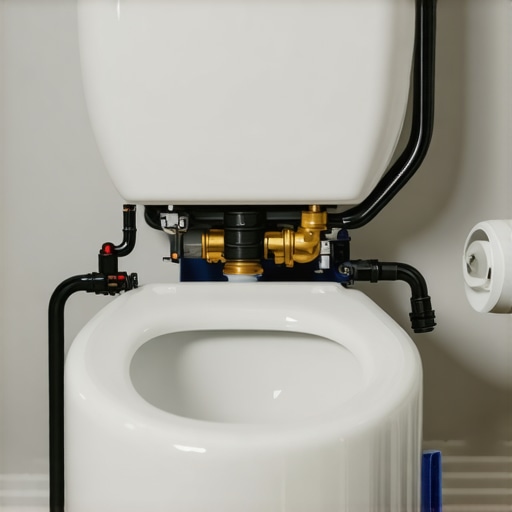
Ever scrubbed every inch of your bathroom, only to miss that one tiny space behind the toilet—and then worry if your landlord will notice? I’ve been there. One move-out, I overlooked that little corner, thinking I’d cleaned it thoroughly. Turns out, a sneaky layer of grime had built up in that hidden nook, and it cost me my deposit. That lightbulb moment made me realize how easy it is to miss areas that seem insignificant but are critical during inspections.
In this post, I’ll share my insights on what to check behind the toilet before you finish your move-out clean. Trust me, knowing these details can make the difference between getting your full deposit or leaving cash on the table. If you’ve ever wondered why some spots get overlooked or how to make sure your cleaning is truly complete, you’re in the right place.
Why Overlooking Hidden Spots Can Cost You More Than Just a Clean Home
Think about it: the back of the toilet is tucked away, often dismissed as a quick wipe. But landlords and inspectors are experts at spotting unseen grime—especially behind those fixtures. According to professional cleaning standards, hidden grime can be a red flag during security deposit inspections, potentially leading to deductions or disputes. Early in my cleaning journey, I made the mistake of rushing past this area, assuming what I couldn’t see was clean enough. But I learned the hard way that these overlooked spots are often the first evidence of neglect.
By paying attention to these hidden areas, you not only ensure a spotless home but also avoid unnecessary costs. So, what exactly should you check behind your toilet? Let’s dive into that next.
Is the Dirt Behind Your Toilet Actually Worth the Extra Effort?
From my experience, the answer is a resounding yes. I used to believe that polishing the visible surfaces was enough. But after finding stubborn stains and buildup in unseen corners, I realized that move-out cleaning is all about covering every detail. This mistake taught me that neglecting small spaces can backfire, especially when your landlord is a stickler or if you want to guarantee your deposit refund. Proper inspection and cleaning behind the toilet have become essential steps for me—less stress and more confidence that I’ve done a thorough job.
To master this crucial step, I recommend checking out comprehensive guides like the [move-out clean checklist](https://spotlesscarpetz.com/move-out-clean-checklist-to-simplify-your-transition). It offers practical tips on tackling those tricky spots and making sure nothing slips through the cracks.
Ready to turn your move-out cleaning from a stressful chore into a confident sweep? Keep reading for the step-by-step methods that will leave you with peace of mind—and your full deposit in hand.
Get Underneath Like a Pro
Start by removing the toilet seat if possible, to access every nook and cranny. Use a rubber glove or a long-handled brush to reach behind and beneath the toilet. Think of it as cleaning the inside of a jar—you need to reach in deep to get all the residue out.
Identify Hidden Dirt Spots
Locate the areas prone to grime buildup, such as the back corner between the toilet and the wall, and the edges where dust and soap scum like to hide. A small mirror can help you see into tight spots; think of it as your cleaning detective tool.
Use the Right Tools
Equip yourself with a designated toilet brush, microfiber cloths, and a disinfectant spray. For hard-to-reach areas, attach a microfiber cloth to a stick or use a long-handled tool. This approach is akin to using a fishing rod—precision and reach are key.
Apply Sanitizing Techniques
Spray disinfectant generously onto all surfaces behind and underneath the toilet. Allow it to sit for several minutes to break down bacteria and grime, similar to letting a marinade do its work before wiping away.
Scrub and Wipe Thoroughly
Scrub the hidden corners with a brush or cloth, focusing on stubborn stains. Don’t forget to clean the bolts and base where dust particles settle. Use a clean microfiber cloth to wipe down the area, ensuring no residue remains. Think of this as polishing jewelry—careful and detailed work yields sparkle.
Final Inspection and Maintenance
After cleaning, perform a visual check with your mirror to ensure no spots are missed. Keep a small hand vacuum nearby for quick cleanup of dust or hair. Regular maintenance prevents grime from accumulating, saving time during move-out inspections and ensuring your efforts pay off.
Practical Tip from My Experience
Once, I overlooked cleaning behind my toilet entirely until I noticed a faint odor during the final walkthrough. I quickly mopped behind and reapplied disinfectant, which eliminated the smell and secured my deposit. This tactic proved that meticulous attention to hidden spots directly impacts results, especially in tight spaces that landlords scrutinize. Mastering this step means fewer surprises and more confidence during move-out day.
Many people assume that house cleaning is straightforward, but in reality, misconceptions can lead to overlooked spots and ineffective sanitation. For example, a widespread myth is that using more cleaning product equals better cleanliness; in truth, overuse can leave residues that attract dirt and bacteria, as highlighted by experts in effective house-cleaning strategies. Another common mistake is believing that household disinfectants eliminate all germs instantly; however, proper contact time and correct application are crucial for maximum efficacy, according to research from cleaning professionals. Moreover, many underestimate upholstery’s role in indoor hygiene, often neglecting the importance of regular deep cleaning to prevent allergen buildup, which can impact health long-term. An even bigger misconception is that move-out cleaning only involves superficial wiping, but thorough attention to detail—such as behind appliances and inside vents—is vital to secure your deposit and ensure a healthy living environment. Do you often fall for these myths? Let’s dig deeper into the nuances that can significantly elevate your cleaning game.
What advanced techniques can really boost your cleaning results and prevent common mistakes?
Experts recommend targeted approaches—like pre-treating stains before scrubbing and using steam cleaning for upholstery—to tackle dirt more effectively. For deeper insights, check out our comprehensive guides on effective house cleaning secrets and move-out strategies. Remember, understanding these hidden nuances isn’t just about appearances; it has real implications for health, hygiene, and your wallet. Next time you clean, think critically about the techniques you use—your home’s cleanliness depends on it. Want tailored advice? Feel free to reach out through our contact page.Maintaining a spotless home over the long term requires the right tools and a strategic approach. I personally rely on equipment that combines durability and efficiency to keep every surface, upholstery, and corner in pristine condition. For instance, my go-to vacuum is the Dyson V11 Torque Drive, which I find indispensable for deep cleaning upholstery and carpets due to its powerful suction and versatile attachments. Its digital display helps me monitor performance and battery life, making regular maintenance a breeze. Similarly, I use a steam cleaner like the Bissell SteamShot to sanitize surfaces without harsh chemicals, which aligns with expert recommendations on effective sanitizing methods for a germ-free home. Steam cleaning not only removes stubborn stains but also kills bacteria, fungi, and dust mites—ultimately aiding in maintaining indoor health long-term.
Lessons That Changed My Move-Out Routine Forever
One of the biggest lessons I learned was the importance of inspecting behind fixtures like the toilet before finalizing my cleaning. Skipping this step almost cost me my security deposit. I also discovered that investing in quality tools, like a long-handled brush and microfiber cloths, makes all the difference. Additionally, I realized that understanding common misconceptions—like the idea that scrubbing superficially is enough—can lead to overlooked grime that landlords will notice. Lastly, practicing regular maintenance rather than just deep cleaning at move-out saves stress and ensures a truly clean home that reflects your true effort.
Tools and Resources That Elevate Your Cleaning Game
For my move-out cleaning, I swear by tools like the Dyson V11 Torque Drive, which handles upholstery and carpets with ease, and the Bissell SteamShot for sanitizing surfaces naturally. I also rely on comprehensive guides, such as the move-out clean checklist, which keeps me on track and ensures I don’t miss critical areas. When it comes to understanding effective sanitizing methods, I turn to trusted professional insights that boost my confidence. These resources have truly transformed my approach from haphazard to methodical, making each move-out tan98r feel rewarding.
Your Next Step Toward Mastering Move-Out Cleanliness
Taking the initiative to thoroughly clean behind and under fixtures isn’t just about satisfying landlord expectations—it’s about pride in your home and confidence in your efforts. Every detail you master adds up to a deposit you’ll get back and a reputation as a responsible tenant. So, why not start today? Equip yourself with the right tools, follow a solid plan, and pay attention to those hidden spots that often go unnoticed. Your fully-refundable deposit is worth it. What part of your move-out cleaning routine has been the most challenging? Share your experiences below—I’d love to hear your story!