
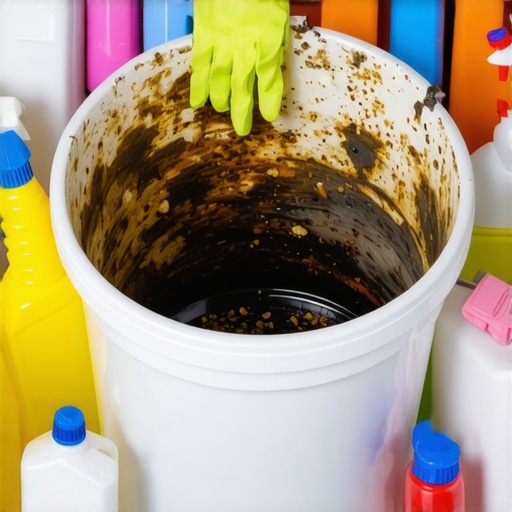
It was a typical Sunday afternoon when I finally peeked inside my trash can—and was hit with a wave of something that resembled a swamp. You know that feeling when you realize there’s a whole world of grime hiding in places you least expect? My eyes widened as I saw the tiny buildup of gunk that had accumulated over weeks, unnoticed but unmistakably gross. That lightbulb moment made me rethink my entire cleaning routine.
We often focus on the visible mess—dust on the shelves, stains on the carpet—but what about the sneaky grime lurking beneath? Today, I promise to share how I finally tackled the grime living at the bottom of my trash can, and how you can do the same effortlessly. Trust me, eliminating this hidden scourge isn’t just about cleanliness; it’s about health and peace of mind.
Why You Should Deal with Trash Can Gunk Before It Takes Over
That grimy buildup isn’t just unsightly; it can breed bacteria, create foul odors, and even attract pests. According to the Environmental Protection Agency, household bacteria can thrive on common surfaces like trash cans, especially if they aren’t cleaned regularly. If left unchecked, this grime becomes a breeding ground for germs that could compromise your home’s sanitation. The good news? Addressing this isn’t complicated, and the results are remarkably satisfying.
Is Your Trash Can Actually Worth the Hype?
Early on, I made the mistake of ignoring my trash can’s interior, thinking a quick rinse was enough. That was until I noticed that no matter how often I emptied it, the lingering smell persisted. I realized I was overlooking a crucial step: deep cleaning the bottom where grime and residue tend to settle and harden. This neglect turned my trash can into a germ factory, something I never imagined during my rushed weekly cleaning routine.
So, if you’re wondering whether tackling this hidden grime is worth your time — spoiler: it absolutely is. Not only does a clean trash can smell fresher, but it also keeps your home safer and more hygienic. Ready to stop the cycle of reeking, bacteria-laden trash cans? Let’s dive into the practical steps to banish that stubborn grime for good.
And if you’re curious about other sneaky spots your home might be hiding germs, check out these sanitizing hacks to keep your house truly safe and clean.
Break Down the Deep Cleaning Process
Whenever I tackle my trash can, I don’t just rinse it out quickly. Instead, I start by removing the bag and dumping any loose debris into the trash. I then take a stiff brush or an old toothbrush and scrub the interior with a solution of hot water and a few drops of dish soap. Think of it like deep cleaning a stubborn coffee mug — you need to get into all the corners and crevices to loosen hardened residues.
Prepping the Solution for Maximum Effectiveness
For tougher grime, I switch to a vinegar and baking soda mixture. Pour half a cup of vinegar into the can, followed by a tablespoon of baking soda—expect some fizzing. This reaction breaks down grease and neutralizes odors. I let it sit for about 10 minutes to work its magic, then use my brush to scrub away the loosened gunk. It’s similar to how a plumber would use a special mixture to clear a clogged drain — patience and the right formula make all the difference.
Focus on the Bottom and Hidden Nooks
The bottom of the trash can is like a forgotten corner in your house, often neglected but full of grime. To reach it effectively, I invert the can and give it a gentle shake to loosen any stuck debris. Then, with a sponge or brush, I scrub along the base and sides. It’s crucial because residue tends to settle and harden there over time. I avoid just rinsing; I want to physically lift out every speck of build-up.
Dealing with Stubborn Residue
If any area refuses to budge, I apply a concentrated spray of multi-purpose cleaner or a disinfectant. I let it sit for a few minutes, then scrub again. Think of it like loosening a cured stain on upholstery — sometimes, a little extra soak and scrubbing is necessary for complete removal. For this step, I often refer to upholstery cleaning tips to understand how different materials respond to cleaning agents.
Rinse and Dry Thoroughly
Once the grime is loosened, I rinse the can with boiling water or a strong stream of hot water if possible. This helps wash away residues and disinfects at the same time. Immediately after rinsing, I dry the interior thoroughly with a clean towel or cloth to prevent new mold or bacteria from taking hold. Comparing it to drying a freshly washed dish — thorough drying keeps everything fresh and prevents future messes.
Apply Odor Control Measures
Finally, I sprinkle baking soda along the bottom, just like you would with a new carpet to absorb lingering smells. For extra freshness, I may add a few drops of essential oil onto the baking soda before placing the trash bag back in. This way, my trash can smells clean and inviting, not rancid or sour. Incorporating odor control acts as the finishing touch, much like the deodorizer sprays used in house sanitizing secrets.
Set Regular Maintenance Routines
To keep grime at bay, I clean my trash cans weekly — a quick rinse and a sprinkle of fresh baking soda. Preventive steps like this stop buildup before it becomes a stubborn chore. Think of it like maintaining a high-touch electronic — regular cleaning prevents bacteria from settling in deeply. Remember, consistency saves effort later, and a clean trash can contributes to a healthier, fresher home environment.
Many homeowners believe they know the basics of effective cleaning, but often, there’s a deeper layer of misunderstanding that can sabotage your efforts. For example, a common myth is that using only surface-cleaning methods suffices for sanitization. In reality, many disinfectants don’t penetrate grime or biofilms, which protect germs from traditional cleaning techniques. According to microbiologist Dr. Charles P. Gerba, bacteria can form resistant layers called biofilms that require specific strategies to eliminate, such as deep scrubbing and the use of EPA-approved disinfectants. This nuance is frequently overlooked, leading to false confidence in superficial cleaning routines.
Another trap homeowners fall into involves move-out cleaning. Many think a quick cleanup is enough to ensure their deposit return, but landlords are increasingly inspecting hidden spots like behind appliances or inside air vents. A thorough approach, like following comprehensive move-out cleaning checklists, is essential. You can find detailed strategies that help you not only clean efficiently but also avoid costly deductions.
When it comes to upholstery, a widespread mistake is disregarding fabric type. Applying harsh chemicals to delicate materials can damage fibers or cause discoloration. The expert advice from the Ultimate Upholstery Care Guide emphasizes testing cleaning solutions on hidden areas first and choosing appropriate methods—steam cleaning for durable fabrics or gentle vacuuming for fragile ones. Failing to recognize these nuances can lead to irreversible damage.
Now, let’s address a question that advanced cleaners and DIY enthusiasts alike often ponder:
How can I effectively sanitize high-touch surfaces without contributing to chemical resistance?
It’s crucial to use disinfectants that are EPA-registered and proven to break down biofilms without over-reliance on harsh chemicals. Incorporating natural solutions like diluted vinegar or increased mechanical action, such as micro-textured cloths, can enhance sanitization while minimizing chemical buildup. As Dr. Gerba notes, overusing disinfectants can lead to resistant strains, making it harder to eliminate germs over time.
Understanding these nuances elevates your cleaning game from routine to professional-level. Incorporate targeted strategies like deep scrubbing, choosing the right cleaning agents for upholstery, and being aware of biofilms to truly achieve a healthy, spotless home. For more expert insights, explore our comprehensive sanitizing methods guide.
Have you ever fallen into this trap? Let me know in the comments.
How to Keep Cleaning Tools Working Like New
Investing in quality cleaning equipment is the foundation of an efficient home hygiene routine. I personally swear by using a high-grade steam cleaner, such as the McCulloch MC1275 Heavy-Duty Steam Cleaner, because it effectively tackles stubborn grime on multiple surfaces without chemicals. Regular maintenance of these devices ensures longevity; for example, after each use, I run plain water through the system to prevent mineral buildup, which can clog components and reduce efficiency. Additionally, replacing filters and descaling tanks periodically helps maintain peak performance, saving you money in the long run. Predicting the future, I believe advancements in Eco-friendly steam cleaning and smart home integrations will further simplify maintaining a pristine environment without increasing effort.
Tools I Recommend for Deep Cleaning Upholstery and Moving Out
For upholstery, a quality wet/dry vac with a built-in upholstery brush, like the Vesency Wet/Dry Vacuum, has revolutionized my approach. It allows me to remove dirt, pet hair, and stains effectively, especially when paired with the Ultimate Upholstery Care Guide. When preparing for move-out cleaning, I rely on a powerful handheld steam cleaner, combined with microfiber polishers, to clean hard-to-reach areas like vents and behind appliances. Using specialized tools ensures the job is thorough, which is essential for getting your deposit back. To keep your equipment in top shape, always follow manufacturer instructions for cleaning filters and storage—it’s a small step that prolongs tool life and maintains cleaning effectiveness.
Maximize Long-Term Results with Proper Maintenance
Long-term home cleanliness hinges on regular upkeep and sensible tool care. For instance, I set a weekly schedule that includes quick rinses of my steam cleaner and replacing worn-out accessories, like brushes and pads. This prevents buildup and preserves their efficacy. Additionally, I keep a log of maintenance tasks to stay consistent. As technology evolves, I anticipate that integrating smart sensors into cleaning tools— alerting users when filters need changing or parts require servicing—will become commonplace, enhancing durability and performance even further.
Keep Your Systems Running Smoothly with Troubleshooting Tips
If your vacuum’s suction diminishes, check the filters and hose for blockages, similarly to how professional cleaners recommend routine checks. For steam cleaners, descaling with vinegar solution (as specified by the manufacturer) prevents mineral deposits. Remember, a poorly maintained tool not only hampers cleaning but also shortens its lifespan, leading to higher replacement costs. Make it a habit to review your equipment’s user manual and schedule preventative maintenance, turning minor issues into simple fixes before they become costly repairs.
Try This Advanced Tip to Boost Your Cleaning Power
One technique I highly recommend is periodically using a <baking soda and vinegar flush> on your vacuum hoses and steam cleaner nozzles. This natural combo dissolves mineral buildup and dislodges debris, restoring optimal airflow and heat transfer. It’s a simple, chemical-free way to keep your tools at peak performance, especially if you notice decreases in suction or steam pressure. Incorporate this tip monthly to extend the life of your equipment and ensure every cleaning session is as effective as the first.
What I Wish I Knew When Tackling Hidden Grime
- Sometimes, the greatest cleaning breakthroughs happen during the simplest tasks—like deep cleaning your trash can—that reveal just how much buildup can go unnoticed but impact your home’s hygiene profoundly. Realizing this was my lightbulb moment, inspiring me to adopt a more thorough approach.
- Ignoring the importance of cleaning hidden spots brewing with bacteria, especially at the bottom of trash cans or behind appliances, is a common mistake. Facing this challenge head-on taught me the value of patience and the power of targeted strategies that make a real difference.
- Deep cleaning isn’t just about fresh scents; it’s about safeguarding your family’s health. The lessons learned from stubborn grime removal, such as using vinegar and baking soda, are skills that translate to many areas of home maintenance, reinforcing the importance of consistency.
My Must-Have Arsenal for Effective Home Hygiene
- A high-quality steam cleaner like the efficient house sanitizing guide has been a game-changer for me, offering chemical-free power to tackle grime on various surfaces. It’s reliable and eco-friendly, fitting seamlessly into my routine.
- Investing in a sturdy cleaning brush and microfiber cloths ensures I can reach every nook, from grout lines to upholstery seams. These tools are trusted by professionals and have helped me maintain spotless results without damaging delicate fabrics.
- Complement your toolkit with natural solutions like vinegar and baking soda—they’re affordable, non-toxic, and incredibly effective against biofilms and stubborn residues. My experience confirms that combining mechanical action with these agents yields the best sanitization outcomes.
Your Next Step Toward a Truly Clean Home
Cleaning smarter means creating a healthier, more inviting environment for everyone. By embracing deep cleaning routines and investing in the right tools, you take control of your home’s hygiene in ways that truly matter. Remember, consistent effort today prevents big messes tomorrow, turning housecleaning from a chore into a rewarding habit. Ready to elevate your cleaning game and enjoy the peace of mind that comes with a pristine space? Dive into these strategies, and let your home shine brighter than ever.
What’s the one sneakiest spot you’ve neglected in your cleaning routine? Share your experiences below—I’d love to hear your stories!
,