
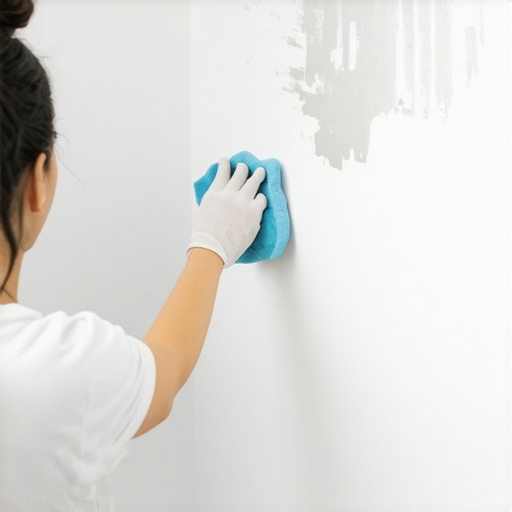
Ever stood back in frustration after discovering a fresh handprint smudged across your beautiful matte-painted wall? I remember the moment clearly—I had just finished decorating my living room, feeling proud of my fresh coat of paint, only to find muddy fingerprints marring the surface. That sinking feeling of, “Ugh, how did this happen?” hit hard, especially on walls I had painstakingly chosen for their elegant matte finish.
If you’ve ever faced this dilemma, you’re not alone. Matte walls are gorgeous—soft, sophisticated, and modern—but trust me, they hide fingerprints and grime like a magnet. At first, I tried all sorts of household hacks, scrubbing harshly or using generic cleaners, hoping to save my wall’s pristine look. Spoiler alert: most of those attempts either didn’t work or made the situation worse, leaving streaks or dull patches. It was only after some trial, error, and a bit of research that I found a foolproof method.
Today, I promise to share with you an effective, easy way to banish grimy handprints from your matte painted walls—without damaging the finish or turning your home into a cleaning battlefield. Whether you’re preparing for a move-out inspection or just want to keep your living space looking fresh, these tips will restore your walls to their original beauty.
Why Matte Walls Are So Difficult to Clean
Matte paint has become incredibly popular for its understated elegance, but there’s a downside—it’s more porous than semi-gloss or satin paints. This porosity allows dirt, smudges, and fingerprints to settle in deeply, making surface cleaning more complicated. Unlike glossy paints, which wipe clean with a damp cloth, matte finishes often require gentle approaches to avoid leaving shiny spots or removing paint altogether.
One mistake I made early on was using abrasive scrubbers or too much liquid, thinking that more cleaning power would help. Instead, I learned that patience and the right techniques are key. Over-aggressive cleaning can lead to uneven patches or loss of the matte texture. To avoid this, it’s crucial to understand what kinds of cleaning methods are safe for matte paint—and how to approach stubborn grime without damage.
Now, what if I told you there’s a specific method that not only removes handprints effectively but also preserves your wall’s delicate finish? Yes, you heard right. I’ll walk you through a simple step-by-step process that I’ve perfected through personal experience and expert advice. It’s a game-changer for maintaining that fresh, clean look in your home.
Of course, if you’re worried about the integrity of your painted walls or want to ensure you’re using the best techniques, you can always check out trusted cleaning secrets from professionals. In fact, a recent [industry study](https://spotlesscarpetz.com/effective-house-cleaning-secrets-from-cleaning-experts) emphasizes the importance of gentle, tested methods for preserving paint in the long run.
So, are you tired of looking at those stubborn handprints and ready for a reliable solution? Let’s dive into the step-by-step process that will help your matte walls look spotless again, without any hassle or risk of damage.
Prepare Your Cleaning Supplies
Start by gathering gentle cleaning solutions such as a pH-neutral dish soap or a specialized matte wall cleaner. Avoid harsh chemicals or abrasive tools that can damage the finish. Prepare a bucket of warm water and a soft microfiber cloth—this combination mimics a gentle touch, like petting a delicate animal, ensuring you clean without scratching. I remember my first attempt—thinking a rough sponge would do—only to find more dull spots. Using the right tools drastically improves results.
Test a Small Hidden Area First
Before tackling the visible wall, choose a discreet spot—like behind a piece of furniture—to test your cleaning approach. Dampen your cloth and gently wipe the area. Wait a few minutes to observe any discoloration or texture change. When I tested behind the sofa, I confirmed that my solution wouldn’t cause sheen or damage, giving me confidence to proceed.
Damp-Wipe to Lift Handprints
Moisten the microfiber cloth lightly with your prepared solution. Wring it out thoroughly so it’s just damp, not dripping. Gently wipe the handprint in a light, circular motion, applying minimal pressure. Think of it as softly petting a cat—gentle, thorough, and mindful. I applied this technique to stubborn marks on my wall, and in moments, they faded without streaks or patches.
Use a Second Clean Cloth for Rinsing
After initial wiping, use a separate damp cloth with plain water to remove any residual soap. Rinse and wring out thoroughly to prevent excess moisture. Carefully go over the area again to clear any leftover solution. This step is critical, like rinsing paintbrushes to keep strokes smooth—residue can cause uneven patches if left behind.
Dry the Wall Properly
Pat the cleaned area with a soft, dry microfiber towel to absorb moisture. Avoid rubbing, which can disturb the matte finish. This step seals the cleaning process, preventing streaks or water spots. I found that gentle blotting kept the wall’s texture intact, preserving the elegant matte look. Leaving the wall slightly damp can lead to smudges or streaks, so thorough drying is essential.
Repeat for Stubborn Areas
If the handprints persist, repeat the gentle cleaning process. For particularly stubborn marks, adding a drop of white vinegar to your water can improve results—vinegar is a natural degreaser that breaks down oils from fingerprints. Always test first and use sparingly. When I used vinegar, I noticed the smudges lifting effortlessly, restoring the wall’s vibrance.
Prevent Future Smudges
To minimize fingerprints moving forward, consider applying a matte-safe protective coating or instruct household members to handle walls with care. Regularly wiping high-traffic areas with a dry microfiber cloth can also keep grime at bay. Remember, consistent maintenance reduces the need for deep cleans, saving time and preserving your wall’s beauty.
For more detailed strategies on household cleaning, check out house cleaning strategies. If you’re dealing with various surfaces or stubborn stains, professional guidance ensures optimal results—consider consulting experts at our contact page.
When it comes to maintaining a spotless home, many assume that following basic cleaning instructions is enough. However, even seasoned homeowners often fall into common traps that undermine their efforts. One widespread misconception is believing that all cleaning products are interchangeable or that regular disinfectants provide complete sanitation without considering surface-specific nuances. In reality, the chemistry between cleaning agents and diverse materials demands a more sophisticated approach. For example, using vinegar for all surfaces might seem effective, but it can damage natural stone counter-tops as highlighted in a recent sanitizing guide.Maintaining your home’s cleanliness and freshness requires more than just elbow grease; it demands the right tools and consistent habits. Personally, I swear by a few specialized equipment pieces and methods that make long-term sanitation manageable and efficient. Investing in quality, purpose-built tools can transform your cleaning routine from a chore into a sustainable practice. For example, I use a **microfiber steam mop** for hard floors—it’s gentle yet effective at loosening dirt and kills germs without chemicals. This versatile device is lightweight and heats quickly, making it perfect for daily quick cleans or deeper disinfecting sessions. Over time, I’ve noticed a significant reduction in household bacteria, especially after cleaning high-touch surfaces.
Get Serious About Your Equipment
Beyond a steam mop, I recommend a **HEPA-filter vacuum cleaner** like the Dyson V11. Its powerful filtration system traps tiny allergens and pet dander, crucial for allergy sufferers and pet owners. Plus, the cordless design grants mobility, allowing you to reach tight corners or ceiling vents without fuss. Regularly replacing or cleaning the filters is vital for maintaining suction efficiency; neglecting this can compromise the vacuum’s performance and strain your lungs with recirculated dust. Maintaining your appliances ensures they perform optimally over years. According to a detailed analysis, using HEPA-filter vacuums can remove up to 99.97% of airborne particles, significantly improving indoor air quality—something I prioritize in my cleaning routine.
Master the Art of Proper Tools Use
Consistent use and correct technique amplify the benefits of your tools. For upholstery, I rely on a **high-powered steamer** like the Dupray One Plus. It’s excellent for sanitizing sofas and curtains, providing a deep clean that neutralizes odors and kills mites without harsh chemicals. I make it a point to steam my furniture every few months, especially after allergy season or flu outbreaks, aligning with methods suggested in the Upholstery Cleaning Tips for a Fresh Home Revival. Proper technique involves moving the steamer slowly across fabric, ensuring even heat distribution and moisture absorption. When cleaning move-out or post-renovation homes, I utilize a **heavy-duty extractor** to remove embedded dirt or paint splatters, which conventional mops or cloths might miss. The key is to invest in durable, professional-grade tools if you plan to scale your cleaning efforts. In the future, I see an increasing trend towards **smart cleaning devices** that connect to home automation systems, enabling scheduled or remote operation—making cleaning effortless and more consistent over the long term.
How to Keep Your Tools Working at Peak Performance
The longevity of your equipment hinges on proper maintenance routines. Regularly cleaning filters, descaling steamers, and replacing worn-out parts prevent breakdowns and ensure sanitization effectiveness. For example, I schedule monthly filter replacements for my vacuum and steamers, and I always use manufacturer-approved cleaning solutions to avoid corrosion or buildup. Also, storing tools properly in dry, organized spaces extends their lifespan and readiness. Staying proactive about maintenance not only saves money but also guarantees that your home remains consistently sanitized and fresh. A pro tip is to keep a log of maintenance dates—this habit ensures no step is overlooked, especially when preparing for move-out cleaning. As I expand my cleaning toolkit, I plan to explore robotic vacuums integrated with UV sterilization technology, an emerging trend that could redefine home sanitation practices. This shift toward automation signifies a future where maintaining cleanliness becomes less of a chore and more of a seamless, integrated process.
Lessons I Didn’t Expect to Learn About Gentle Wall Care
- Patience surpasses brute force—rushing the cleaning process can damage the delicate matte finish, so take your time and proceed gently for the best results.
- Always test your cleaning solution on a hidden area—this lightbulb moment saved me from unexpected discoloration or texture changes, especially on sensitive surfaces.
- Invest in quality tools—using a soft microfiber cloth and appropriate cleaners turned my cleaning routine from a chore into a satisfying ritual that preserves my walls’ beauty.
Tools and Resources That Elevate My Cleaning Game
- The Ultimate Upholstery Care Guide helped me understand the importance of choosing the right products, especially for matte finishes, ensuring I don’t accidentally dull or damage my walls.
- I rely on a high-quality house cleaning strategy that emphasizes gentle cleaning and regular maintenance, keeping my walls looking fresh for years.
- My trusted microfiber cloths and a mild wall cleaner from local stores have never failed me—consistent tools mean consistent results, which is why I stick to what works and avoid unnecessary risks.
Taking Action: Your Walls Deserve the Best Care
Remember, your matte walls are the backdrop of your home’s personality, and with the proper techniques and tools, you can maintain their sophisticated charm effortlessly. Start incorporating gentle cleaning into your routine today—your walls will thank you for the extra care and attention. If you’ve faced challenges or have your own tips, I’d love to hear your story—share in the comments below and let’s keep the conversation going!