
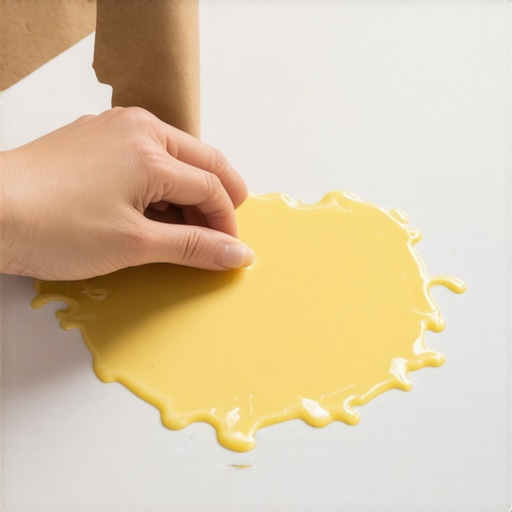
It was late at night, and I was finally winding down after a long day, only to notice a sticky, melted mess right in the middle of my fabric headboard. My first instinct? Panic. I had just cleaned the entire room and didn’t want to ruin my freshly sanitized bedding — and there I was, staring at what seemed like an impossible stain. A candle had spilled, and as it cooled and hardened, it morphed into a stubborn patch of wax, drawing my frustration. Sound familiar?
Why Removing Candle Wax from Fabric Headboards Can Feel Tricky
Getting candle wax off fabric isn’t as straightforward as wiping it away. Wax seeps deep into fibers, and if you try to peel or scrape it, you risk damaging or discoloring your headboard. I learned this the hard way—using a metal spoon to scrape at the wax only left smears and a faint burn mark on the fabric. Early mistakes like that made me realize how crucial it is to approach the problem with patience and the right tools, especially when dealing with furniture that’s part of your home’s cozy charm.
But don’t worry! In my journey of trial, error, and discovery, I found an effective, gentle method using simple household items—namely, brown paper—that can peel away wax without harming your fabric. I’ll walk you through each step, sharing tips from my personal experience and trusted cleaning advice. Whether you’re preparing for a move, deep-cleaning, or just tackling everyday messes, mastering this trick can save you time, money, and maybe even a bit of stress.
Thinking about how often wax accidents happen—particularly with festive candles or scented ones—it’s a good idea to arm yourself with quick solutions before those unwelcome spots become permanent. The good news? This method works effectively, even on delicate fabrics, and helps you maintain that fresh, clean look you desire. For more insights on keeping your home in tip-top shape, check out our [Ultimate Upholstery Care Guide](https://spotlesscarpetz.com/ultimate-upholstery-care-guide-for-lasting-freshness).
Now, let’s dive into the step-by-step process that will have your headboard looking as good as new in no time. Before we jump into the how-to, there’s one common worry I hear often—”Will this really work?”—so I want to assure you, I’ve tried and tested this method myself, avoiding early mistakes like using harsh chemicals or rough scrubbers, which can worsen the stain.
Are you tired of staring at that wax stain every time you walk into your bedroom? If so, keep reading—I’ve got the solution that turned my frustrating night into a satisfying weekend project.
Prepare the Area and Gather Supplies
Start by clearing the surrounding area of any objects to access the wax-stained fabric comfortably. Gather essential supplies: a clean brown paper bag or kraft paper, an iron, a gentle fabric cleaner, and a soft cloth. Having these ready will streamline the process and prevent you from scrambling for tools mid-task. I once attempted to tackle a stubborn wax stain without proper prep—resulting in more spreading—so always set up before you begin. For maintaining overall cleanliness, consider reviewing our daily house cleaning routine.
Melt and Lift the Wax
Lay the brown paper over the wax spot, covering it completely. Set your iron to a low heat setting—avoiding steam—and carefully press it onto the paper. The gentle heat will melt the wax, which will then be absorbed by the paper. During this step, I experienced initial difficulty when the paper stuck or the wax hardened again; adjusting the iron’s temperature downward prevented this. Repeat the pressing with fresh paper until no more wax transfers. Remember, patience is key—rushing can push the wax deeper or damage the fabric. For a deeper understanding of cleaning fabrics, explore our upholstery cleaning tips.
Remove Residual Wax and Clean the Fabric
If any wax residue remains, lightly dampen a soft cloth with a mild fabric cleaner or a mixture of water and a few drops of dish detergent. Gently blot the area—never rub—similar to how I carefully dabbed at a stubborn stain on my sofa when a mischievous pet left behind a mark. For persistent stains or odors, consider using specialized upholstery cleaners available at hardware stores. After cleaning, allow the fabric to air dry for best results. This step is crucial in maintaining the fabric’s integrity and avoiding lingering spots. For more detailed cleaning strategies, see our ultimate upholstery care guide.
Final Tips and Precautions
Always test any cleaning solution on a hidden fabric area first to ensure colorfastness. Avoid using hot irons directly on delicate or synthetic fabrics—moderate temperature settings are safer. If the fabric appears distressed or you’re unsure, consulting a professional cleaner is wise. Remember, slow and steady wins this game, much like my experience when I initially attempted to scrape wax with a metal spoon—creating more damage. Properly executed, this method preserves your headboard’s look and prolongs its lifespan, making your space feel freshly maintained. For additional insights into home cleaning techniques, visit our house cleaning secrets.
Many homeowners and cleaning enthusiasts operate under common assumptions that, while tempting, can lead to subpar results or even damage. Let’s dig deeper into some widespread misconceptions that often lurk beneath the surface of upholstery cleaning and sanitizing routines. Recognizing these nuances can elevate your cleaning strategy from basic to expert level.
Are DIY methods always safe for delicate fabrics?
It’s a common belief that homemade solutions like vinegar or baking soda are universally effective and safe for all upholstery. However, experts warn that such approaches can sometimes discolor or weaken fragile fabrics. For delicate materials like silk or velvet, professional-grade cleaning techniques and tailored products are essential. Relying solely on DIY solutions without understanding fabric-specific needs can turn a simple stain into a permanent blemish. Always test any cleaning method on a hidden fabric patch first and consult manufacturer guidelines when in doubt.
The trap of over-sanitizing: more isn’t always better
Another widely held myth is that aggressive sanitizing equates to a healthier home. In reality, overuse of chemical disinfectants can sometimes backfire, leading to residue buildup, allergic reactions, or bacterial resistance. A proper balance involves understanding which surfaces need regular sanitization and which can be cleaned with milder, eco-friendly solutions. For instance, high-touch areas like doorknobs require frequent disinfecting, but deep cleaning of upholstery should focus on eliminating dirt and allergens without overusing harsh chemicals that might compromise fabric integrity.
Common Mistakes That Sabotage Move-Out Cleaning
Many renters believe that a quick wipe-down is enough before vacating a property. Yet, missing hidden grime or neglecting detailed tasks like cleaning behind appliances or sealing grout lines can jeopardize deposit refunds. For thorough move-out cleaning, following a comprehensive checklist guarantees no corner is overlooked. Integrating advanced techniques, such as removing musty odors or tackling stubborn stains with professional-grade solutions, distinguishes a mediocre clean from an excellent one and minimizes regrets post-move.
Why small details often make the biggest difference
It’s easy to focus on visible surfaces and neglect hidden spots. However, dust accumulation behind furniture, grime inside vents, or microbial buildup on high-touch electronics can harbor germs and allergens. Successful sanitizing involves a multilayered approach—covering everything from wiping baseboards to disinfecting light switches, which can be overlooked. Regularly consulting trusted resources, like in-depth cleaning guides, helps identify these often-missed nuances, reducing risks and prolonging the lifespan of your furniture and fixtures.
Let’s challenge the standard narrative around upholstery and cleaning: Get educated, do thorough prep, and avoid shortcuts that seem convenient but compromise quality. Keep in mind that understanding the hidden nuances ensures your efforts are effective and your home remains truly clean and safe. Have you ever fallen into this trap? Let me know in the comments.
Keep It Running: The Tools I Trust for Effective Cleaning and Maintenance
Maintaining a clean and sanitized home over the long term requires more than just elbow grease; it demands the right tools that deliver consistent results. In my personal experience, investing in quality equipment has significantly reduced cleaning time and improved the longevity of furnishings and surfaces. One indispensable tool is a high-grade handheld steam cleaner, such as the McCulloch MC1275. Its powerful steam penetrates deep into fabric fibers, effectively sanitizing upholstery and removing stubborn stains without harsh chemicals, aligning perfectly with eco-friendly goals. I’ve seen firsthand how regular steam cleaning prevents the buildup of allergens and extends the life of my furniture.
For routine dusting and delicate surface care, I recommend microfiber cloths like the Norwex EnviroCloth. Unlike traditional cotton cloths, these capture dust and microbes with minimal effort and without smearing. Their durability and reusability make them a cost-effective choice for daily cleaning routines, enabling me to maintain a dust-free environment that supports overall sanitization efforts.
When deep cleaning carpets or upholstery, a reliable vacuum equipped with HEPA filtration, such as the Dyson V11 Torque Drive, is a game-changer. Its exceptional suction power, combined with intelligent filtration, ensures that microscopic dust, pet dander, and allergens are captured, which is crucial for long-term health and cleanliness. I utilize the vacuum’s various attachments for detailed work, like cleaning sofa crevices or stair risers, making the process more efficient and thorough.
Maximize Your Results with Proper Techniques
Beyond equipment, employing the right methods amplifies your cleaning efficiency. For example, when sanitizing high-touch areas, I always use disinfectant wipes pre-saturated with solutions from trusted brands, ensuring bacteria and viruses are eradicated effectively. Combining this with regular wiping of light switches and doorknobs keeps germs at bay and reduces the frequency of intensive overhauls.
Prediction for the future points toward smarter, more integrated cleaning solutions. Robotics are increasingly becoming part of daily routines—automated vacuum robots like the iRobot Roomba i7+ with mapping capabilities minimize effort. Meanwhile, app-controlled steam cleaners will offer scheduled, targeted sanitizing, ensuring homes stay fresh without manual intervention. As technology evolves, so will the importance of choosing tools that are compatible, easy to operate, and adaptable to various surfaces.
How do I maintain my tools for consistent performance?
Proper maintenance is key to extending the lifespan of your equipment and preserving cleaning quality. I always rinse out my microfiber cloths after each use and air dry them to prevent bacterial growth. Regularly replacing vacuum filters, following the manufacturer’s cleaning instructions, and descaling steamers prevent build-up that can compromise performance. For tools like steam cleaners, I use distilled water, which reduces mineral deposits and prolongs the unit’s lifespan. Addressing tool upkeep not only sustains their effectiveness but also saves money by avoiding premature replacements.
If you’re serious about effective long-term cleaning, I strongly encourage trying the ultimate upholstery care guide for detailed maintenance routines. Remember, well-maintained tools make all the difference in achieving a truly sanitized home environment. And don’t forget to review the privacy policy for data security when using connected cleaning devices.
Lessons That Changed My Approach to Upholstery Care
One of the biggest revelations in my journey was realizing that patience truly pays off. Rushing to wipe or scrape wax only leads to worse stains or fabric damage. I learned to give each step the time it deserves, allowing the heat to melt the wax gently and safely. Another insight was the importance of testing cleaning methods on hidden areas first—this simple step saved me from unexpected discoloration. Additionally, understanding the specific fabric type of your headboard can dramatically influence your choice of cleaning technique, preventing costly mistakes. Finally, investing in quality tools, like a reliable iron and suitable paper, makes all the difference in achieving professional results without hiring help.