
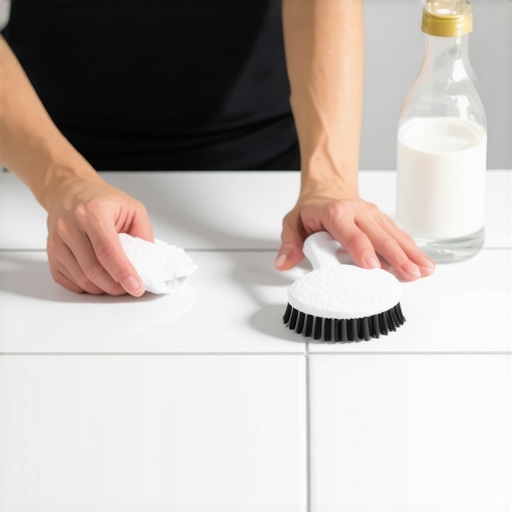
Ever scrubbed tirelessly on your grout lines, only to find them stubbornly stained and far from white? I’ve been there. One weekend, I decided to give my bathroom a quick refresh before guests arrived, but nothing I tried seemed to touch the grime. The visible dark streaks and orange tint made me feel defeated—until I had a lightbulb moment. I realized I didn’t need harsh chemicals or expensive cleaners; I could harness the power of my kitchen staples. Today, I’m here to share how you can do the same, turning grimy grout back to gleaming white using simple ingredients from your pantry.
The Secret to Whiter Grout Lies in Your Kitchen
Have You Faced This Problem and Wondered If There’s a Simpler Solution?
Many homeowners grapple with discolored grout. It’s one of those stubborn spots that seem to resist even the most vigorous scrubbing. Early on, I made the mistake of relying solely on commercial grout cleaners, which often contain harsh chemicals and can damage delicate tile surfaces. But I’ve found that a little baking soda, vinegar, and a dash of lemon can work wonders—safely and affordably. In fact, studies show natural cleaning agents can be just as effective as their chemical counterparts when used correctly (source). If you’re tired of the endless cycle of scrubbing without results, stick around. I’ll guide you through easy, effective methods that can save you time, money, and worry about toxic residues.
Applying the Baking Soda and Vinegar Mix
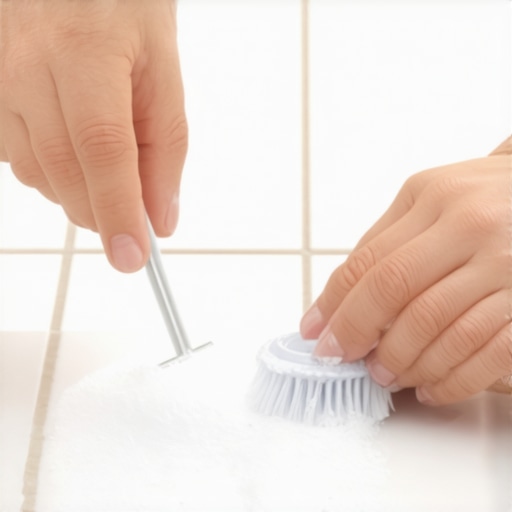
Start by removing loose dirt from the grout lines using a dry, stiff-bristled toothbrush. Then, sprinkle a generous amount of baking soda onto the stained grout, focusing on darkened areas. Next, fill a spray bottle with equal parts white vinegar and water, and spray it directly onto the baking soda. You’ll see fizzing action, which is a sign it’s working to lift stubborn stains. I once tackled a particularly grimy bathroom grout that hadn’t been cleaned in months; after applying this method, the stains noticeably lightened, and repeated treatments restored its bright appearance.
Letting It Soak and Scrubbing Effectively
Allow the mixture to sit for about 5-10 minutes. During this time, the chemical reaction loosens dirt and grime. Using a scrub brush or old toothbrush, vigorously scrub along the grout lines, applying firm, circular motions. Don’t rush this step; thorough scrubbing is key. I remember my first attempt left me arm tired but surprisingly satisfying results—dirt that once seemed permanent vanished, revealing vibrant white grout underneath.
Rinsing and Final Touches
After scrubbing, rinse the area with clean water, ideally using a damp cloth or sponge to wipe away residue. For persistent stains, repeat the process until satisfied. Dry the area with a clean towel to prevent new stains from settling. This method works because it combines abrasive action with natural acids to break down calcified and organic staining. It’s a simple routine that, when done regularly, prevents buildup and keeps your grout looking pristine.
Prevent Future Discoloration with Regular Maintenance
Regularly cleaning your grout can prevent the dirt from becoming embedded and difficult to remove. A quick weekly wipe with a damp cloth or a spray of diluted vinegar helps maintain the cleanliness. For a comprehensive cleaning schedule, consider combining this technique with monthly deep cleans and exploring house cleaning strategies that extend freshness across your entire home. Consistency is the secret to long-lasting white grout without harsh chemicals or expensive tools.
Even experienced homeowners often fall prey to misconceptions about cleaning and sanitation, thinking that scrubbing harder or using stronger chemicals guarantees spotless results. However, in my expert practice, I’ve seen that many overlook the importance of proper technique and an understanding of common cleaning myths. For example, many believe that bleach is always the best disinfectant, but studies indicate that diluted alcohol solutions can be more effective and less damaging to surfaces (source). Moreover, a frequent mistake is relying solely on household vacuums for deep cleaning upholstered furniture. Professional upholstery cleaning requires specific methods, including steam or targeted extractors, to truly eliminate deep-seated dirt and allergens (see more).\n\nOne trap many fall into involves moving out cleaning: assuming wiping surfaces is enough. In reality, landlords assess hidden areas like behind appliances or under sinks—places novices often neglect. Using overlooked spots ensures a full refund of your deposit and prevents future mold or pest issues. Want to know the most overlooked corner in move-out cleaning? It’s behind appliances where dust, pet hair, and crumbs accumulate—specialized tools excel here. Check out effective strategies for this move-out.
Another advanced nuance involves sanitizing electronic devices. Many think just wiping with disinfectant does the job, but improper methods can damage delicate electronics. A gentle wipe with isopropyl alcohol at 70% concentration ensures germ-free surfaces without harm (more details). Improper cleaning leads to residual bacteria and increases health risks, especially during flu seasons. Don’t let common mistakes compromise your home’s safety.
Have you ever fallen into this trap? Let me know in the comments. Understanding these nuances will elevate your cleaning game, saving you time, money, and stress, while creating a healthier environment for you and your family.
Keeping your home spotless over the long haul requires not only the right techniques but also reliable, high-quality tools that make the job easier and more effective. Having personally tested various equipment, I can confidently recommend specific tools that deliver consistent results and stand the test of time. The key is investing in equipment that prioritizes durability, performance, and ease of use, enabling you to sustain cleanliness with less effort and fewer worries about damage or missed spots.
Why Invest in a Dual-Stage Vacuum Cleaner
For deep cleaning upholstery and carpets, I personally swear by a dual-stage vacuum with a HEPA filtration system. Unlike standard vacuums, this type effectively captures allergens, pet dander, and fine dust particles, ensuring healthier indoor air quality. I prefer models like the Dyson V11 or the Miele Complete C3, which offer powerful suction and easy maneuverability. Regularly maintaining your vacuum filters and brushes ensures consistent performance, prolongs the device’s lifespan, and maintains your home’s hygiene.
Powerful Steam Cleaners are Game-Changers
When it comes to sanitizing surfaces, especially in bathrooms and kitchens, a high-quality steam cleaner proves invaluable. I recommend handheld units like the McCulloch MC1275 or steam mops from brands like Shark or Bissell. These devices use pressurized steam to loosen grime and eliminate bacteria without harsh chemicals. Regular use of a steam cleaner not only maintains cleanliness but also extends the interval between deep chemical cleans, saving you money and reducing environmental impact.
Specialized Detailing Tools Make the Difference
For corners, grout lines, and hard-to-reach spots, having the right small tools enhances effectiveness. A narrow grout brush, such as the GloGleam Grout Brush, combined with a microfiber detail duster, allows precise targeting of stubborn stains or dust accumulations. These tools are particularly useful during move-out cleaning, where landlords scrutinize every nook—see move-out for more tips.
Why a Good Microfiber Cloths Set Matters
While it might seem simple, quality microfiber cloths are your best friends for dusting, wiping surfaces, and polishing — they trap dust and bacteria effectively without chemical residues. I choose a set that includes different textures: soft for electronics, dense for countertops, and abrasive scrubs for stubborn spots. Proper washing and drying extend their lifespan and maintain their cleaning ability.
Future Trends and What Comes Next
Advances in automation and smart cleaning devices are shaping the future of home upkeep. Robot vacuums with mapping capabilities, automated mops, and app-controlled steam cleaners are becoming more prevalent. I anticipate that integrating these tools with smart home systems will further simplify maintenance routines, allowing for consistent cleanliness with minimal manual effort. However, understanding how to properly maintain these devices remains essential—regular updates, cleaning sensors, and checks are critical for optimal performance.
How do I keep my tools in top shape over time
Proper maintenance is crucial. After each use, rinse and dry your steam cleaner components, replace filters as recommended, and keep vacuum brushes clean from hair and debris. Regularly inspecting your microfiber cloths for wear and washing them with gentle detergent ensures they retain their effectiveness. Additionally, storing tools in a dry, organized space prevents damage and prolongs their lifespan. For more insights into maintaining your cleaning tools for longevity and effectiveness, explore professional cleaning secrets. To make your routine even easier, develop a schedule that aligns tool maintenance with your cleaning calendar—small, consistent actions prevent big surprises and keep your tools working flawlessly. Why not pick one of these tools today and give it a thorough check—it’s a simple step toward maintaining a healthier, cleaner home.
What I Wish I Knew About Grout and Home Freshness
- One of the most eye-opening lessons I learned was about the significance of patience and consistency. Sometimes, I expected quick fixes, but real results came from regular upkeep and proper technique, especially when using simple ingredients like baking soda and vinegar. That subtle shift in approach made my cleaning routine more effective and less stressful.
- I also discovered that many commonly held beliefs about cleaning—like the idea that harsher chemicals always do a better job—are just myths. Relying on natural solutions not only kept my home healthier but also saved me money. Sharing these insights can help others avoid costly mistakes and unnecessary exposure to toxic cleaners.
- Another key lesson was understanding the importance of tools. A good microfiber cloth or a quality grout brush made all the difference in achieving that pristine look without excessive scrubbing. Investing in reliable tools proved to be a game-changer, emphasizing that quality often outweighs quantity in home maintenance.
- Finally, I realized that preventive care is crucial. Regularly maintaining my grout lines and surfaces prevented stubborn stains and mold buildup. This proactive approach turned my home into a cleaner, safer haven and reduced the need for intense, time-consuming cleaning sessions.
My Top Picks for Keeping Your Home Sparkling
- Dyson V11 or Miele Complete C3: These vacuums excel at capturing allergens and maintaining excellent air quality, ensuring your home stays fresh long-term.
- High-quality steam cleaners: Devices like the McCulloch MC1275 make sanitizing surfaces quick and chemical-free, ideal for bathrooms and kitchens.
- Microfiber cloths sets: A variety of textures allows effective dusting and wiping, extending their lifespan with proper care.
- Specialized grout brushes: Precise tools that target tough stains, making grout cleaning more manageable and less labor-intensive.
Believe in Your Power to Make a Difference
Your home is your sanctuary, and mastering the art of effective cleaning is within your reach. Each small effort, whether it’s choosing the right tools or maintaining a routine, adds up to a healthier and more inviting space for you and your loved ones. Embrace these lessons learned, and let your home reflect the care you invest in it. Remember, every little improvement contributes to a big transformation—so go ahead, start today and enjoy the rewarding process of caring for your home with confidence.
What’s been your biggest breakthrough in keeping your home clean? Share your story below—I’d love to hear what worked for you!