

It was a typical Saturday morning when I caught a glimpse of my window sills—covered in a frustrating, stubborn layer of grime and gunk that refused to come off with regular cleaning. I had just finished a big move-out cleaning session, and that grimy buildup was the last thing I needed to see. Frustration crept in as I realized how much time I’d waste scrubbing those tough spots, feeling like I was fighting a losing battle. Sound familiar? If you’ve ever looked at your window sills and thought, “There’s gotta be a faster way,” then you’re in good company.
Why Your Window Sills Get So Gunked Up and Why It Matters
Over time, window sills accumulate a surprising amount of dirt, dust, pet hair, pollen, and often even mold spores—especially in humid environments. According to the American Lung Association, mold and dust can significantly impact indoor air quality and our health, making it essential to keep those hidden spots clean. But the real challenge isn’t just aesthetics; it’s about preventing long-term damage. Gunk trapped in the crevices can cause wood rot, paint deterioration, and even lead to bigger structural issues down the line. If you’re planning to sell your home or just want a cozy, healthy space, mastering the art of quick, effective cleaning is a game-changer.
So why are window sills so tricky to clean effectively? Well, the buildup often hides in hard-to-reach corners and beneath layers of caked-on dirt. Regular wiping doesn’t cut it, especially when that gunk has hardened over time. I used to think more scrubbing was the answer—until I learned a few simple hacks that cut cleaning time in half.
Are you tired of spending ages trying to scrub away the grime, only to see little improvement? Trust me, I’ve been there. Early on, I made the mistake of using harsh chemical cleaners that left my wood sills damaged or sticky. I also tried toothpicks and old credit cards to reach into corners, which was more frustrating than effective. That’s why I’m committed to sharing quick, safe, and effective methods—so you can tackle those stubborn spots without wasting your whole weekend.
Stay tuned, because next, I’ll walk you through my favorite tips and tricks to get your window sills looking brand new—fast. Ready to say goodbye to that pesky gunk? Let’s dive into the solutions that actually work.
Start with a Good Vacuum and Brush
Before applying any liquid cleaners, remove loose debris using a handheld vacuum or a soft brush. I recall a time when I used an old paintbrush to sweep away dust and pet hair from my window sills — the dust flew everywhere, but it was worth it. Clearing away loose dirt prevents scratching the surface during wet cleaning and ensures more effective removal of grime afterward.
Apply a Gentle Cleaning Solution Properly
Mix a solution of warm water and mild dish soap—think of it as a spa treatment for your sills. Dip a microfiber cloth into the solution, wring it out thoroughly, then wipe down the surface and into crevices. I once struggled with stubborn grime on a neglected sill, but when I switched to a soft sponge soaked in this mild solution, the dirt started lifting easily without harming the wood finish.
Use Tools for Hard-to-Reach Areas
For corners and crevices, employ small tools like a toothbrush or a cluster of cotton swabs dipped in your cleaning solution. This approach works like a charm to get into tiny gaps. I remember cleaning a sill after a move-out, where the corner was caked with dust. A toothbrush helped dislodge dirt from tight spots without scratching the surface.
Tackle Stubborn Grime with Baking Soda
For really tough stains, sprinkle a small amount of baking soda directly onto the grime, then spray with a mixture of equal parts water and vinegar. Let it sit for 5-10 minutes. Think of baking soda as a gentle abrasive that lifts gunk without damaging wood. I once used this method on a heavily stained sill; the stains vanished, restoring its original look with minimal effort.
Rinse and Dry Thoroughly
After scrubbing, wipe again with a clean, damp microfiber cloth to remove any residue. Follow with a dry cloth or towel to prevent water damage or warping—especially important if your sills are wooden. I learned the hard way to dry thoroughly after a cleaning session, as moisture can lead to swelling or mold growth over time.
Optional: Protect Your Sills Moving Forward
Consider applying a thin coat of furniture polish or wood sealant to keep grime from settling in quickly. When I treated my wooden sills with a protective finish, I noticed less dust accumulation and easier cleaning next time. Routine maintenance like this makes sanitation less of a chore and keeps your window sills looking pristine.
Many homeowners believe they know the basics of upholstery and house cleaning, but in reality, there are subtle nuances and widespread misconceptions that can undermine your efforts. Let’s dig deeper into what most people get wrong and how to avoid costly mistakes.
One prevalent myth is that using bleach is always the best way to sanitize fabrics and surfaces. In fact, overusing bleach can weaken fibers, cause discoloration, and sometimes even create a false sense of cleanliness. An expert from the National Sanitation Foundation emphasizes that regular cleaning with appropriate disinfectants tailored to each material yields better results than harsh chemicals applied indiscriminately.
A common trap during move-out cleaning is relying solely on surface wiping, underestimating the importance of deep cleaning hidden spots. For example, grout, window tracks, and behind appliances harbor bacteria and grime that only thorough, targeted cleaning can eliminate. Check out move-out cleaning strategies to ensure nothing gets overlooked.
Many underestimate the importance of proper drying after sanitizing. Not drying damp areas promptly can lead to mold growth—a serious health hazard. This is especially true for upholstery and carpets, where residual moisture can stay trapped, fostering bacteria and mold. Remember, sterilization is only effective if moisture is fully removed.
Advanced cleaners often ask: Why do some disinfectants lose effectiveness over time? The answer lies in contact time and chemical stability. For instance, alcohol-based disinfectants require a certain dwell time to kill germs effectively, but many overlook this step, leaving surfaces inadequately sanitized. For the best results, see expert cleaning tips.
Another mistake is over-application of cleaning products, which can lead to residue buildup, attracting more dirt and reducing the lifespan of upholstery fabrics. Less is often more—using the proper amount of cleaner and allowing surfaces to dry thoroughly enhances longevity and hygiene.
Lastly, many neglect the importance of routine sanitizing over deep cleaning. While deep cleans are essential for scheduled maintenance, daily routines with microfiber cloths and disinfectant sprays build a barrier against germs, making big messes less daunting.
Have you ever fallen into this trap? Let me know in the comments. To stay ahead of these pitfalls, consider consulting experts for tailored advice or professional services, such as professional cleaning that understands the nuanced needs of your upholstery and household surfaces. Remember, informed cleaning practices not only save you time and money but also create a healthier living environment.”}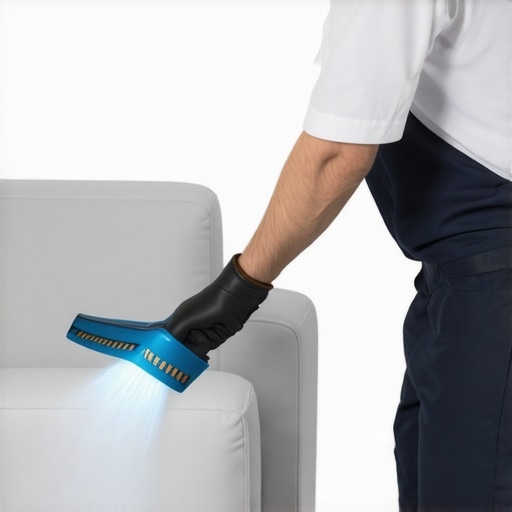 ,To keep your home fresh and your cleaning efforts sustainable, investing in the right tools is essential. Personally, I swear by using a commercial-grade steam cleaner for upholstery—it effortlessly lifts deep-seated dirt and allergens without harsh chemicals, and my furniture stays fresher longer. For instance, the .I carefully select models with adjustable pressure and steam temperature controls, allowing me to customize the cleaning to different fabrics and stains, ultimately extending the lifespan of my upholstery while maintaining a healthy environment. Additionally, a microfiber steam mop is a game changer for hard floors, providing deep sanitization and easy drying, which prevents mold and bacterial growth over time. In move-out cleaning scenarios, I utilize a handheld cordless vacuum with HEPA filtration—lightweight yet powerful—to efficiently remove dust from crevices and under appliances, streamlining the process and reducing physical strain. Looking ahead, trends are shifting towards smarter cleaning devices equipped with IoT connectivity, enabling real-time monitoring of air quality and surface cleanliness, promising even more effective and eco-friendly maintenance routines.
How do I keep my cleaning tools in top shape over time?
Regular maintenance of your equipment ensures optimal performance and longevity. For example, cleaning the brushes and replacing filters in your vacuum every few months prevents reduced suction and allergen dispersal. I also recommend descaling steam cleaners periodically by running vinegar-water solutions through the system—this prevents mineral buildup and maintains optimal heat transfer, ensuring deep sanitation. Investing in high-quality tools might have a higher initial cost, but their durability and efficiency lead to long-term savings and better results. Don’t forget to store your tools properly in a dry, dust-free environment to prevent rust and mold. Reviewing manufacturer guidelines for maintenance routines can be very helpful; for example, Kärcher recommends regular descaling and filter replacement, which I follow diligently to keep my equipment running smoothly for years. To further streamline your cleaning, consider creating a schedule for routine tool maintenance aligned with your cleaning calendar, ensuring your equipment performs reliably when you need it most. Want to dive deeper into maintaining your cleaning arsenal? Reach out via our contact page for personalized advice or professional tips. And for a comprehensive approach, explore strategies in house cleaning strategies for a sparkling home today. To master your routine, try regularly replacing filters and descaling your devices—these simple steps yield long-term benefits for both your equipment and your health.
3 Lessons That Changed My Approach to Upholstery and House Cleaning
First, I discovered that effortless cleaning often comes down to choosing the right tools, like microfiber cloths and quality vacuums, rather than relying solely on harsh chemicals. This realization saved me time and preserved my furniture’s integrity. Second, understanding the importance of routine maintenance, such as regular dusting and prompt stain treatment, prevents grime buildup and extends the lifespan of my upholstery. Lastly, I learned that patience and careful spot treatment are key; rushing can lead to discoloration or damage, so taking your time yields better results every time.
My Top Picks for a Cleaner Home and Happier Pocket
Personally, I swear by the Ultimate Upholstery Care Guide because it offers practical tips rooted in expertise, helping me maintain my furniture’s freshness without pain. For deep cleaning, the secrets from cleaning professionals have transformed my approach, making move-out cleaning less stressful. When it comes to disinfecting high-touch surfaces, utilizing effective sanitizing methods ensures safety, especially in busy households. These resources have become my trusted companions in creating a healthier environment.
Keep Moving Forward: Your Upholstery and House Cleaning Adventure
Embracing these lessons and resources fuels my confidence to tackle any cleaning challenge. Remember, consistency and proper technique are your allies in maintaining a gorgeous, healthy home. Don’t wait for stubborn grime to take over—start applying these insights today, and enjoy the satisfaction of a truly clean space. Every small step brings you closer to a home that mirrors your care and effort.
What’s been your biggest breakthrough in upholstery or house cleaning? Share your story below and inspire others to elevate their cleaning game!