
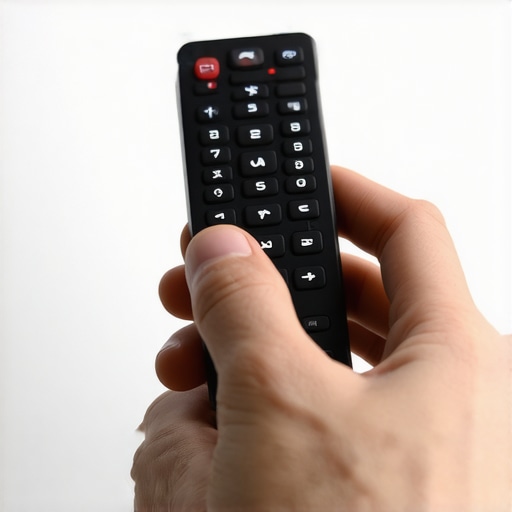
Have you ever watched helplessly as water droplets seeped under the tiny buttons of your remote control during cleaning? I have, and let me tell you, nothing ruins the moment quite like the panic of realizing you’ve just soaked your favorite device. One weekend, after a particularly ambitious attempt to clean my living room remote, I ended up with a soggy button cluster and an electronics panic attack. It was then I realized there had to be a smarter way to sanitize without risking permanent damage.
Why It’s So Tricky to Clean Your Remote Safely
The challenge with cleaning remotes and other small electronics is balancing thorough sanitation with the delicate nature of their components. Liquids can easily trickle beneath buttons, causing internal corrosion or short circuits—problems that are costly and frustrating. Since remotes are often touched by multiple people, from kids to guests, they harbor bacteria and germs. According to the CDC, high-touch surfaces like remote controls are hotspots for germs, making regular cleaning essential. But what’s the secret to effective sanitation without water everywhere?
Is Trying to Clean Your Remote a Waste of Time?
Maybe you’re skeptical, thinking, “Is there really a safe way, or am I destined to keep scrubbing with questionable results?” I was once guilty of using too much liquid cleaner, thinking it would do the job faster. That mistake nearly wrecked my remote and left me more frustrated than ever. The key is understanding that not all cleaning methods are created equal—and that applying the right technique can save your device and your sanity.
In this post, I’ll share my proven tips for sanitizing your remote control without any risk of water or liquid damage, proven through personal trials and expert advice. So if you’ve faced the same dry-swallowing fear of water slipping under the buttons, stay tuned. We’re about to turn your cleaning frustration into a simple, safe routine that keeps your devices germ-free and fully functional.
Choose the Right Tools for a Quick Sanitize
To avoid water seeping into your remote and causing internal damage, use microfiber cloths dampened with isopropyl alcohol (at least 70%). I once used a soggy paper towel, which resulted in water trickling under the buttons—lesson learned. Microfiber is gentle yet effective, absorbing minimal liquid and evaporating quickly, making it perfect for electronics. Have a spray bottle ready with alcohol and a clean cloth before starting.
Apply and Wipe Carefully
Spritz your microfiber cloth lightly with alcohol, avoiding over-saturation. Gently wipe the remote’s surface, paying special attention to high-touch areas like buttons and side grips. Avoid dripping or pouring liquid directly onto the device, which mirrors the common mistake of using too much cleaner during move-out cleaning and risking water damage. Remember, less is more—think of it like cleaning a delicate glass ornament rather than scrubbing a stubborn stain.
Focus on the Buttons and Crevices
Buttons and gaps harbor germs and need extra attention. Use a soft brush or a cotton swab dipped lightly in alcohol to reach into tight spaces. This method is akin to deep cleaning upholstery, where targeted tools lift grime from small corners. I once used a toothpick dipped in alcohol to clean between the remote’s buttons, which worked surprisingly well without risking seepage. This step is crucial to ensure a thorough sanitization that kills germs on contact.
Allow Proper Drying Time
Once wiped, let the remote sit untouched for at least five minutes to allow any residual alcohol to evaporate. Do not press buttons immediately afterward, as moisture trapped beneath might cause issues. During my last cleaning session, I learned that patience is key—rushing resulted in sticky buttons the next day. Proper drying ensures your controls remain fully operational and germ-free, without residual moisture becoming a hidden hazard.
Avoid Harsh Chemicals and Excessive Liquids
Steer clear of bleach, abrasive cleaners, or too much liquid, as these can deteriorate plastic or seep into internal components. This aligns with upholstery cleaning tips that emphasize the use of gentle, appropriate products. Remember, your goal is to disinfect without damaging, much like how careful move-out cleaning protects your deposit. If in doubt, consult the device manufacturer’s cleaning guidelines or visit effective sanitizing methods.
Use Disinfectant-Specific Wipes for Convenience
For a quick and safe option, choose disinfectant wipes made for electronics. They are pre-moistened with the right amount of agent, reducing the risk of excess liquid. I tested these on my remote after a family gathering, and the process was swift, leaving no residue or moisture. These wipes also eliminate germs on contact, providing peace of mind during flu season or allergy relief periods. Just ensure they are alcohol or EPA-approved for electronics to prevent damage.
Integrate Regular Maintenance into Your Routine
Schedule weekly quick cleanings using these methods to keep germs at bay. Similar to a daily house cleaning routine, this practice prevents buildup and extends the life of your remote. Over time, I noticed my devices stayed cleaner and smelled fresher, with less grimy residue accumulating. If you want your entire home to stay sanitized, check out daily cleaning routines for tips on maintaining a healthy environment.
Final Tips for Water-Free Safe Sanitizing
Always avoid pouring liquids directly onto electronics. Use minimal moisture, and opt for proven disinfectants like alcohol-based wipes or sprays. Remember, patience and proper tools are your best allies—just like with upholstery or move-out cleaning, where precision prevents damage and ensures thorough sanitation. When in doubt, consulting professional cleaning guides or experts can save time and money, keeping your gadgets as safe as possible.
Many property owners and tenants believe that general cleaning practices are sufficient for move-out sanitation or upholstery maintenance, but this assumption can lead to costly mistakes. One prevalent myth is that using harsh chemicals or abrasive scrubbing effectively kills all germs and restores furniture to a pristine state. However, overusing strong cleaners can damage delicate fabrics and surfaces, reducing their lifespan and risking residue buildup. Experts emphasize the importance of tailored approaches, such as selecting appropriate cleaning agents and techniques suited for specific materials, which not only protect your investments but also ensure thorough sanitation. Another common trap involves neglecting hidden zones, like the undersides of furniture or behind appliances, which harbor accumulated dirt, mold, or bacteria, potentially causing health issues or failing inspections. Additionally, many overlook the significance of proper drying after cleaning, especially in upholstery. Moisture trapped within cushions or fabric fibers encourages mold growth, degrading the material and introducing unpleasant odors. An advanced mistake that often trips up even seasoned cleaners is assuming that all disinfectants are equally effective against every pathogen. For example, some disinfectants may lack efficacy against specific viruses or bacteria if not applied according to manufacturer instructions. Consumer reports and studies, such as those by the CDC, highlight the importance of selecting EPA-registered disinfectants for reliable germ eradication. During move-out cleaning, it’s tempting to rush through tasks, but an overlooked step like thorough agitation—using brushes or vacuuming before applying cleansers—can significantly enhance results. Skipping this step leaves residues and dirt intact, diminishing the cleaning’s effectiveness. To elevate your cleaning game, consider integrating professional tips, like the ones shared in our [move-out cleaning strategies](https://spotlesscarpetz.com/move-out-cleaning-strategies-to-secure-your-deposit), which stress attention to detail and material-specific approaches. Remember, mastering move-out sanitation isn’t about harder scrubbing but smarter techniques—embracing nuanced methods ensures your property looks its best and passes inspection without issues. Have you ever fallen into this trap? Let me know in the comments.
Keep It Running: Essential Tools I Trust
Maintaining a pristine home or sanitized workspace requires the right equipment. Over the years, I’ve refined my toolkit to ensure efficiency and longevity. One indispensable tool is the Microfiber Cloth. I exclusively use high-quality, lint-free microfiber because it captures dust and grime effectively without scratching surfaces. For stubborn spots, I rely on the Electric Steam Cleaner—a game-changer for upholstery and tile deep cleaning—because it disinfects without chemicals and shortens cleaning time. When disinfecting electronics or delicate items, I reach for Isopropyl Alcohol (70% or higher), stored in a spray bottle with a fine nozzle for controlled application. These tools enable me to keep my spaces germ-free with minimal risk of damage.
Streamlining Cleaning with Software and Checklists
Automation and organization are crucial for consistent maintenance. I utilize apps like digital checklists to schedule regular tasks, from move-out cleaning hacks to daily routines. These reminders prevent me from neglecting or overdoing cleaning sessions. Additionally, specialized cleaning software helps to track supplies and suggests optimal intervals for chores, ensuring that no area is overlooked. Incorporating these systems saves time and maintains a higher standard of cleanliness over the long term.
How do I maintain my cleaning arsenal over time?
Regularly inspecting your tools is vital. For instance, washing microfiber cloths after each use prevents bacteria buildup, while replacing worn-out brushes ensures effective scrubbing. I recommend investing in quality equipment upfront; though more expensive initially, durable tools like stainless steel scrub brushes or professional-grade vacuums last longer and perform better. Keeping your tools in a dedicated, organized storage space speeds up your routine and minimizes misplacement. Remember to follow manufacturer guidelines for maintenance — for example, descaling steam cleaners or replacing filters in vacuums—to sustain their performance. By cultivating a habit of regular maintenance of your equipment, you guarantee the continued effectiveness of your cleaning efforts and extend the lifespan of your investments.
The Future of Home Maintenance Technology
Looking ahead, smart cleaning devices integrated with IoT (Internet of Things) capabilities are poised to revolutionize household sanitation. Imagine robotic vacuums that recognize high-traffic areas or smart spray systems that dispense disinfectants automatically based on usage patterns. The evolution of AI-powered cleaning tools promises to deliver even more personalized and efficient maintenance routines, reducing manual effort while increasing effectiveness. To stay ahead, I suggest experimenting with current smart gadgets and integrating them into your cleaning schedules. For in-depth insights into future trends, explore advanced sanitizing methods.
Take Action and Elevate Your Routine
One expert tip worth trying today is to implement a monthly equipment check. Examine each tool for wear and tear, clean cleaned items thoroughly, and replace parts as needed. This proactive approach prevents unexpected breakdowns and ensures your tools remain effective, ultimately saving you time and money. Start by testing this simple step and experience how it transforms your long-term maintenance practices. For more tailored advice, contact us through our contact page and let us help you craft a personalized cleaning maintenance plan that keeps your home spotless and your tools in top shape.
What I Wish I Knew Before Drenched My Remote
- One of the toughest lessons I learned was that even a tiny drop of liquid can permanently damage a delicate electronic device. Patience and precise tools are essential to avoid costly repairs.
- I’ve realized that shortcuts—like spraying straight onto surfaces—often lead to unintended water seepage. Instead, a damp cloth with alcohol does the job safely and effectively.
- The importance of understanding manufacturer guidelines became clear after I accidentally voided my warranty by using harsh chemicals. Knowing what your device can handle saves time and money.
- Deep cleaning isn’t about aggressive scrubbing; gentle, targeted methods yield better results without risking internal damage.
- Consistent routine maintenance and smart tools keep gadgets germ-free and fully functional longer than sporadic, reckless cleaning.
Tools That Changed My Approach to Safe Sanitizing
- High-quality microfiber cloths—I trust their ability to pick up grime with minimal liquid, making them perfect for electronics like remotes. Check out our upholstery care guide for more tips.
- 70% isopropyl alcohol in spray bottles—precise and fast-evaporating, this keeps my devices clean without water seepage. It’s my go-to for electronics.
- Small, soft brushes and cotton swabs—reach into crevices without pushing moisture or debris deeper. They’re a small but mighty part of my routine.
- Disinfectant wipes designed for electronics—quick, safe, and effective for on-the-go sanitizing, especially during flu season. Just ensure they’re EPA-approved for electronics.
Your Next Steps to Confidently Clean Gadgets
The journey to perfect, water-free sanitization is ongoing, but don’t let fear hold you back. Small, informed steps—like using the right tools and methods—can transform your routine from stressful to satisfying. Remember, protecting your devices extends their life, keeps germs at bay, and gives you peace of mind. Why not try incorporating these insights into your next cleaning session and share your experience below? Your journey to safer, smarter sanitizing starts today!