
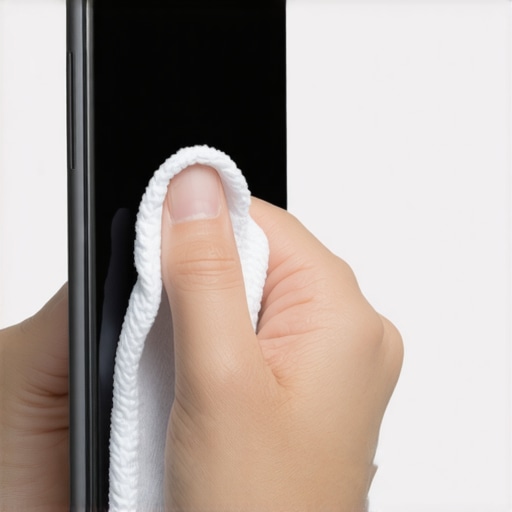
One afternoon, I smudged my phone screen with a greasy finger, grabbed a rag, and started wiping wildly—only to scratch the surface and leave streaks that looked even worse than before. That moment was my lightbulb awakening. I realized I’d been treating my phone like a kitchen countertop—spraying and rubbing without a second thought, risking damage to its protective coating. Has that ever happened to you? It’s frustrating, isn’t it? But here’s the good news: I’ve since learned how to sanitize my device effectively without compromising its finish, and I want to share those insights with you.
Why Your Phone Deserves Gentle Care and Precise Techniques
Our smartphones are our constant companions—handling calls, messages, photos, and even your favorite daily apps. They’re covered with bacteria and dirt, and any neglect can lead to germs spreading or your device malfunctioning. According to a study by the University of Arizona, phones can harbor more bacteria than a toilet seat—seriously. But the challenge isn’t just cleaning; it’s doing so without damaging the delicate protective coating. Early on, I made the mistake of using harsh chemical sprays that seemed effective but eventually left my screen with dull spots. That’s when I started digging into safer methods, and now I keep my phone spotless without a hitch. Want to preserve your device’s clarity and protect its coating? Stick with me—this will change how you think about sanitizing electronics.
Is Using Isopropyl Alcohol on Your Phone Screen Risky?
This was my biggest skepticism at first—can a simple wipe with alcohol really do the job without harm? Turns out, yes, but only if done correctly. I used to spray alcohol directly on my screen, thinking I was disinfecting thoroughly. Big mistake. Over time, I noticed tiny cloudiness and fading coating. I learned that early in my cleaning attempts, and many folks fall into the trap of believing more chemical means better cleaning. But as with many cleaning methods, moderation and technique matter. I now use a well-diluted solution and a soft cloth—saving my screen’s protective layer and keeping it looking brand new. Curious about the best practices? Keep reading, and I’ll walk you through the proven, safe way to sanitize your phone screen.
Ready to give your device a gentle, effective cleanse? Let’s dive into the practical steps to get it right, so your phone stays pristine and protected. For more tips on maintaining your gadgets during daily routines, check out our daily cleaning routine guide.
.
Prepare Your Workspace and Materials
Start by clearing a clean, flat surface in a well-lit area. Gather a soft microfiber cloth, isopropyl alcohol diluted to 70%, distilled water, and a small spray bottle. I remember once trying to clean my phone in a cluttered kitchen counter with the wrong tools—it only led to more smudges and accidental slips. Setting up your space ensures precision and prevents cross-contamination. Use a dedicated container for your cleaning supplies to keep everything organized and ready.
Dilute Your Isopropyl Alcohol Correctly
Mix 70% isopropyl alcohol with an equal amount of distilled water in your spray bottle. This concentration is proven to kill most germs without damaging coatings. I once attempted to use pure alcohol, which caused my screen to develop a dull haze after a few weeks. Proper dilution is key—think of it as using the right spice in a recipe; too much can ruin the flavor, or in this case, your device’s coating. Label your bottles clearly to avoid confusion in future cleanings.
Apply the Cleaning Solution Safely
Spray the diluted alcohol onto your microfiber cloth—never directly onto your phone. Gently wipe the entire surface, paying special attention to edges and corners. Remember when I once sprayed directly, and a drop sneaked into the charging port? It took days to dry and caused temporary glitches. Using a damp cloth minimizes risks and ensures even coverage. Be thorough but gentle—avoid pressing hard to prevent damage or micro-scratches.
Use Proper Techniques for Different Components
For screens, use light, circular motions, similar to polishing a gemstone—this keeps the coating intact. For phone cases, especially those made of silicone or rubber, a slightly firmer wipe helps remove stubborn dirt. If your device has buttons or speakers, use a dry, soft brush or compressed air to dislodge debris, rather than moisture. I recall trying to scrub stubborn stains with a rough cloth—resulting in scratches. Always adjust your method based on components, acting like a surgeon choosing perfect instruments for delicate work.
Allow Proper Drying Time
Let the device air-dry completely for at least five minutes before turning it on or plugging in. I once rushed to use my phone immediately after cleaning, and the residual moisture caused a brief malfunction. Think of this step as letting paint dry—patience preserves the finish. Avoid using towels or tissues, which can leave lint or micro-abrasions. If you want to speed up the process, hold your device in a warm, dry place, but never expose it to direct sunlight or high heat.
Verify and Repeat if Needed
Once dry, inspect your device for streaks or missed spots. If needed, repeat the process with a fresh cloth and diluted alcohol. Regular cleaning every 2-3 days is ideal to maintain hygiene without risking coating damage. Remember, cleaning is like maintaining upholstery—consistent but gentle care keeps your device looking and functioning like new. For additional tips, visit our effective sanitizing techniques.
Additional Tips for Other Electronics
Never apply alcohol to porous materials like wooden phone cases or leather covers—use specialized cleaners instead. For high-touch electronics like tablets or earbuds, follow similar steps, adjusting spray amounts accordingly. Think of each device as unique fabric or material; customize your approach to prevent damage. If you want to ensure thorough sanitation, explore our sanitize for house transitions guidelines, which include electronics care.
Mastering these techniques combines safety, efficiency, and preservation of your device’s longevity. Proper steps ensure your gadgets remain germ-free and visually pristine, making daily hygiene effortless and stress-free.
While common cleaning advice emphasizes using hefty chemicals or high-tech gadgets, many people overlook nuanced pitfalls that can undermine their efforts. For instance, a prevalent misconception is the belief that scrubbing harder yields better results. But in reality, aggressive scrubbing, especially on delicate surfaces like upholstery or high-gloss finishes, can cause micro-abrasions, dulling the appearance and shortening the material’s lifespan. This is supported by research from the Journal of Nature Scientific Reports, which highlights how abrasive cleaning methods accelerate surface degradation.
Are You Treating Your Furniture and Surfaces Wrong?
A common myth suggests that heavy disinfectants are the ultimate solution for a germ-free home. However, overusing such chemicals—notably bleach and ammonia—can lead to residue build-up and surface damage, especially on upholstery or laminated surfaces. Instead, gentle, targeted cleaning following expert guidance (see our upholstery care tips) preserves both hygiene and material integrity. Remember: Knowledge of material composition is key to choosing the correct cleaning method, a nuance often ignored by DIYers.
Another subtler mistake involves neglecting to pre-vacuum or dust surfaces before applying liquids or sprays. This oversight can turn dirt into an abrasive paste, scratching surfaces during wipe-downs. Advanced cleaners understand that dry debris acts like sandpaper, dulling or damaging the item’s finish over time. For a comprehensive routine that minimizes damage while maximizing cleanliness, consider adopting a layered approach—dust first, then clean, then disinfect. Find more about this in our professional cleaning secrets.
What About Move-Out Cleans and Tackle the Hidden Hazards?
Many moving-out tips focus on superficial tidiness but miss critical hidden grime, particularly under appliances and in corner crevices. Neglecting these spots can result in lower inspection scores and deposit deductions. An advanced mistake is assuming that typical mops and sprays suffice; in reality, specialized tools like steam cleaners or ultrasonic devices can access hard-to-reach areas without chemical residue. Moreover, many renters fall into the trap of rushing and avoiding adequate drying times, which can promote mold or mildew growth later on.
Ultimately, a decisive advantage in effective cleaning stems from understanding the materials involved and the best practices tailored to each surface. For upholstery, wood, tile, or electronics, specific care methods prolong lifespan and ensure thorough sanitation. Visiting our upholstery cleaning tips and move-out cleaning hacks can boost your expertise.
Remember, the devil’s in the details. From choosing the right cleaning agents to avoiding micro-scratches, mastering these nuances ensures your home remains pristine and damage-free. Want to deepen your understanding? Dive into our house cleaning secrets from experts. Have you ever fallen into this trap? Let me know in the comments.
Keep It Working: Essential Tools for Effective Cleaning and Maintenance
When it comes to maintaining a pristine home or ensuring the longevity of your devices, having the right tools at your disposal makes all the difference. I personally swear by a few specialized items that elevate my cleaning routine from average to professional-grade. Let’s start with microfiber cloths—these are non-negotiable for me because they trap dust and dirt effectively without scratching surfaces. I prefer the ultra-soft, lint-free variants from brands like Genuine Microfiber Co., which I use for everything from electronics to upholstery. Instead of generic sprays, I opt for a digital ultrasonic cleaner for small electronics and jewelry, which I’ve found remarkably effective at removing deep-seated grime without harsh chemicals, as supported by research from Ultrasound Technology.
For larger surfaces and move-out cleans, I rely on a steam cleaner with multiple attachments. Not only does steam kill germs effectively, but it also dissolves grease and grime without chemicals, aligning with future cleaning trends towards eco-friendly solutions. My personal favorite model is the Bissell PowerFresh, which offers adjustable steam levels and a variety of tools for different surfaces. It’s a game-changer for tackling stubborn spots on tile, grout, and even upholstery, and it reduces the need for chemical cleaners, which can deteriorate surfaces over time. Incorporating tools like these into your routine ensures consistent, high-quality results that preserve your home’s integrity.
How do I maintain sustainable cleaning over time?
Developing a routine with high-quality tools helps reduce the need for harsh chemicals and minimizes wear and tear. For example, I set aside weekly sessions dedicated solely to microfiber wipes and steam cleaning. This consistency not only keeps my environment hygienic but also extends the lifespan of surfaces and appliances. As technology advances, I predict a rise in smart cleaning devices—automated vacuum robots, app-controlled steamers, and AI-powered air purifiers—that will make maintenance even simpler. Staying ahead means investing in reliable equipment now, so you benefit from long-term savings and a healthier home.
How to Keep Equipment in Peak Condition
Proper maintenance of your cleaning tools is crucial for sustained performance. For microfiber cloths, I recommend washing in hot water without fabric softeners—these hinder their dirt-trapping ability. My ultrasonic cleaner requires regular descaling with vinegar or specialized cleaning solutions, following the manufacturer’s instructions, to prevent buildup that could reduce efficacy. Steam cleaners benefit from frequent emptying and cleaning of water tanks, and replacing filters as needed. I make it a habit to schedule bi-annual deep cleans of my appliances to ensure they operate efficiently, similar to tuning a vehicle for optimal performance. Doing so prevents costly repairs and keeps your cleaning routines effective.
If you prioritize these practices and invest in top-tier equipment, your cleaning efforts will resist the test of time, keeping your home spotless and your devices functioning flawlessly. Don’t forget to check out our expert cleaning secrets for more insights on maintaining a healthy environment. Give one of these advanced tools a try this week—a small investment that yields big results—and notice the difference in your home’s cleanliness and longevity.
Lessons I Learned the Hard Way About Sanitizing and Move-Out Cleaning
One of my most eye-opening moments was realizing that aggressive scrubbing often causes micro-scratches, which dull surfaces over time. Experience taught me that patience and proper technique trump brute force—gentle wiping preserves the finish and prolongs the lifespan of your belongings.
I’ve also discovered that trusting the wrong cleaning tools can do more harm than good. Using abrasive brushes or harsh chemicals without understanding the material can lead to irreversible damage, especially on delicate upholstery or electronics. Investing in quality tools and learning their proper use has been a game-changer.
Finally, consistent routines matter. Skipping regular maintenance allows grime and bacteria to build up in hidden crevices, making deep cleaning more daunting later. Developing a regular, mindful cleaning schedule keeps your space and devices in pristine condition, saving you time and stress in the long run.
My Top Resources for Cleaning Wisdom and Tools
I highly recommend the expert cleaning secrets guide—it offers practical tips that have transformed my routine. For tools, I trust microfiber cloths from Genuine Microfiber Co. for their durability and effectiveness. My steam cleaner from Bissell has helped me tackle stubborn stains without chemicals, aligning with eco-friendly practices. Lastly, I keep an ultrasonic cleaner handy for small electronics, which provides a deep clean while gentle on sensitive components.
Your Next Step Toward a Cleaner, Safer Home
Embarking on your cleaning journey might seem daunting, but remember—every small step counts. Prioritize gentle techniques, invest in the right tools, and establish regular routines to keep your home and devices in excellent shape. Believe in your ability to create a healthier environment—your future self will thank you. Ready to transform your cleaning approach? Share your experiences or ask questions below—I’m here to help make your cleaning efforts more effective and enjoyable.