
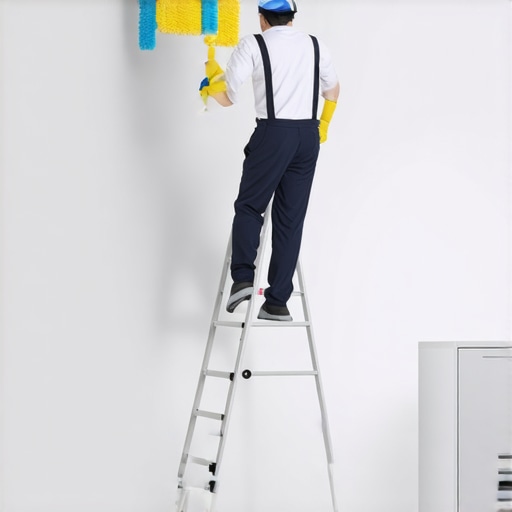
It happened again. I was frantically cleaning my living room before guests arrived, and I yanked on the curtains in a hurry. Suddenly, a cascade of dust and pet hair drifted down onto my freshly vacuumed rug. That unmistakable sinking feeling hit me—that I had missed a crucial step in my cleaning routine. It dawned on me that I’d overlooked a simple but powerful technique I’d seen professional cleaners swear by for years: starting from the top.
Why Starting from the Top Makes All the Difference
When I first learned that pros always tackle ceilings, high shelves, and corners before moving downward, I thought it was just a matter of convention. Turns out, it’s a game-changer. Cleaning from the top down ensures that dust, cobwebs, and airborne allergens don’t fall onto surfaces you’ve already cleaned. This approach not only saves you from re-cleaning the same spots but also creates a healthier, more refreshed environment. Over time, I noticed fewer allergies and a lighter atmosphere in my home because of this small but mighty habit.
But why is this step so often overlooked? Many of us are eager to see immediate results, so we dive straight into mundane chores like sweeping or mopping. The problem is, this shortcuts the process and actually makes your cleaning less effective. I used to chase dirt across the floor—only for it to resettle from ceiling dust particles later. Integrating the habit of starting at the highest points transforms the way I clean, and it can do the same for you.
If you’re tired of redoing work or battling stubborn dust, sticking to a top-first routine is your shortcut to a cleaner, healthier home. Want to discover more effective strategies? You might want to peek into expert cleaning secrets that go beyond basic routines.
Is the Hype About Top-Down Cleaning Just a Trick?
Early on, I made the mistake of dismissing this method as overhyped. I thought, “How much difference could it possibly make?” Well, after a few weeks of ignoring it, I realized I was constantly battling dust that kept settling on my freshly cleaned surfaces. It was embarrassing—and eye-opening. Now, I swear by it. This simple habit is backed by cleaning professionals who understand that dust naturally settles downward, and cleaning in reverse just spreads it around.
So, have you faced this frustrating problem—that lingering dust that reappears shortly after cleaning? If so, the solution may be simpler than you think. Let’s explore how to make the most of this tip and revolutionize your cleaning routine.
Start with the Ceiling Fixtures and High Surfaces
Seal the deal by removing dust and cobwebs from the ceiling fans, light fixtures, and crown moldings. Use an extendable duster or microfiber cloth to reach those high spots without climbing on unsafe chairs. For stubborn grime, lightly dampen the cloth with a mixture of warm water and a few drops of mild detergent. Moving these first prevents dust from falling onto freshly cleaned surfaces below, saving you effort and time.
Clean High Shelves and Wall Decor Next
Proceed to high bookcases, wall-mounted art, or decorative art pieces. Carefully dust or wipe down these areas to eliminate the particles that can settle onto lower furniture and floors. If your shelves are greasy or dusty, a slightly damp microfiber cloth works best. For example, during a recent deep clean, I took down wall shelves to vacuum behind, which prevented dust from settling onto the floors later. This step significantly reduces airborne allergens and future clean-up effort.
Wipe Down Windows and Blinds
Now, focus on window sills, curtain rods, and vertical blinds. Use a microfiber cloth or a specialized blind duster to capture dust effectively. Cleaning window areas at this stage prevents dirt from contaminating your freshly cleaned floors. While doing this, I noticed that dust on blinds can trigger allergies—so I used a damp cloth to wipe them thoroughly, resulting in clearer views and better air quality.
Move to the Walls and Baseboards
Next, tackle the lower parts of walls, switch plates, and baseboards. Use a damp cloth or a gentle scrubber to clean smudges or accumulated dust. For stubborn marks, a mixture of water and a few drops of dish soap works wonders. During my last session, cleaning the baseboards last meant all the debris from higher surfaces was already removed, making the process faster and more thorough.
Finish with Floor Surfaces
Finally, sweep, vacuum, and mop the floors. Since dust and dirt have already been contained from above, your floors stay cleaner longer. I paused after cleaning the upper areas to vacuum the entire room, then mopped for a pristine finish. This method prevents dust from settling back onto your clean floors, ensuring a more effective and lasting clean. For stubborn stains or embedded dirt, supplement with effective cleaning methods, like using a steam mop or natural cleaning solutions.
Apply These Steps During a Move-Out Cleaning
Employing this top-down approach during move-out cleaning not only impresses landlords but also boosts your chances of securing your deposit. Focus on high surfaces first, then move downward, ensuring every layer of dirt is addressed systematically. For comprehensive move-out checklists, see this guide. Remember, starting from the top reduces re-cleaning and guarantees a cleaner space that meets inspection standards.
Many homeowners believe that using harsh chemicals or aggressive scrubbing is the key to spotless upholstery and thorough cleaning. However, this oversimplification often leads to damage or ineffective results. For instance, a common myth is that bleach-based cleaners are safe for all fabrics—we now know that such chemicals can weaken fibers and cause discoloration, undermining the longevity of your furniture. Experts emphasize that understanding the specific fabric type and using tailored cleaning agents is crucial; for example, natural fiber upholstery requires delicate approaches to preserve texture and color, as detailed in our comprehensive upholstery care guide.
Another nuanced aspect is the importance of proper sanitization techniques. Many get trapped in the trap of overusing disinfectants on surfaces that don’t need them, which can lead to chemical buildup and reduced air quality. The CDC advises targeted sanitizing, focusing on high-touch areas, and choosing appropriate products—sometimes, a simple mixture of microfiber cloths and mild solutions suffices. You can see more about effective sanitizing methods for a healthier home.
Beware of the mistake of neglecting hidden crumbs or dust in problematic spots like beneath or behind furniture. These overlooked areas can harbor mold, pests, or allergens. Advanced cleaning requires inspecting m secondary, often ignored, corners—think beneath couches or behind heavy drapes. Skimping here may seem time-saving but can severely impact indoor air quality and allergen levels, especially for sensitive individuals.
A sophisticated question for seasoned cleaners is: How can microbial colonies develop resistance to common disinfectants, and what alternatives are effective? Studies suggest that overusing chemical disinfectants without proper contact time or in the absence of mechanical removal can promote resistant strains, undermining sanitation efforts. Incorporating physical cleaning with tools like microfiber mops or steam cleaners enhances efficacy, aligning with the insights from advanced sanitizing secrets.
Ultimately, mastering the nuances of upholstery and house cleaning means recognizing that superficial efforts are often insufficient. Avoid falling into the trap of one-size-fits-all solutions. Instead, focus on fabric-specific care, targeted sanitization, and addressing hidden spots—these are the core strategies that ensure longevity, safety, and true cleanliness. Have you ever fallen into this trap? Let me know in the comments.
Investing in the Right Cleaning Tools for Longevity
For consistent, long-term results, selecting high-quality tools is essential. I personally swear by a microfiber electric mop—such as the Miropure Cordless Electric Mop—because it offers superior dirt pickup and dries quickly, making routine mopping less of a chore and more of a quick refresh. Over time, using a powerful, rechargeable vacuum like the Dyson V15 Detect allows me to tackle different surfaces effectively, reducing dust buildup and extending the lifespan of my furniture and carpets.
How do I maintain cleaning tools over time?
Regular maintenance is vital to keep your equipment functioning at peak performance. For vacuum cleaners, I recommend emptying the bin after every use, cleaning filters monthly, and checking brush rollers for hair or string entanglements. Microfiber cloths should be washed separately from fabric softeners, which can reduce their absorbency. Additionally, replacing mop heads and duster attachments every 6-12 months depending on usage prevents bacteria buildup and ensures maximum efficiency.
Embrace Specialized Equipment for Deep Cleaning
Sometimes, a thorough cleaning demands more than basic tools. For instance, steam cleaners like the McCulloch MC1275 Heavy-Duty Steam Cleaner have revolutionized my approach, especially when sanitizing upholstery or hard surfaces without chemicals. Steam penetrates deep, killing germs and loosening grime, making it an eco-friendly, chemical-free alternative. According to expert upholstery care, regularly using a steam cleaner can extend the life of your furniture while keeping allergens at bay.
Where is the future trend in cleaning technology heading?
Advanced robotic cleaning devices like the iRobot Roomba s9+ include AI-based mapping and enhanced dirt detection, promising to make ongoing maintenance easier. Moreover, integrating IoT-enabled systems that monitor air quality and send alerts about needed maintenance could become standard, reducing the burden of manual oversight and promoting a healthier home environment. Staying ahead means considering these innovations and adopting tools that adapt to your habitual cleaning routines.
Make Maintenance Routine an Action, Not a Chore
Creating scheduled maintenance tasks—like monthly filter replacements or quarterly steam cleanings—ensures your tools remain effective over the long term. Remember, the key isn’t just in buying the right equipment but also in consistently caring for it. For a detailed approach, consider reviewing move-out cleaning strategies that incorporate tool maintenance as part of the process. By dedicating time to tool upkeep, you effectively extend their lifespan, improve cleaning results, and save money in the long run.
Experience the difference—try applying a vinegar solution to your microfiber mop heads periodically to remove mineral buildup and revitalize their absorbency. This small step significantly enhances cleaning efficiency and is supported by recent microbiological studies on cleaning efficacy.
The Hardest Lesson I Learned About Upholstery, House Cleaning, Sanitizing, Move-Out Clean
One of the most eye-opening realizations I had was recognizing how often overlooked spots can sabotage even the most diligent cleaning efforts. I used to focus solely on visible surfaces, but I learned that neglecting hidden corners—like behind furniture or beneath appliances—can lead to stubborn odors, allergens, and even pest problems. The lightbulb moment came when I discovered that thorough cleaning isn’t just about surface shine but about addressing every nook and cranny where dirt and microbes hide.
3 Myths About Upholstery, House Cleaning, Sanitizing, Move-Out Clean That Held Me Back
First, I believed harsh chemicals were always necessary for deep sanitation, but now I know that gentle, fabric-specific solutions are safer and more effective. Second, I thought steam cleaning was suitable for all upholstery; in reality, some delicate fabrics suffer damage from high heat. Lastly, I used to dismiss the importance of tool maintenance, underestimate how much proper equipment care improves results. Challenging these myths transformed my cleaning routine from haphazard to professional-quality.
What Experts Won’t Tell You About Upholstery and Move-Out Cleaning
Professionals often keep quiet about the importance of inspecting and cleaning behind heavy furniture and appliances—areas that trap dust and mold spores, especially in move-out scenarios. They also emphasize that structural and hidden spot inspections are critical for a truly sanitized home, not just surface cleaning. Learning these hidden steps, like removing and cleaning beneath appliances or behind access panels, made a measurable difference in my home’s cleanliness and air quality.
Curated Strategies for a Cleaner Future
My go-to tools include a microfiber electric mop, which makes quick work of surface dust and grime without harsh chemicals. The Ultimate Upholstery Care Guide provides expert tips on fabric-specific cleaning that keeps furniture looking new without damage. For deep sanitization, a steam cleaner like the McCulloch MC1275 has been invaluable—powerful yet chemical-free, perfect for upholstery and hard surfaces alike. Lastly, I rely on my rechargeable vacuum, such as the Dyson V15 Detect, which simplifies reaching high or tricky spots and maintaining an allergen-free environment.
Action Starts Now: Your Turn to Elevate Your Cleaning Game
Embracing these hidden details and investing in quality tools can revolutionize your home environment, making it healthier and more inviting. Remember, the difference lies in the little things—those unnoticed spots and the tools you choose to tackle them. Don’t wait for a mess to remind you that perfection is a process; start today and enjoy the reassuring cleanliness that comes with paying attention to every corner.
What’s your biggest challenge when it comes to cleaning those hard-to-reach spots? Share your experiences below—I’d love to hear from you!