
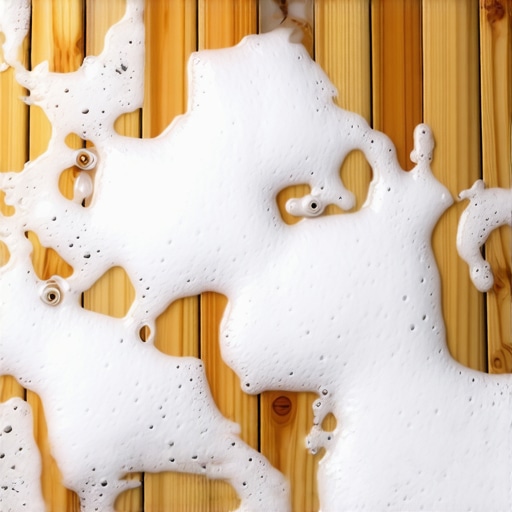
I remember the first time I casually grabbed the dish soap from my kitchen and thought, “Hey, this might do the trick for my wood floors.” It seemed logical at the time—clean dishes, shiny counters, why not my floors too? But within days, I noticed they looked dull, streaky, and worse—some spots felt sticky. That was my lightbulb moment. Turns out, what I thought was a cleaning shortcut was actually a costly mistake.
The Hidden Risks of Dish Soap on Wood Floors
Wood floors are delicate, porous, and require specific care. Using dish soap, which is designed to cut grease and handle food residue, often contains additives and chemicals that can harm your hardwood’s finish. These substances leave behind residues that attract dirt or create a film, making your floors look worse over time. Plus, frequent use can strip away the protective sealant, exposing the wood to moisture and damage.
Early on, I made the mistake of thinking that dish soap was a quick fix. Instead, it created more work, and in some cases, irreversible damage. I learned this the hard way, and now I want to save you from the same pitfalls. Proper cleaning not only keeps your floors looking fabulous but also prolongs their life—and all it takes is a little knowledge and the right products.
What If I Already Made This Mistake?
If you’ve already used dish soap on your wood floors, don’t panic. There are effective ways to restore your floors’ health and shine. For more tips on deep-cleaning and maintaining your hardwood, check out our article on house cleaning strategies for a sparkling home. And if you’re concerned about sanitizing your space after cleaning mishaps, I recommend exploring sanitizing secrets for a safer house.
In the next sections, we’ll cover the core reasons why dish soap is a no-go and discuss proven methods to keep your wood floors pristine without risking damage. Because, believe me, your floors deserve better than a soapy slip-up—and so do your floors, for that matter.
You might have faced this exact dilemma—accidentally using the wrong cleaner or worrying if your tried-and-true method is harming your floors. If so, you’re not alone. Let’s dive into the specifics and get your floors back on track.
Use the Right Cleaning Tools
Start with a soft-bristled broom or a microfiber dust mop to remove loose dirt and debris from your floors. I once used a stiff brush that scratched the surface; switching to microfiber prevented damage and made cleaning more effective. Regularly clean your tools to avoid redistributing dirt.
Select the Correct Cleaning Solution
A pH-neutral wood floor cleaner is ideal. Avoid harsh chemicals like bleach or vinegar, which can strip the finish. When I tried a homemade vinegar solution, it left a cloudy film; using a proper wood cleaner restored clarity and shine. Follow product instructions precisely to prevent over-wetting.
Implement Proper Mopping Techniques
Dampen a microfiber mop with your chosen cleaner—never soak it. Wring out excess moisture thoroughly. Mop in the direction of the wood grain to enhance cleanliness without scratching. During my last session, I used a slightly damp mop, preventing water seepage that could cause warping over time.
Avoid Excess Water and Steam
Water is the enemy of wood floors. Excess moisture can cause swelling, warping, and mold. I once used a steam mop incorrectly, which left standing water, leading to cupping. Instead, opt for dry or lightly damp cleaning methods. If deep cleaning is necessary, consider professional services for safe, thorough results.
Dry the Floor Thoroughly
After mopping, immediately dry the surface with a clean, dry microfiber cloth or towel. This extra step prevents moisture from seeping into seams or grain. I experienced streaks when I skipped this step, but drying immediately kept the shine intact and avoided streaking.
Maintain and Protect Your Floors
Place rugs in high-traffic areas and felt pads under furniture legs to prevent scratches. Regular cleaning prevents buildup that requires aggressive scrubbing. My routine of daily sweeping and weekly damp mopping significantly extended the life of my hardwood floors.
Schedule Deep Cleanings Professionally
Every 1-2 years, consider professional deep cleaning and refinishing to preserve your floors’ appearance and integrity. I once hired experts who used specialized equipment, restoring my dull floors to a like-new condition. For comprehensive guidance, check out expert cleaning secrets.
Be Consistent with Your Cleaning Routine
Establish a daily, weekly, and monthly cleaning schedule to keep your floors in top shape. I found that sticking to a routine prevented stains and damage, saving time and money in the long run. Regular maintenance is the best way to protect your investment and ensure lasting beauty.
Many homeowners operate under assumptions about cleaning that can unknowingly backfire and diminish their efforts. For instance, a widespread myth is that using bleach is universally effective against all germs and stains. In reality, overusing harsh chemicals like bleach can damage delicate surfaces and even cause health issues if not used properly. Experts emphasize that selecting the right cleaner for each surface is crucial; for example, enzymatic products work better on organic stains, as highlighted in a study by the American Cleaning Institute.
Another misconception is that frequent deep cleaning isn’t necessary if daily tidying is maintained. However, neglecting periodic deep cleans can lead to the buildup of hidden grime, mold, or bacterial colonies that threaten indoor air quality. For a comprehensive approach, integrating effective sanitizing methods, especially during seasonal illness peaks, is advisable—check out our dedicated sanitizing techniques.
Moving beyond surface cleaning, many overlook the significance of proper upholstery care. Using generic vacuum attachments can damage delicate fabrics over time, undermining your investment and comfort. Opt for specialized tools and techniques, such as gentle steam cleaning, which not only extends fabric life but also effectively eliminates allergens and mites. For expert tips, see our upholstery cleaning guide.
Ever wondered why some cleaning routines seem ineffective despite repeated effort? The hidden issue often lies in neglecting overlooked spots and integrating routine maintenance with strategic cleaning intervals. For example, the dark corners behind appliances or the dust accumulated on ceiling fans are breeding grounds for microbes and allergens. Incorporating regular attention to these areas, along with a scheduled daily cleaning routine, ensures a genuinely clean environment.
Attention to detail extends into move-out cleaning. Common pitfalls include forgetting to disinfect high-touch areas or overlooking hidden grime in less visible pockets. Using a comprehensive move-out checklist can help prevent these mistakes and secure your deposit.
Finally, many underestimate the importance of understanding their cleaning tools’ nuances. Using the wrong brush type or abrasive pads can damage floors, upholstery, or surfaces. As a rule of thumb, always match your tools with manufacturer recommendations and regularly maintain equipment for optimal results.
Have you ever fallen into this trap? Let me know in the comments. Digging deeper into these hidden nuances can significantly elevate your cleaning game, ensuring your home remains healthy, sparkling, and well-maintained.
Consistent Care Meets Smart Equipment
Keeping your home spotless and well-maintained over the years hinges on the tools you choose and your maintenance routines. I personally recommend investing in a high-quality, adjustable steam cleaner, like the Dupray Neat Steam Cleaner, because it effectively sanitizes surfaces without harsh chemicals, making it ideal for upholstery and hard-to-reach spots.
Another game-changer is a microfiber rotational mop with an extendable handle. Unlike traditional mops, its plush fibers trap dust and dirt better, reducing the need for frequent replacements. I use this daily to keep surfaces clean and limit wear on delicate finishes. Pairing this with a pH-neutral cleaner ensures longevity for your wood and laminate floors, avoiding damage caused by acids or alkalis. For expert insights, see our guide on expert cleaning secrets.
How do I maintain my cleaning tools over time?
Proper maintenance of your equipment prolongs their life and safeguards your home. Regularly descale your steam cleaner using manufacturer-approved solutions to prevent mineral buildup, which can reduce effectiveness. Wash microfiber cloths and mop heads after each use in hot water with a little vinegar—this removes residues and bacteria, ensuring these tools remain sanitary. Additionally, inspect vacuum filters monthly and replace or clean them according to the manufacturer’s instructions to maintain optimal suction. These small habits make a big difference in achieving consistent, high-quality cleanliness and can prevent costly repairs or replacements down the line.
Future Trends in Home Maintenance Tools
As technology advances, we’re seeing smarter cleaning systems with IoT integration that monitor usage and maintenance needs remotely. Automated robot vacuums and mops that can adapt to your schedule and detect areas needing extra attention are becoming mainstream, promising hassle-free upkeep. Incorporating these innovations can elevate your routine, saving you time and ensuring your home stays pristine without constant manual effort. To get started, consider experimenting with a robotic vacuum that doubles as a germ-killing machine, like the iRobot Roomba i7+ with UV sterilization, which is predicted to be more common in the coming years.
Now is the perfect time to try out an advanced tip: regularly descaling your steam cleaner to keep it performing at peak efficiency. This small step ensures long-term effectiveness, especially if you use it for upholstery and sanitizing surfaces. For detailed instructions, check out our expert cleaning secrets and incorporate this into your maintenance routine.
Remember, mastering your tools and routines today sets the foundation for a healthier, cleaner home tomorrow. For personalized advice or to discuss your cleaning setup, don’t hesitate to reach out through our contact page. Let’s keep your home working seamlessly for years to come.
The Hardest Lesson I Learned About Home Cleaning and Maintenance
One of my most profound lessons was realizing that quick fixes, like using dish soap on hardwood floors, can lead to long-term damage. It taught me that patience and proper tools outweigh shortcuts in the end, a truth that applies to every aspect of home upkeep.
3 Myths About Sanitizing and Upholstery That Held Me Back
Believing that aggressive chemicals are always necessary or that deep cleaning isn’t urgent can be costly misconceptions. Learning that gentle, effective methods and regular maintenance preserve surfaces and health was a game-changer, encouraging smarter choices.
What Experts Won’t Tell You About Move-Out Cleaning and Protecting Your Deposit
While many focus on surface cleanliness, professionals emphasize the importance of detailed attention to hidden spots and proper tools—they know these details guarantee a smooth move-out inspection and deposit return. Their insights have saved me from costly oversights.
Curated Tools That Changed My House Cleaning Approach
My toolbox now includes a pH-neutral wood floor cleaner for longevity, a microfiber rotational mop for efficiency, and a steam cleaner for versatile sanitizing. These tools, recommended by trusted cleaning professionals, have transformed my routine, making it more effective and gentle.
Your Home, Your Sanctuary: Taking Action Today
Remember, mastering proper cleaning and maintenance routines is an ongoing journey. Small, consistent steps today build the foundation for a healthier, more beautiful home tomorrow. Don’t wait—start implementing smarter practices now and see the difference.
What’s your biggest home cleaning challenge right now? Share your experience below—I’d love to help you overcome it!
.