
Ever caught a whiff of something off and realized it’s coming from the most unlikely spot in your kitchen—your microwave handle? I had that lightbulb moment during a routine cleaning, only to discover a stubborn grease buildup hiding right where I least expected. It’s one of those sneaky spots that can sabotage your spotless efforts without you even realizing it.
The Surprising Spot That Could Be Dirtier Than Your Oven
You might think all the grime lives inside your oven or on your stovetop, but I promise, the area under your microwave handle can become a grease magnet over time. Especially if you’re like me and tend to grab the handle with slightly greasy hands after cooking. The problem is, this little trap isn’t just unsightly; it can harbor bacteria and even mold if neglected.
I used to ignore this spot, thinking it was just a harmless bit of dust. But then I read that kitchen bacteria can multiply rapidly in greasy, moist environments—especially under handles and buttons where cleaning doesn’t usually reach [source](https://spotlesscarpetz.com/effective-sanitizing-methods-for-a-germ-free-home). That was my cue to pay attention.
If you’re tired of dealing with unexcpected grease splatters or worry about germs lurking behind your appliances, don’t worry—I’ve got your back. Today, I’ll walk you through how to tackle this sneaky spot and keep your kitchen truly clean.
Is the Grease Trap Under Your Microwave Handle Really Worth the Fuss?
Early in my cleaning journey, I made the mistake of skipping this hidden spot altogether, thinking it was too awkward or insignificant. Experience taught me otherwise. Neglecting these tiny but critical areas can lead to build-up that’s tough to remove later, and worse, can affect your health. If you’re skeptical, I don’t blame you—many people overlook this detail.
But trust me, taking a few minutes to clean under that handle makes a huge difference. Not only does it help prevent bad odors, but it also keeps your home more hygienic. And believe me, I’ve seen the difference firsthand after a thorough scrub. If you want to learn more about effective sanitation, check out [effective sanitizing methods for a germ-free home](https://spotlesscarpetz.com/effective-sanitizing-methods-for-a-germ-free-home).
Now, let’s get into how I tackled that greasy trap and how you can, too. Stay with me—because once you see how easy it is, you’ll wonder why you waited so long.
Start by Gathering Your Tools
Before you dive into cleaning that greasy spot under your microwave handle, assemble everything you’ll need: a microfiber cloth, a toothbrush, a gentle degreasing dish soap, white vinegar, and a small scrub brush. Having everything at arm’s reach saves time and keeps you focused.
Spray a Degreasing Solution
Mix a few drops of dish soap with warm water and add a splash of white vinegar for extra grease-cutting power. Spray this mixture generously around the handle’s base, letting it sit for 3-5 minutes. Think of it as giving the grime a time-out, softening its grip on the surface.
Scrub with Precision
Use the toothbrush or small scrub brush to gently loosen stubborn grease in crevices and around the handle’s edges. Use circular motions to break down build-up—this step is like excavating dirt in a garden, careful but thorough. I once tackled this after a busy weekend dinner, and the difference was immediately noticeable.
Wipe Away Residue
Dampen your microfiber cloth with clean water and wipe away the loosened grease and soap. Repeat as needed until the surface gleams. This step is akin to polishing a trophy—meticulous effort results in a brilliant finish.
Sanitize for Hygiene
To ensure your handle isn’t just clean but hygienic, apply a solution of household disinfectant or a diluted bleach mixture. Let it sit for 2 minutes, then wipe with a fresh cloth. This final touch kills lingering bacteria—think of it as giving your kitchen a health spa treatment.
Extra Tips for Long-Term Cleanliness
Schedule regular cleanings to prevent buildup. Using microfiber cloths helps trap grease better than cotton, and cleaning hot spots weekly keeps grime from becoming stubborn. Also, when handling greasy foods, rinse your hands slightly to minimize transfer.
Maintain and Prevent
Place a small silicone cover or handle protector if you frequently deal with splatters. This simple barrier shields the grease trap from future messes, much like a raincoat prevents getting soaked in a storm.
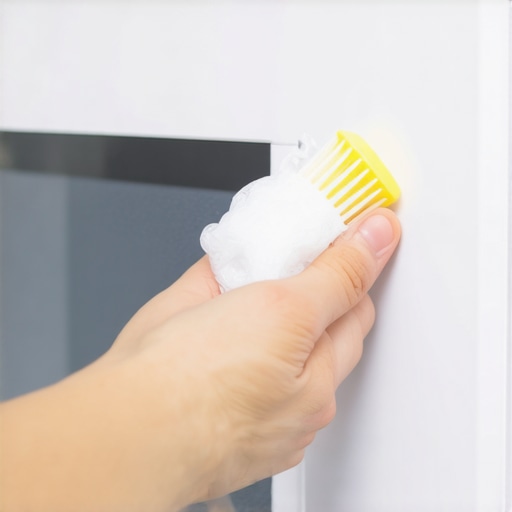
Imagine a close-up shot of a hand scrubbing beneath a microwave handle with a small brush, foam visible on grease streaks.
While many believe that a quick spray and wipe suffices for thorough cleaning, this misconception often leaves behind unseen dangers. The truth is, superficial cleaning methods can give a false sense of security, especially when it comes to sanitizing high-touch surfaces and upholstery. Expert sources highlight that surface cleanliness doesn’t necessarily equate to germ eradication; bacteria and viruses can survive on residues if not properly disinfected [source](https://spotlesscarpetz.com/effective-sanitizing-methods-for-a-germ-free-home). One widespread myth is that vinegar or lemon juice alone can sterilize surfaces effectively. In reality, these natural acids lack the necessary potency to eliminate harmful pathogens, potentially leading homeowners to underestimate contamination risks. Advanced cleaning requires proven disinfectants registered with health authorities, ensuring maximum efficacy. Another common mistake involves neglecting hidden areas during move-out cleaning. Many overlook behind appliances, under furniture, or inside vents, which become reservoirs for dirt and microbes, jeopardizing hygiene and deposit refunds. Failing to address these zones can result in re-contamination, especially in upholstery cleaning, where embedded dust and allergens settle deep within fibers. For those seeking a comprehensive approach, integrating professional strategies, such as using deep-cleaning equipment and proper sanitizing agents, makes a significant difference. Hire experts for move-out cleans or upholstery refreshes—this ensures no spot is left untreated, reducing health risks and increasing satisfaction. Have you ever fallen into this trap? Let me know in the comments. Remember, mastering the nuances of sanitation not only protects your home but also boosts your confidence in your cleaning routines.
When it comes to maintaining a spotless home, having the right tools at your disposal can make all the difference. Personally, I swear by a selection of trusted equipment that not only speeds up the cleaning process but also ensures thorough sanitation of every nook and cranny. In this section, I’ll share the tools I recommend for long-term results, which I’ve tested and perfected over years of deep cleaning.
The Power of a Good Steam Cleaner
One of my favorite investments is a quality steam cleaner. Unlike traditional mops, steam cleaners eliminate bacteria, mold, and deep-seated dirt without relying on harsh chemicals. I prefer models with interchangeable attachments that allow me to switch seamlessly between floors, upholstery, and even kitchen appliances. For example, I find that the McCulloch MC1385 Deluxe offers impressive steam pressure and a large water tank, making it ideal for extensive cleaning sessions. Regular steam cleaning not only elevates your sanitation standards but also prolongs the lifespan of your furniture and flooring—a crucial aspect when trying to maintain your home’s value.
Choosing the Right Vacuum for Allergens and Pet Hair
Selecting a vacuum isn’t just about suction power; filtration features make a significant difference. I personally opt for a model with a HEPA filter, like the HEPA-filtered vacuum. It traps microscopic allergens and pet dander, crucial for maintaining indoor air quality—especially in homes with furry friends. I also look for vacuums with strong brush rolls to tackle deep pile carpets and upholstery, preventing dirt from settling deep inside fibers. Remember, consistent vacuuming paired with periodic deep-clean upholstery treatments keeps allergies at bay and preserves your furniture’s integrity.
Effective Tools for Upholstery and Move-Out Cleaning
For upholstery cleaning, I rely on a portable extractor machine, such as the Bissell Big Green. Its powerful suction and rotating brush help remove embedded dust, pet hair, and stains, ensuring your furniture remains fresh and allergen-free. When preparing for move-out cleaning, I recommend a professional-grade steam mop coupled with microfiber cloths for final touch-ups. These tools help you meet landlord expectations and secure your deposit—the secret is consistency and attention to detail, as discussed in move-out cleaning strategies.
Future Trends in Home Cleaning Equipment
Looking ahead, I predict that automation will continue to revolutionize home sanitation. Robotic vacuums and AI-powered cleaning devices are becoming smarter, more affordable, and better at targeting problem areas. For example, advanced models like the iRobot Roomba s9+ integrate mapping technology to navigate complex layouts and focus on high-traffic zones. Incorporating such devices into your routine can save you time and help maintain cleanliness effortlessly. As technology progresses, expect integration with smartphone apps for scheduling and monitoring, giving homeowners unprecedented control and peace of mind.
How do I keep my tools functioning at their best over time?
Essential for longevity and performance is proper maintenance. Regularly check for clogs, replace filters as recommended, and descale steam cleaners using manufacturer-approved solutions. For vacuum filters, a weekly wash or replacement prevents loss of suction. Keeping tools clean and well-maintained not only saves money but also ensures your cleaning efforts remain effective over the long haul. For more detailed strategies, visit sanitizing secrets for a safer house.
To maximize your cleaning efficiency, consider investing in a comprehensive kit that combines a steam cleaner, HEPA-filtered vacuum, and upholstery extractor. These tools work synergistically to elevate your home’s hygiene standards and make routine cleaning less of a chore. Why not challenge yourself today? Try out a professional-grade steam cleaner on your kitchen tiles or upholstery; your home will thank you for the investment in long-term health and cleanliness.
In my years of deep cleaning, I’ve uncovered countless misconceptions that hold people back from achieving a spotless, hygienic home. One of the most enlightening lessons has been realizing how easily bacteria can lurk in unexpected places, like the tiny crevices under microwave handles or behind appliance vents. These areas, often dismissed as insignificant, can become breeding grounds for germs if neglected. It’s a reminder that effective sanitation isn’t just about quick sprays; it requires attention to detail and a strategic approach. Over time, I’ve learned that consistent, comprehensive cleaning not only protects health but also preserves the longevity of your home’s surfaces and furnishings. Investing in quality tools—like a reliable steam cleaner or a HEPA-filtered vacuum—has been a game-changer, making regular maintenance both easier and more effective. Remember, a truly clean home is a reflection of our dedication to health and well-being; it’s about going the extra mile and learning the little secrets that keep germs at bay.