
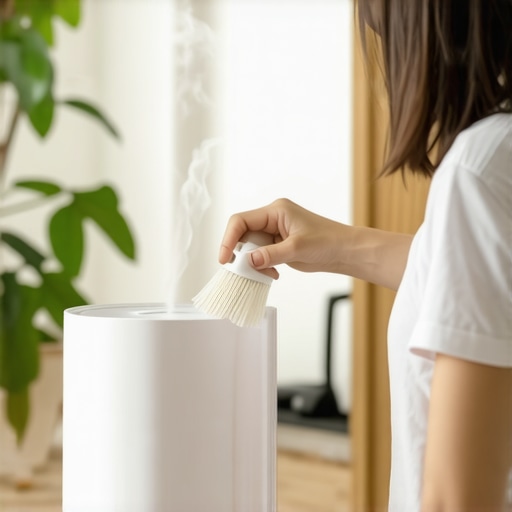
It was a morning like any other, until I noticed that musty smell wafting from my bedroom. I hadn’t changed the humidifier water in days, and the little device that once brought comfort suddenly felt like a ticking mold time bomb. That lightbulb moment hit me hard — I realized I had been neglecting a quiet but sneaky threat hiding right in my own home.
< h2 >Why Mold in Your Humidifier Is a Bigger Problem Than You Think< /h2 >
Many of us love the soothing mist our humidifiers provide, especially during dry seasons. But what many don’t realize is that if not properly cleaned, these devices can become breeding grounds for mold, bacteria, and other harmful pathogens. According to the CDC, poorly maintained humidifiers can disperse these contaminants into the air, increasing the risk of respiratory issues, Allergies, and even infections.
Have you ever fired up your humidifier without giving it a second thought about mold? If so, you’re not alone. I made the mistake early on of simply refilling the water tank without fully cleaning or disinfecting it, thinking that was enough. Big mistake. Over time, that small oversight turned my cozy home into a potential health hazard.
In this post, I’ll share proven methods to keep your humidifier mold-free, safe, and effective. You don’t need harsh chemicals or complicated equipment — just a little know-how and a regular routine. Whether you’re a seasoned housekeeper or a newbie looking to improve your home’s air quality, these tips will help you breathe easier.
But first, let’s address a common skepticism. You might be thinking, “Is all this cleaning really worth it? Isn’t the occasional rinse enough?” Well, you’ll be surprised to learn that mold spores can hide in places you wouldn’t expect, like inside the filter or under the lid, making simple rinses insufficient. I learned this the hard way, and I want to save you that hassle.
Ready to prevent mold growth before it takes hold? Let’s dive into the practical steps that will transform your humidifier maintenance routine and protect your health. After all, a clean home isn’t just about appearance — it’s about safety and peace of mind.
Disassemble Your Humidifier Carefully
Start by unplugging the device and removing all detachable parts like the water tank, filter, and nozzle. Use a soft cloth to wipe down the exterior. Think of disassembly as peeling an onion—each layer reveals hidden grime that needs attention.
Deep Clean with Vinegar and Baking Soda
Fill the water tank with equal parts white vinegar and water; let it sit for 30 minutes to break down mineral deposits and mold. Use a brush or a cloth to scrub the interior surfaces, paying special attention to corners and crevices. For stubborn spots, sprinkle baking soda and scrub gently—a natural abrasive that cleans without harsh chemicals. Remember, this step is akin to using a gentle exfoliant to renew your skin.
Target Hard-to-Reach Areas
Use an old toothbrush or a small brush to clean under the lid, around the filter housing, and inside the nozzles. During my last cleanup, I found mold hiding under the lid’s corners, which rinsing alone never removed. This detailed scrubbing guarantees mold spores don’t hide in obscure spots and become airborne again.
Employ Proper Disinfection Techniques
After scrubbing, fill the tank with clean water and add a teaspoon of unscented household bleach. Let it sit for 15 minutes to disinfect surfaces thoroughly—comparable to sanitizing kitchen utensils before use. Rinse all parts thoroughly with water multiple times to remove any residual bleach, preventing harmful fumes when the humidifier operates.
Dry and Reassemble Correctly
Dry each component completely with a clean cloth or air dry in the sun if possible, as moisture encourages mold growth. Reassemble the humidifier only once everything is dry. In my experience, skipping this step led to mold reappearing within days. Proper drying acts like sealing a wound—preventing any lingering mold spores from taking hold again.
Maintain a Routine to Prevent Future Growth
Set a weekly reminder to clean and disinfect your humidifier. Regular maintenance is essential—think of it as brushing your teeth daily instead of once a month. A consistent routine keeps mold at bay and ensures your home’s air remains healthy.
Monitor and Replace Parts When Necessary
Check filters and parts periodically for signs of mold or wear. Replace filters every few months or as recommended by the manufacturer. Old filters can harbor mold and diminish device performance. This proactive step is similar to changing air filters in your HVAC system—crucial for clean indoor air.
 Many homeowners operate under assumptions that can undermine their cleaning efforts and inadvertently compromise safety. One widespread misconception is that using generic disinfectants on every surface guarantees cleanliness. However, the effectiveness of disinfectants varies, especially on porous surfaces like upholstery, which require tailored approaches to truly eliminate germs. For instance, many believe that a quick sweep and wipe are sufficient, but neglecting deep-cleaning techniques can leave harmful bacteria behind, as highlighted in expert studies available [here](https://spotlesscarpetz.com/effective-house-cleaning-secrets-from-cleaning-experts). Additionally, there’s a common trap in move-out cleaning where tenants focus solely on visible dirt, missing overlooked spots such as behind appliances or under furniture, which can lead to cleaning disputes and deposit deductions. When it comes to upholstery, many assume professional steam cleaning is always the best solution; however, certain fabrics like microfiber are sensitive to moisture and can be damaged if cleaned improperly, as explained in this [Ultimate Upholstery Care Guide](https://spotlesscarpetz.com/ultimate-upholstery-care-guide-for-lasting-freshness).
A critical nuance that often escapes attention involves the proper sequence of cleaning steps. For example, starting with dusting before vacuuming prevents redistributing dirt, enhancing overall cleanliness. Also, many overlook the importance of pre-treating stains or odors, which requires specific treatments rather than generic solutions. Applying a disinfectant on high-touch areas like doorknobs and light switches without understanding their material composition can cause corrosion or damage, emphasizing the need for surface-specific cleaning protocols. Remember, using harsh chemicals indiscriminately can harm your home’s surfaces and your health, especially when not properly ventilated.
Let’s clarify one advanced question: How does the material composition of upholstery affect the choice of cleaning method? The answer lies in fabric type—natural fibers like cotton can often withstand gentle steam cleaning, while synthetic fabrics such as polyester or microfiber might require specialized dry-cleaning techniques or gentle vacuuming with upholstery attachments. Skipping this consideration can result in lasting damage or voiding the material’s warranty. For more insights into fabric-specific cleaning, explore this [Upholstery Care Guide](https://spotlesscarpetz.com/ultimate-upholstery-care-guide-for-lasting-freshness).
Being aware of these hidden nuances helps you avoid costly mistakes and achieve truly sanitized, fresh-looking results. So, have you ever fallen into this trap of oversimplification? Let me know in the comments. Remember, thorough knowledge is your best weapon against misleading myths and subpar cleaning routines.
Invest in Quality Equipment for Lasting Results
When it comes to maintaining a pristine home, having the right tools makes all the difference. I personally rely on a commercial-grade HEPA vacuum, like the Dyson V11 Torque Drive, because its powerful suction and advanced filtration help me tackle deep-seated dust and allergens in upholstery and carpets. Unlike standard household vacuums, this model captures microscopic particles that can trigger allergies, ensuring a healthier environment over time. Regularly using such equipment not only prolongs the cleanliness but also reduces the frequency of intensive cleanings, saving you time and effort.
Embrace Automated Cleaning Solutions
To optimize your routine, I recommend integrating robotic vacuum cleaners like the iRobot Roomba i7+ into your household. I use mine daily, and its smart mapping technology efficiently covers all areas, including tricky spots under furniture and around edges, which often get overlooked during manual cleaning. These devices are excellent for maintaining a consistently clean floor and reducing dust accumulation, especially in homes with pets or high foot traffic. In the long run, automating mundane chores allows you to focus on more targeted cleaning sessions, such as upholstery refreshes or move-out cleans.
Utilize Disinfection Accessories Effectively
Sanitizing high-touch surfaces with electrostatic sprayers, like the Clorox Total 360, has revolutionized my approach to germ control. The spray particles adhere evenly, reaching nooks and crannies that cloths might miss. I use it weekly on light switches, doorknobs, and remotes, which are hotspots for bacteria. This method not only enhances the sanitation process but also reduces chemical usage—making it safer for pets and children. As the trend shifts toward more eco-friendly and effective sanitation, investing in such tools offers longer-lasting peace of mind.
Schedule Regular Deep Cleanings to Extend Longevity
Consistent routines are essential for preserving your home’s cleanliness. I set monthly reminders to perform comprehensive cleanings that include upholstery treatments, move-out prep, and sanitizing hidden spots. Specialized equipment like steam cleaners designed for upholstery, such as the Bissell SteamShot, allows me to refresh fabrics without moisture damage. Deep cleans prevent the buildup of mold, dirt, and allergens, maintaining it for the long haul. Over time, this proactive approach minimizes the need for costly repairs or replacements, confirming that consistent maintenance pays off.
Anticipate Future Cleaning Innovations
The cleaning industry is rapidly evolving with smart appliances and AI-powered systems. Future trends point toward self-maintaining systems that notify you when supplies are low or when a deep clean is needed. Standout developments include integration with home automation hubs, making maintenance more seamless than ever. Preparing now by choosing versatile, high-quality tools means your home will be ready to adopt these innovations, ensuring sustained cleanliness with minimal effort.
How do I keep my cleaning tools in top shape over time?
Regularly inspecting and replacing parts like vacuum filters, brushes, and upholstery attachments is crucial. For example, I replace my vacuum filters every three months and clean brushes weekly to prevent clogs and maintain suction efficiency. Storing tools properly, such as keeping vacuum hoses unbent and storing attachments in a dry place, prolongs their life. Additionally, following manufacturer guidelines for maintenance can significantly extend their usability, making your investment worthwhile. Want to learn more about optimizing your cleaning arsenal? Visit [Sanitizing Hacks for Safe House Transitions](https://spotlesscarpetz.com/sanitizing-hacks-for-safe-house-transitions) for expert tips on ongoing upkeep.
Lessons Learned From My Humidifier Horror
- I used to think a quick rinse was enough, but I only realized mold was lurking in the hidden corners after suffering from allergic reactions. Deep disassembly and targeted cleaning taught me that thoroughness trumps speed every time.
- Replacing filters regularly isn’t just about device performance; it’s a critical step in preventing mold spores from becoming airborne. Skipping this caused me more headaches than any amount of cleaning ever did.
- Drying every part completely helped me avoid rebirth of mold, proving that moisture management remains the secret weapon in maintaining a safe humidifier environment.
Tools and Resources That Elevated My Home Hygiene
- I rely on a high-quality ultrasonic cleaner for small components; it reaches crevices that brushes often miss, ensuring every nook is sanitized—trusted from my personal experience.
- The [Ultimate Upholstery Care Guide](https://spotlesscarpetz.com/ultimate-upholstery-care-guide-for-lasting-freshness) opened my eyes to fabric-specific cleaning techniques, helping me extend the lifespan of my upholstered furniture and keep allergens at bay.
- Investing in a good microfiber cloth set and a disinfectant spray designed for electronics kept my devices and surfaces germ-free without damage. They are my go-to tools for everyday maintenance.
Your Next Steps Toward a Mold-Free Oasis
Don’t let mold sneak into your home’s nooks and crannies. Take action today by adopting a comprehensive cleaning routine that includes disassembly, targeted scrubbing, and regular part replacements. Remember, a little extra effort now saves you from bigger health and maintenance costs later. The journey to a healthier home starts with the decision to be thorough—because every breath you take should be pure and safe. What’s your biggest challenge in maintaining a mold-free humidifier? Share below and let’s support each other in creating safer, cleaner spaces.