
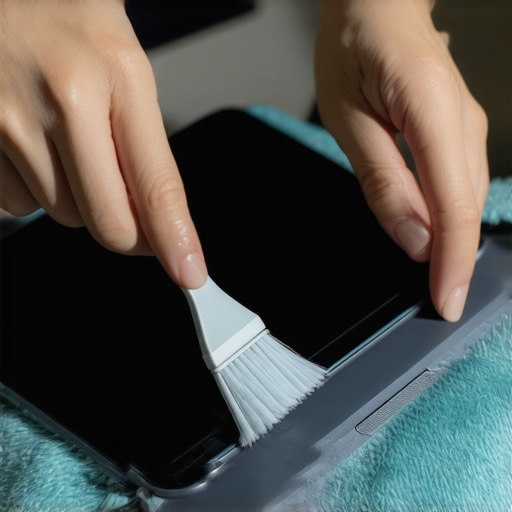
I remember the moment vividly. I was crouched beside my shiny new laptop, armed with a feather duster, thinking I was doing everything right. Yet, within days, my screen flickered strangely, and I wondered if I had somehow damage the internal components. That lightbulb moment led me down a rabbit hole of DIY dusting mistakes—and I found out that what seems simple isn’t always safe when it comes to our cherished electronics.
Why Proper Dusting Matters More Than You Think
Every scratchy gust of wind from my outdated vacuum or clumsy swipe with a cloth risked pushing debris into delicate circuits. Electronics are little wonders but also sensitive little critters that demand gentle handling. If dust gets trapped inside, it can cause overheating, reduce lifespan, and even lead to permanent hardware issues. The good news? With the right techniques, you can keep your devices pristine—without risking damage or voiding your warranty.
Is Rushing to Clean Actually Making Things Worse?
In my early days, I used rough paper towels and even canned air without proper precautions. Not only did I miss spots, but I also risked spraying moisture or forcing debris deeper inside. According to experts in electronic maintenance, improper cleaning can introduce static or push particles into areas that are hard to clean later, creating more harm than good. So, if you’ve ever panicked and blasted your device with a rush of pressurized air, you’re not alone. But trust me, there’s a smarter way. Want to learn the gentle, effective method to dust your electronics safely? Stay tuned—I’ll walk you through the exact steps. Curious if this will actually work for your gadgets? I’ll share strategies I’ve applied myself, ensuring your devices stay clean and functional for years to come. And if you’re tackling a full house cleaning, check out this detailed [move-out clean checklist](https://spotlesscarpetz.com/move-out-clean-checklist-to-simplify-your-transition) to keep everything in top shape during moves. Now, let’s move past the misconceptions and into how to do it right.
Gather Your Supplies for a Gentle Touch
Before diving into cleaning, assemble soft, lint-free microfiber cloths, compressed air cans designed for electronics, and a slightly damp brush or sponge. Avoid harsh chemicals or abrasive materials that can damage delicate components. I once tried using an old scrubbing brush on my keyboard, which left scratches; instead, I learned that patience and proper tools make all the difference.
Power Down and Unplug
Ensure your device is completely powered off and disconnected from any power source. This simple step prevents accidental shocks and protects your electronics from static damage. For my own experience, rushing to clean a powered-on laptop led to a brief, startling spark — quite a wake-up call to always turn off and unplug first.
Loosen Dust with Compressed Air
Hold the can upright and spray short bursts of air into vents, ports, and between keys. Keep the can at least a few inches away to prevent moisture buildup. During my first try, I was tempted to blast everything with a long spray, but I learned that controlled, gentle bursts cleared debris without forcing particles deeper inside. Think of it like blowing dust off a delicate sculpture, not hosing it down.
Carefully Wipe Surfaces
Lightly dampen a microfiber cloth with distilled water or a manufacturer-approved cleaning solution. Gently wipe the surfaces, avoiding excessive moisture that can seep into openings. I once over-saturated a cloth and noticed corroded contacts the next day—a reminder to keep it light and careful. Use a dry cloth afterward to remove any residual moisture, ensuring no liquid remains behind.
Target Hidden Dust with a Soft Brush
Use a soft, anti-static brush to dislodge stubborn dust from crevices and vents. For example, cleaning my gaming mouse with a brush revealed accumulated lint I never knew was there, improving accuracy and airflow. This step ensures no specks are left lurking inside where they can cause overheating or hardware issues.
Be Cautious with Keyboard and Screen
For keyboards, gently tilt the device and use compressed air to remove debris from between keys. For screens, use a pure microfiber cloth with minimal pressure. I once cleaned my touchscreen with a household glass cleaner and smudged the surface—proof that specialized, gentle cleaning preserves the clarity and integrity of delicate displays.
Regular Maintenance Keeps Devices Happy
Establish a routine, such as monthly light cleaning, to prevent dust buildup. Remember, patience and the right approach not only extend your device’s lifespan but also ensure optimal performance. For more detailed tips, check out our [Effective Sanitizing Methods](https://spotlesscarpetz.com/effective-sanitizing-methods-for-a-germ-free-home) to keep every part of your home, including electronics, germ-free and in top shape.Many homeowners believe that simply spraying disinfectant or running the vacuum is enough to ensure a truly clean and sanitized home. However, this oversimplification overlooks critical nuances that can significantly impact effectiveness. For instance, the misconception that using harsh chemicals like bleach always provides complete sanitation can be counterproductive. According to cleaning experts, overusing such chemicals can leave residues that trap dirt and bacteria in porous surfaces, reducing overall cleanliness. Additionally, common myths suggest that high-temperature washing kills all germs on upholstery, but without proper fabric-safe detergents and thorough rinsing, bacteria can persist. An often-overlooked mistake is neglecting hidden spots like behind appliances or inside vents, which can harbor bacteria and mold if not properly addressed. For advanced cleaning, understanding the importance of proper contact time—allowing disinfectants to sit for the recommended duration—can make a huge difference in outcomes. This nuance is supported by studies from the CDC emphasizing that surface contact time is vital for effective pathogen elimination. When moving out, many tenants rush through cleaning, thinking a quick scrub will suffice, but detailed strategies like those outlined in our move-out cleaning checklist ensure all areas are addressed thoroughly, preventing deposit deductions. A common trap is assuming that all surfaces require the same cleaning approach; for example, upholstery needs gentle, specialized cleaning techniques, which are detailed in our upholstery cleaning tips. Ignoring the specific requirements of different materials causes damage or insufficient cleaning. Lastly, many underestimate the value of routine maintenance. Regular light cleaning prevents buildup and extends the lifespan of furnishings and surfaces. This is often misunderstood as unnecessary, but as professionals explain in our house cleaning strategies, consistency is key. Remember, achieving germ-free, fresh spaces isn’t just about cheap shortcuts—it’s about understanding these nuanced practices. Have you ever fallen into this trap? Let me know in the comments.Maintaining a pristine home over the long haul requires more than just quick fixes; it demands reliable tools and strategic methods that prove their worth over time. One of my go-to essentials is a high-quality microfiber mop, which I swear by because of its durability and superior ability to trap dust and dirt without spreading it around. Unlike typical cotton mops, microfiber attracts and holds particles better, making daily maintenance easier and more effective.For stubborn spots, I rely on a steam cleaner that combines heat and moisture to lift grime without harsh chemicals. My personal favorite is the O-Cedar Microsteam cleaner, praised for its versatility and eco-friendly operation. Regular use of such devices not only keeps surfaces spotless but also reduces the need for chemical-heavy cleaners, aligning with a healthier home environment.When it comes to upholstery, investing in a specialized cleaner like the Bissell SpotClean Pro has transformed how I approach furniture maintenance. I use it for spot treatments and periodic deep cleans, extending the lifespan and vibrancy of my fabrics. Following a detailed [upholstery cleaning tips for a fresh home revival](https://spotlesscarpetz.com/upholstery-cleaning-tips-for-a-fresh-home-revival) has also helped me develop a routine that minimizes buildup and maintains softness.Software tools are just as crucial. I utilize a cleaning schedule app to set reminders for weekly, monthly, and quarterly tasks, which helps me stay consistent. Additionally, reviewing products like the CDC’s guidance on effective sanitizing methods ensures I know when to deep clean or simply refresh surfaces, especially important during flu season or after hosting gatherings.Looking ahead, I predict that automation will play a bigger role in long-term maintenance, with robotic vacuum and mopping devices becoming smarter and more intuitive, reducing manual effort and ensuring consistent cleanliness. For now, my tried-and-true combination of manual tools and scheduled routines keeps my home in top shape without the stress.**How do I maintain house cleaning over time?** Establishing a routine and investing in quality tools that fit your needs is key. Regularly updating your approach with modern solutions, like using a [move-out cleaning checklist](https://spotlesscarpetz.com/move-out-cleaning-strategies-to-secure-your-deposit), can streamline the process and prevent oversight. Don’t hesitate to try one of these advanced tips, like incorporating a dependable microfiber mop or scheduling software—it can make a significant difference in achieving lasting results.
Little Tricks That Saved My Devices From Damage
Over time, I realized that gentle, precise dusting techniques not only protected my gadgets but also kept them functioning optimally. Using a soft brush before compressed air prevented pushing debris into hidden areas, which could cause overheating. Applying minimal moisture and avoiding harsh chemicals extended the lifespan of my electronics, turning me into a more mindful cleaner.
What I Wish I’d Known Before My First DIY Dusting Attempt
Jumping into cleaning without proper tools or knowledge often led to costly mistakes. I underestimated the importance of unplugging devices and using anti-static materials. Learning from these errors, I started prioritizing static safety and using specialized tools, which made a huge difference in avoiding hardware mishaps.
How Proper Dusting Transformed My Approach to Electronics Care
Now, I schedule regular, light cleanings rather than waiting until devices get visibly filthy. This proactive approach prevents dust buildup, keeps airflow optimal, and reduces the risk of overheating. Incorporating small habits, like wiping vents weekly, has made my gadgets last longer and operate smoother.
Curated Tools That Make a Difference
Investing in quality microfiber cloths, anti-static brushes, and compressed air cans designed for electronics has been a game changer. I trust brands like DustOff for compressed air and E-cloth for microfiber cleaning because they deliver gentle yet effective results. These tools help me maintain my devices without unintentional damage or static buildup.
Your Next Step in Electronics Preservation
Remember, a little patience and the right techniques go a long way. Consistent, gentle cleaning routines can prevent costly repairs and keep your devices functioning like new. So, why not start today? Your gadgets will thank you, and your peace of mind will grow with each careful clean. What’s your biggest dusting challenge with electronics? Share below—I’d love to hear your experiences and tips!