
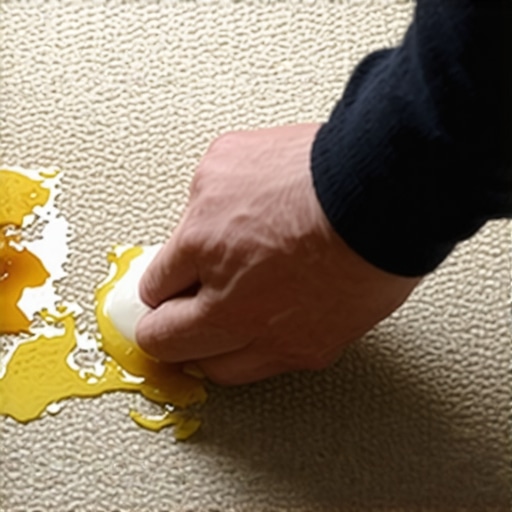
Ever had that heart-stopping moment when a stray candle drip turns your cozy living room into a mini wax disaster? I remember thinking, “Well, that’s another stain I have to stress about cleaning!” After a few frustrating attempts with paper towels and scraping, I realized I was just spreading the mess around. Sound familiar? You’re not alone in this slippery situation! Today, I promise to share proven techniques that **actually** work to remove candle wax from carpets, leaving no stubborn residue behind.
The Slip-up That Started My Wax Woes
Like many, I believed I could just blot the wax quickly with a paper towel or maybe pour hot water over it. Big mistake. I learned the hard way that rushing the process often just pushes the wax deeper into the fibers or spreads it further, making the mess worse. Early on, I made the mistake of applying heat directly with an iron without using a protective sheet—an act that could have had disastrous results! It’s a common pitfall, but one that’s easily avoidable with the right techniques.
Will Removing Candle Wax Ruin My Carpet?
This is a question I hear a lot. The truth is, many assume the process is complicated or risky. But with a few simple tools and patience, you can restore your carpet’s pristine look without professional help. Plus, knowing how to take care of wax spills can save you money and stress in the long run. If you want to learn about effective cleaning methods, I recommend checking out [effective house cleaning secrets from cleaning experts](https://spotlesscarpetz.com/effective-house-cleaning-secrets-from-cleaning-experts), which offers valuable insights for every homeowner.
Are you tired of trying to scrub your carpet and ending up with a bigger mess? Keep reading—I’ll guide you step-by-step through the easiest, most effective wax removal techniques that save your carpet and your sanity. Trust me, it’s simpler than it sounds, and I’ll show you how to do it without the risk of damage.
Freeze and Scrape for Hard Wax
Start by freezing the wax to make it brittle. I recall the time I placed a bag of ice directly on a fresh wax spot, waiting a few minutes until it hardened. Then, gently use a plastic scraper or the edge of a credit card to lift off as much wax as possible, avoiding damage to fibers. This initial step reduces the bulk, making subsequent cleaning easier.
Absorb Excess Wax with Paper Towels
After scraping, cover the residual wax with a layer of paper towels or cloth. Press down gently to absorb melting wax as you apply heat in the next step. I once used layers of paper towel over a stubborn spot, pressing with a warm iron (set to low), protected by a piece of cloth to prevent transfer. Be careful: the key is to heat just enough to melt wax, which the paper absorbs without spreading it further.
Use Heat to Melt Remaining Wax
Apply a Warm Iron—but with caution. Place a brown paper bag, pressing cloth, or paper towel over the wax stain and gently run a warm (not hot) iron across it. The wax will melt and transfer onto the paper, removing the bulk. Remember, never iron directly on the carpet without protection, as too much heat can damage fibers or dye. In my experience, slow, steady passes yield the best results.
Choose the Right Temperature
Set your iron to a low to medium heat—think gentle warmth, not searing hot. Hotter settings risk burning the carpet or causing dye bleeding. If unsure, test on a hidden area first to see how the carpet responds. When I accidentally set the iron too high once, I saw discoloration, so always proceed with caution.
Apply a Cleaning Solution for Stubborn Residue
After wax removal, some oily residue might remain. For this, use a gentle solvent like a mixture of dish soap and warm water, or a commercial carpet cleaner designed for grease. I mixed a few drops of dish soap in warm water and blotted with a clean cloth, working from the outside inward to prevent spreading. For a more thorough clean, consider using a steam cleaner or upholstery extractor if available.
Final Rinse and Dry
Remove residual soap by blotting with clean, damp cloths. Then, press dry with a towel or use a fan to accelerate drying. Ensure the carpet dries thoroughly to prevent mold growth. I once forgot this step and had to deal with a musty smell afterward, teaching me the importance of proper drying.
Prevent Future Wax Stains
Place a tray or wax catchers beneath candles and avoid placing them directly on carpets. Using candles with wider bases reduces the risk of spills. If a spill does occur, acting quickly with the steps above will save your carpet from permanent damage.
Many cleaning misconceptions persist even among seasoned homeowners, often leading to less-than-satisfactory results. A common myth is that using bleach or strong disinfectants guarantees germ-free surfaces. However, excessive reliance on harsh chemicals can damage delicate materials and even create resistant bacteria strains. According to a study published by the Centers for Disease Control and Prevention, overusing disinfectants without proper technique can decrease their effectiveness and pose health risks. Instead, effective sanitizing should involve proper cleaning routines that focus on mechanical removal first, then targeted disinfection. For example, understanding the different sanitizing methods for a germ-free home helps in choosing the right approach for each surface.
Are We Overlooking the Impact of Surface Material on Cleaning?
A significant nuance many overlook is how different materials respond to cleaning agents. For instance, using abrasive sponges on soft furniture can scratch and degrade fabrics over time, undermining hygiene and appearance. While it may seem efficient to scrub vigorously, this often causes more harm than good. Instead, knowing which cleaning tools and solutions are appropriate prevents damage and prolongs the lifespan of your furnishings. For upholstery, specific cleaning tips can make a notable difference, ensuring deep cleanliness without wear and tear. Remember, a gentle approach coupled with the right products often yields superior results.
Another common mistake is assuming move-out cleaning is just about surface wiping. The truth is, deep cleaning strategies involve meticulous attention to overlooked spots such as behind appliances or inside vents. For a comprehensive guide, check out move-out cleaning strategies. Making these nuances part of your routine can prevent costly deductions from security deposits and ensure a truly clean space.
Why Are Simplistic Cleaning Solutions Often Short-Lived?
Many believe that quick fixes, like a spray-and-wipe approach, suffice for long-term cleanliness. But in reality, this often only addresses surface dirt, leaving bacteria, mold, or grime lurking beneath. For more durable results, investing in proper cleaning routines that incorporate comprehensive techniques—like steam cleaning for carpets or deep attention to crevices—are crucial. For detailed routines, explore house cleaning strategies designed for lasting freshness. Recognizing these overlooked steps ensures not just appearance, but genuine hygiene in your living space.
Have you ever fallen into this trap of underestimating the importance of nuanced cleaning? Let me know in the comments. Remember, understanding and applying these advanced insights can transform your cleaning outcomes from simple maintenance to professional-grade results.
Maintaining a spotless home isn’t just about quick fixes; it’s about investing in the right tools and habits that ensure lasting results. Over the years, I’ve refined my cleaning arsenal to include equipment that combines efficiency with care, helping me keep everything from carpets to upholstery in top shape.
Electrify Your Cleaning Routine with a Quality Steam Cleaner
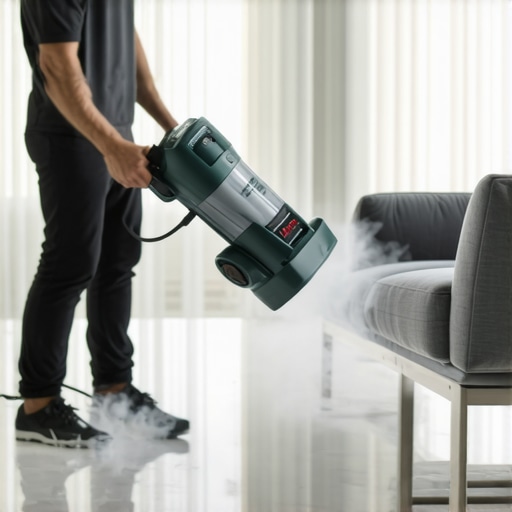
I’ve found that a high-quality steam cleaner is indispensable for deep cleaning carpets, upholstery, and even grout lines. Unlike traditional vacuuming, steam cleaning uses hot vapor to eliminate bacteria, dust mites, and stains without harsh chemicals. I personally prefer models with adjustable pressure controls and attachments like upholstery steam brushes—these features allow me to customize the process and avoid damaging delicate fabrics. For instance, using a professional-grade steamer reduces the need for chemical disinfectants and keeps my home’s air quality pristine. As technology advances, we can expect more eco-friendly models that consume less water and energy, aligning with future sustainability trends.
Master the Art of Precision with Microfiber Cloths
When it comes to dusting and wiping down surfaces, microfiber cloths are my go-to. They trap dirt and bacteria more effectively than cotton, especially when paired with just water or gentle cleaning solutions. I make sure to wash and maintain my microfiber cloths properly—avoiding fabric softeners that diminish their electrostatic properties—and replace them when they start to fray. This small investment in quality cloths translates into less cleaning time and a more hygienic environment. Experts recommend updating your microfiber supplies periodically, as these tools tend to lose their electrostatic charge over time, which can diminish their cleaning power.
Incorporate Smart Software for Routine Maintenance
Technology isn’t just for cleaning equipment; apps and scheduling tools help me stay consistent. Setting reminders for weekly or bi-weekly tasks ensures that my home receives regular attention, preventing the buildup of grime and allergens. I use a simple calendar app to plan deep cleaning sessions and track progress—this accountability keeps me on track and lessens the chance of neglecting areas like behind appliances or inside vents. Looking ahead, integrating smart home systems that monitor air quality and notify you when filters need replacing will revolutionize long-term household maintenance.
How do I maintain these tools over time?
Proper maintenance extends the life of your cleaning tools and preserves their effectiveness. For steam cleaners, I always disengage attachments after use, empty tanks to prevent mold, and descale them regularly with manufacturer-recommended solutions—this practice avoids mineral buildup that can impair performance. Microfiber cloths should be washed in hot water without fabric softeners and replaced every few months. Additionally, storing your equipment in a cool, dry place prevents deterioration. Regularly inspecting and caring for your tools ensures they remain reliable, making your cleaning routines more effective and less costly over time. For more detailed tips on maintaining your cleaning arsenal, check out this resource.
Investing in the right tools and adopting a disciplined maintenance routine can dramatically improve your home’s cleanliness and hygiene. Start by testing a steam cleaner on a small area to see its impact, then incorporate microfiber cloths into your daily routines. Over time, these habits will become second nature, turning house cleaning from a chore into a seamless part of your lifestyle.
Getting candle wax on your carpet can feel like a nightmare, but with the right approach, you can restore your space to pristine condition. Over the years, I’ve learned that patience and knowing the exact steps make all the difference—avoiding costly professional cleaning or permanent stains. Let me share some insider wisdom from my personal experience that will help you tackle wax spills confidently and efficiently.
Lessons I Learned About Wax Removal That No One Tells You
- Stop the Spread Early: Attempting to wipe wax immediately often pushes it deeper or smears it across fibers. Freezing it first makes a remarkable difference—hardening the wax and making it brittle.
- Choose Gentle Tools: Using a plastic scraper or even an old credit card prevents damage to your carpet while lifting hardened wax. I once damaged a delicate rug by using a metal spatula—lesson learned!
- Heat with Caution: Applying heat is crucial, but temperature control is essential. Too hot, and you risk burning the fibers or causing dye bleeding. Always test on a hidden spot before proceeding.
- Use Proper Absorbents: Brown paper bags or neutral paper towels effectively transfer melted wax when warmed appropriately. This step saved me from staining my favorite carpet.
- Follow Up with Cleaning Solutions: Residual oily film can linger. A gentle dish soap solution combined with blotting removes any lingering residue cleanly, preventing attraction of more dirt.
Curated Resources for Deep Cleaning and Maintenance
If you’re ready to elevate your cleaning game, I recommend exploring these expert house cleaning secrets. They offer comprehensive advice on maintaining carpets, upholstery, and dealing with stubborn stains. For specific guidance on sanitizing your entire home effectively, this resource is invaluable. Investing in quality tools like a steam cleaner or microfiber cloths, which I trust personally, can make ongoing maintenance much easier and more effective.
Your Next Step Towards a Cleaner Sanctuary
Remember, no spill is permanent if you approach it with patience and the right techniques. Taking a bit of time to master these steps will save you stress and money, transforming your cleaning routine into a more satisfying, even meditative, ritual. Believe me, your carpets—and your peace of mind—will thank you for it. So go ahead, give those wax stains the boot, and enjoy the refreshed beauty of your home.
Have you ever tried a unique method to remove candle wax from your carpet? Share your experiences below—I’d love to hear your story!
,