
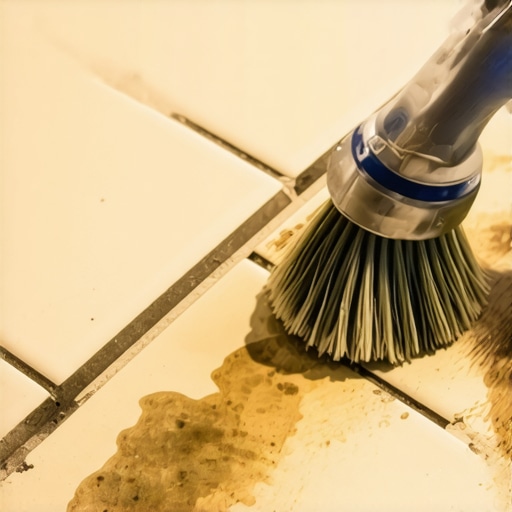
It was late on a Saturday afternoon when I finally decided to tackle my neglected bathroom grout. Armed with a tired old grout brush and some so-called “miracle” cleaning products, I dove in with enthusiasm. But within minutes, I knew something was off—despite my efforts, the grout looked worse. That sticky, grimy residue seemed to cling tighter, and the bathroom looked just as dirty as when I started. Have you ever experienced that sinking feeling, thinking you’re doing a thorough clean but ending up with a dull, dingy space that seems impossible to revive?
Why Your Grout Brush Could Be Sabotaging Your Bathroom’s Sparkle
One of the most common mistakes I made early on was using the wrong tools in the wrong way—specifically, the grout brush. It might seem like a simple, innocent cleaning tool, but there’s a hidden trap that can turn it into your bathroom’s worst enemy. When I first started scrubbing away, I was under the impression that more scrubbing meant cleaner grout. Instead, I was pressing harder, using abrasive motions that pushed dirt and grime deeper into the tiny pores of the tile, making it look dirtier than ever.
What I didn’t realize was that a misguided technique could create a thin film or, worse, spread the grime across the surface, leaving behind a dull, stained appearance. It’s like trying to clean a stubborn stain on a shirt with a scrub brush—more scrubbing might seem logical, but it can cause damage instead of cleanliness. This is a mistake many homeowners make without even realizing it.
In fact, studies show that aggressive scrubbing with the wrong tools can damage delicate tile surfaces, leading to a buildup of residue that’s almost impossible to remove long-term (see [effective house cleaning secrets from cleaning experts](https://spotlesscarpetz.com/effective-house-cleaning-secrets-from-cleaning-experts)). This realization was a game-changer for me, and I want to make sure that you don’t fall into the same trap.
If your bathroom grout looks permanently stained or streaked, don’t worry—there’s hope. In the sections ahead, I’ll share the secrets I wish I knew earlier, based on my own struggles and research, to help you restore that fresh, clean look to your bathroom. Trust me, a few simple adjustments in your cleaning approach can make all the difference.
Now, before we dive into the actual techniques, ask yourself: have you ever invested time in scrubbing, only to come away feeling frustrated with the stubborn stains still lurking? If so, you’re not alone. But let’s turn that frustration into a solution that actually works. Ready to finally banish those dingy grout lines and keep your bathroom looking sparkling?
Choosing the Right Tools for the Job
Start by selecting a high-quality, non-abrasive grout brush with stiff bristles. In my experience, a soft-bristled brush paired with a handheld scrub represents a balanced approach, preventing damage while providing enough scrubbing power. Remember, a metal or overly stiff brush can scratch delicate tile surfaces, leading to more grime accumulation over time. Before you begin, remove any loose debris with a vacuum or a dry cloth. This minimizes dirt transfer during scrubbing, making your task more effective.
Pre-Treat the Grout with a Deep Cleaning Solution
Apply a specialized grout cleaner or a homemade mixture of baking soda and vinegar—spread it evenly over the grout lines. Let it sit for at least 10 minutes so the solution penetrates the grime. During this step, I recall attempting to clean heavily stained grout with just water, which was futile. Pre-treatment softens the dirt, reducing the need for excessive scrubbing, and prevents residue buildup caused by aggressive cleanings. Avoid over-soaping, which can cause a film that makes grout appear dull rather than clean. For stubborn stains, I recommend a paste of baking soda and hydrogen peroxide, applied directly to the stain, then left to work for 15 minutes.
Scrubbing Technique for Maximum Effectiveness
When scrubbing, use a firm, consistent pressure with small circular motions—think of it as unlocking a stubborn lock rather than grinding away at it. I once tried to scrub in harsh back-and-forth motions, which led to hand fatigue and minimal results. Instead, focusing on gentle, controlled circular movements allows the bristles to sink into the pores of the grout, lifting dirt without damaging the tile surface. Maintain a damp sponge or cloth nearby to wipe away loosened grime frequently, preventing residue from redepositing. Remember, over-scrubbing can push dirt deeper or cause the grout to crack, so patience is key.
Rinsing and Drying Properly
After scrubbing, rinse the area thoroughly with warm water, ensuring all cleaning residues are washed away. Use a clean microfiber cloth or mop to wipe excess water and dirt from the surface. This step is crucial: left-over cleaner or debris can cause a film or streaked appearance. For best results, dry the grout with a clean towel or allow it to air dry. I once skipped thorough rinsing, which left a dull sheen rather than a polished look. Proper drying ensures the grout’s natural color pops and prevents new grime from settling in quickly.
Extra Tips for Persistent Stains
If stains persist, apply a mixture of hydrogen peroxide and baking soda directly to the grout, then cover with plastic wrap to prevent evaporation. Leave it for 20-30 minutes before scrubbing again. For rare cases where stains refuse to budge, consider professional cleaning methods or sealed grout options for future protection. For ongoing maintenance, regular light cleaning with a neutral pH cleaner can keep grout lines looking fresh and prevent heavy buildup. Remember, avoid harsh chemicals or bleach on colored grout, as it can cause discoloration—more on that in this guide.
Many homeowners assume that basic cleaning techniques are sufficient for maintaining a spotless home, but in reality, there’s a lot more nuance involved. One common misconception is that using harsher chemicals or scrubbing harder guarantees cleanliness. However, overly aggressive approaches can damage surfaces and push grime deeper, making future cleaning even more difficult. For example, when cleaning upholstery, many believe that bleach or high-temperature steam cleans are best, but these can weaken fabric fibers over time—more info can be found in our [ Upholstery Care Guide ] on effective cleaning methods.
Another myth is that sanitizer alone completely disinfects surfaces. In truth, proper disinfectant contact time and appropriate products are crucial; simply spraying disinfectant and wiping away doesn’t ensure germs are killed. This is especially important in move-out cleaning scenarios, where thorough sanitation can make or break your deposit return. Discover reliable strategies in our [ Move-Out Cleaning Tips ].
Be aware of the “oops” factor: mistaking a product for universal is a trap. Many assume that all disinfectants or detergents are interchangeable, but some chemicals can be incompatible or cause staining, especially on delicate surfaces. Always check manufacturer instructions or seek advice from cleaning professionals.
A question I often get from advanced readers is: “How can I optimize cleaning routines to prevent residues that attract more dirt over time?” The key lies in understanding surface chemistry and cleaning frequency—regular, light cleaning prevents buildup and enforces hygiene without damaging materials. Studies show that layering harsh cleaning agents can degrade surfaces and create microabrasions, trapping more dirt and bacteria. To deepen your knowledge, review this [ Sanitizing Secrets for a Safer Home ].
Avoid common pitfalls by knowing your materials and choosing the right cleaning tools and solutions. For instance, opting for microfiber cloths over sponges reduces bacteria spread and surface abrasion. Regularly updating your cleaning techniques based on surface type will save time and preserve your home’s integrity. Have you ever fallen into this trap? Let me know in the comments.Maintaining a pristine home over the long term requires more than just sporadic cleaning; it demands the right tools that deliver consistent results without damaging surfaces. As someone who has tested countless products, I can confidently recommend equipment and techniques that make maintenance both effective and efficient. Investing in quality tools will not only save you time but also extend the lifespan of your surfaces, upholstery, and appliances.
One essential device I swear by is a high-quality microfiber steam mop. Unlike conventional mops, a steam mop uses gentle heat and moisture to disinfect floors deeply without harsh chemicals. This is especially beneficial for homes with children or pets, as it ensures a germ-free environment while being environmentally friendly. For stubborn stains or textured surfaces, I turn to a turbo brush attachment that delivers powerful cleaning without scratching delicate materials. These are compatible with most handheld electric cleaners, like the [Dyson V11](https://dyson.com/), which I use for upholstery and hard-to-reach spots.
When it comes to upholstery, regular maintenance is crucial to prevent build-up of pet hair, dust, and allergens. I use a specialized upholstery cleaning tool that features a combination of gentle bristles and a powerful suction. This setup allows me to refresh sofas and curtains without resorting to chemicals that could degrade fabrics. For more advanced care, I refer to the detailed techniques outlined in our [Ultimate Upholstery Care Guide for Lasting Freshness](https://spotlesscarpetz.com/ultimate-upholstery-care-guide-for-lasting-freshness), which emphasizes the importance of periodic professional cleaning, especially for delicate or heavily used items.
For long-term results, establishing a routine with tools designed for regular maintenance is key. I schedule weekly quick cleans with microfiber cloths and a neutral pH spray, like this [house cleaning strategy](https://spotlesscarpetz.com/house-cleaning-strategies-for-a-sparkling-home-today), ensuring that dirt, dust, and bacteria don’t have a chance to settle deeply. Additionally, using a robotic vacuum such as the Roomba i7 can automate daily dirt patrol, freeing up your time for more detailed deep cleans.
Looking ahead, I predict that smart cleaning devices will become even more integrated into home maintenance routines. Imagine sensors that alert you when surfaces need cleaning or autonomous systems that coordinate multiple tools for a full-home refresh—this technological evolution promises hassle-free upkeep.
How do I maintain my cleaning tools over time?
Regularly cleaning your equipment prevents residue buildup, ensures optimal performance, and prolongs their lifespan. For example, washing microfiber cloths after each use, replacing vacuum filters every few months, and inspecting brushes for wear can make a significant difference. Always follow manufacturer guidelines, and consider routine professional maintenance of powered equipment to avoid breakdowns.
To make your routines even more effective, consider investing in an ultrasonic cleaner for small parts like nozzles and brushes. This device uses high-frequency waves to remove dirt and bacteria thoroughly, restoring your tools’ efficiency. Proper care of your cleaning arsenal is an underrated but vital aspect of long-term home maintenance.
Don’t hesitate to try integrating a microfiber steam mop into your weekly routine—you’ll be surprised how much quality and longevity it adds to your surfaces. Remember, investing in the right tools tailored to your specific needs is the smartest way to keep your home truly clean without constant guesswork. For more expert insights, check out our [Effective House Cleaning Secrets from Cleaning Experts](https://spotlesscarpetz.com/effective-house-cleaning-secrets-from-cleaning-experts), and start upgrading your cleaning toolkit today.
The Hidden Lessons Your Cleaning Routine Might Be Missing
Over years of trial and error, I discovered that relying solely on brute force—more scrubbing, harsher chemicals—often backfires, damaging surfaces and trapping dirt deeper. A lightbulb moment hit me when I realized gentle, targeted cleaning preserves the integrity of delicate materials and keeps grime at bay longer. Also, integrating tools like microfiber cloths and steam mops not only enhances effectiveness but reduces the need for aggressive scrubbing. Lastly, consistency beats intensity; regular, small maintenance tasks prevent buildup and make deep cleans less daunting, transforming my approach from reactive to proactive.