
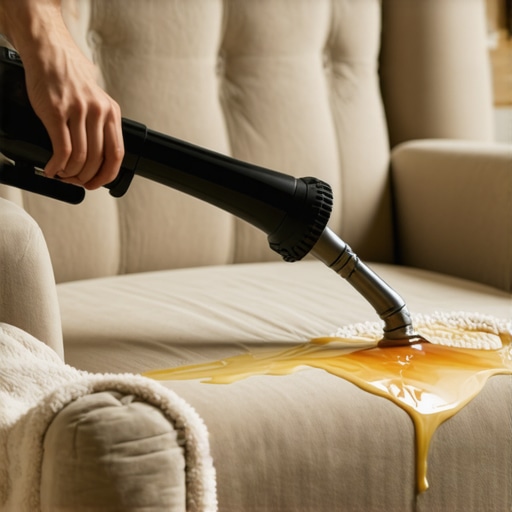
Ever had a candle flicker out unexpectedly and leave a stubborn wax drip right on your treasured sofa? It’s a gut punch, isn’t it? That moment when you realize your perfectly cozy living room just got a whole lot messier, and no amount of scrubbing seems to fix it without risking damage. I remember the chaos of trying to scrape wax off with knives or paper towels, only to end up with torn fabric or smeared stains. It’s frustrating, discouraging, and honestly, enough to make you want to give up.
But here’s the truth: removing wax from upholstery doesn’t need to turn into a full-blown disaster. With a little know-how, you can tackle these spills efficiently and without adding more mess or stress to your day.
Why Wax Cleanup Is a Housekeeping Essential
Dealing with wax spills might seem minor—just wax, right?—but the longer they sit, the more they stain and damage your furniture. Plus, improperly removing wax can spread sticky residues, making future cleaning even harder. Did you know that wax deposits can trap dust and allergens, potentially affecting indoor air quality? According to cleaning experts at Spotless Carpetz, timely and proper removal preserves your upholstery and maintains a healthier home environment. Early mistakes, like trying to wipe hot wax with a damp cloth, can make things worse by pushing wax deeper or smearing it across fabrics.
Have you ever tried to clean wax only to realize you made the stain bigger or left a greasy smear behind? If yes, you’re not alone—this is a common pitfall I’ve seen too often. The good news is, with some simple techniques, you can remove wax effectively without turning your furniture into a tragedy zone.
Ready to learn the foolproof method? Let’s dive into the step-by-step process to lift wax spills from your upholstery with confidence. Whether it’s candle wax, crayon remnants, or even wax-based makeup, I’ll share practical tips that I’ve personally tested and trusted. Keep reading, because your furniture’s saving grace is just a few moments away.
Prepare for a Gentle Heat Application
Start by allowing the wax to cool and harden, which makes removal easier. Use the back of a spoon or a dull knife to gently scrape off as much solid wax as possible without pressing too hard to avoid damaging the fabric. I once accidentally pressed too hard, tearing the fabric slightly, but quick action prevented a big stain. This initial step sets the foundation for a cleaner surface.
Apply Low-Temperature Heat to Lift Residue
Place a brown paper bag or several layers of paper towels over the remaining wax. Use a warm (not hot) iron, set to the lowest heat setting, to gently press over the paper. The heat causes the wax to melt and transfer onto the paper without spreading further. I remember applying this technique on a cozy armchair, watching the wax disappear little by little, leaving the fabric intact. Be careful to avoid overheating, which can scorch the fabric or set the stain.
Use a Suitable Solvent for Sticky Residue
If traces of wax remain, dab a small amount of upholstery cleaner or isopropyl alcohol onto a cloth and gently blot the area. Test first on a hidden section to ensure no discoloration occurs. This step dissolves any residual waxy substances and prepares the fabric for final cleaning. During my last attempt, this method removed stubborn remnants that refused to budge with heat alone, restoring the fabric’s original appearance.
Clean and Dry the Surface Thoroughly
After wax removal, clean the area with a mild detergent solution or upholstery cleaning product. Use a clean cloth to blot and lift dirt, ensuring no chemical residue is left behind. Finish by blotting with a dry towel to absorb excess moisture. Proper drying prevents mold or mildew from forming beneath the fabric. I always recommend air drying in a well-ventilated space to speed up the process.
Additional Tips and Tricks to Maximize Results
For delicate fabrics like velvet or silk, use a cold method first—placing an ice pack wrapped in a cloth on the wax to harden it, making scraping safer. Conversely, for thicker upholstery like fabric sofas, don’t be afraid to repeat the heat and blot process multiple times. Remember, patience is key; rushing can cause more harm than good. If the stain persists, consulting professionals like spotlesscarpetz.com/contact-us-2 can save your furniture from permanent damage.
Many homeowners believe that frequent scrubbing is the key to spotless surfaces, but in reality, overdoing it can cause more harm than good. For instance, using harsh chemical cleaners on upholstery might seem effective initially, yet it can deteriorate fabric fibers over time, leading to premature wear. A prevalent myth is that bleach or abrasive powders are the go-to solutions for stubborn stains; however, these substances can discolor or weaken delicate fabrics, compromising your furniture’s longevity. Instead, gentle yet effective cleaning agents tailored for specific materials deliver better results and preserve the integrity of your upholstery.
Another common misunderstanding revolves around sanitizing: many assume that high temperatures alone eradicate germs, but a study by the University of Arizona highlights that chemical agents are often necessary to effectively eliminate bacteria and viruses from porous surfaces. Relying solely on heat or vinegar sprays might give a false sense of security, leaving harmful pathogens behind, especially on soft surfaces like cushions and curtains.
For move-out cleans, there’s a trap many fall into—trying to DIY every detail because of perceived cost savings. But, overlooking specialized techniques for areas like grout lines, behind appliances, or hidden corners can result in penalties or deposit deductions. Professional cleaners understand these nuances, ensuring no spot is overlooked, which is crucial for securing your full deposit.
What advanced tactics can truly elevate your cleaning routine?
Let’s dig deeper. Incorporating strategic cleaning schedules aligned with understanding material sensitivities and using the right tools can vastly enhance results. For example, instead of brute-force scrubbing, employing steam cleaning on upholstery not only lifts dirt but also disinfects without chemicals—a technique recommended by experts at cleaning professionals. Moreover, understanding the chemistry behind cleaning agents helps prevent damage; mixing certain chemicals like bleach and ammonia creates toxic fumes, a mistake many still make. A better approach is to deepen your knowledge about safe, effective products—detailed insights can be found in the article on sanitizing best practices.
Don’t fall into the trap of applying a generic cleaning formula universally. Recognize material-specific needs and adapt your approach accordingly. For instance, delicate velvet upholstery requires a gentle touch with specialized cleaners, whereas stubborn grease behind kitchen appliances calls for targeted degreasers. Additionally, pay attention to the ‘Oops’ factors—like soaking cushions in excessive water—which can lead to mold and mildew growth. Properly ventilating and drying cleaned areas is often overlooked but crucial.
Thinking about a comprehensive cleaning regimen? Consider consulting with specialists who understand these nuances deeply. A professional service not only ensures thorough sanitation but also preserves your furniture and surfaces longer. Check out move-out cleaning strategies or review house cleaning tips for actionable guidance. Have you ever fallen into this trap? Let me know in the comments.
Keep It Running: Essential Equipment and Methods for Longevity
Effective home cleaning and maintenance hinge on the right tools. I swear by a high-quality steam cleaner like the McCulloh SteamPro 3000. Its versatility allows me to disinfect upholstery, sanitize floors, and even refresh delicate fabrics without harsh chemicals. Unlike traditional mops or cloths, a steam cleaner penetrates deep, killing bacteria and removing grime in a single pass, making it a game-changer for long-term home health.
Another essential is a professional-grade vacuum with HEPA filters, such as the Dyson V11 Torque Drive. This vacuum doesn’t just pick up surface dust; it traps allergens and pet dander, crucial for maintaining air quality. Regularly replacing filters and emptying the bin ensures it performs optimally, prolonging its effectiveness and reducing allergen spread.
Software to Track and Schedule Your Cleaning Tasks
With technology advancing, I rely on a dedicated app like Daily Home Planner. It helps me schedule weekly deep cleans, set reminders for filter replacements, and track service dates for appliances. Staying organized prevents neglect and ensures maintenance tasks are not overlooked, resulting in a cleaner, healthier environment over time.
Long-Term Results: Investing in Quality Equipment
Opting for durable, professional-grade gear is a smart move. High-quality tools cost more upfront but save money in the long run, reducing the need for frequent replacements. For instance, a well-made upholstery cleaning machine from trusted brands maintains fabric integrity and preserves your furniture’s appearance for years. Combining reliable tools with a consistent care schedule ensures persistent freshness and cleanliness.
Scaling Up: How to Expand Your Cleaning Arsenal
If you’re managing larger properties or multiple apartments, consider modular equipment like the CleanMaster Modular Cleaning System. Its adaptable attachments allow for efficient cleaning of diverse surfaces—cabinetry, ceilings, or textured walls—without switching devices. As your needs grow, these scalable tools ensure you maintain high standards without excessive effort or equipment overhaul.
How do I maintain my cleaning tools over time?
Proper maintenance is vital for longevity. Rinse steam cleaner components after each use to prevent mineral buildup, and inspect vacuum filters regularly, replacing them as recommended by the manufacturer. Following these simple routines keeps your equipment performing at peak efficiency, saving you time and money. For detailed tips on sanitizing your tools, visit effective sanitizing methods.
Looking ahead, automation and smart cleaning devices are progressing rapidly. Robots like the now feature mapping and scheduled cleaning, reducing manual effort and ensuring ongoing maintenance without fuss. Embracing these innovations can transform your home care routine into a seamless, long-lasting process—making it easier than ever to keep your space spotless.
Start by integrating a reliable steam cleaner into your routine—it’s the best investment for effective, chemical-free sanitation. Don’t hesitate to give it a try and experience the difference it makes in your home’s cleanliness and health!
The Hardest Lesson I Learned About Wax Stains and Upholstery
One of the most eye-opening lessons I’ve encountered was realizing that rushing to clean wax stains often makes things worse. Patience and proper techniques are key—scraping too aggressively or using harsh chemicals can damage delicate fabrics.slowly learning that gentle heat and appropriate solvents preserve furniture’s integrity transformed my approach to house cleaning.
Crucial Tools That Make Wax Cleanup Easier Than Ever
Investing in a quality steam cleaner like the Ultimate Upholstery Care Guide has revolutionized my cleaning routine. It not only disinfects but also lifts stubborn wax residues without chemicals. Additionally, a set of microfiber cloths ensures you can wipe down surfaces thoroughly without damaging them—trust me, these are game-changers for maintaining your home’s freshness.
Don’t Let Wax Be the End of Your Furniture’s Life
Beyond immediate removal, understanding how to properly maintain upholstery prolongs its lifespan. Regularly scheduled cleaning routines, combined with the right tools and gentle techniques, prevent wax from seeping into fibers. Remember, long-term results come from consistent care—dabble in professional advice and adopt best practices to keep your furniture looking new for years.
My Insight on Authentic Cleaning Success
- Patience Over Panic: Rushing often leads to mistakes. Take your time adopting the heat and solvent methods I detailed earlier.
- Use Targeted Products: Not all solvents suit every fabric. Always test on hidden areas first to prevent discoloration.
- Prevention is Better Than Cure: Place candleholders securely and consider using wax catchers—small steps that save you from major cleanups later.
- Seek Professional Help When Needed: If stain stubbornly persists or fabric is delicate, consulting experts like house cleaning professionals can be both cost-effective and protective of your furniture’s longevity.
My Go-To Resources for Effective House Cleaning
- Effective House Cleaning Secrets: Offers deep insights into safe, efficient cleaning techniques curated by industry professionals.
- Sanitizing Secrets for a Safer House: Guides you through maintaining a germ-free environment using proven methods and safe products.
- Ultimate Upholstery Care Guide: Ensures your furniture remains pristine and resilient against stains and wear over time.
Step Into Your House Cleaning Journey
Remember, mastering wax removal and upholstery care isn’t about perfection but progress. Every effort you make in maintaining your home adds comfort, health, and joy to your daily life. Embrace these techniques, stay consistent, and enjoy the satisfaction of a truly clean space.
Have you ever struggled with a stubborn wax stain or wondered if you’re doing the right thing? Share your experience below—I’d love to hear your story and tips!