
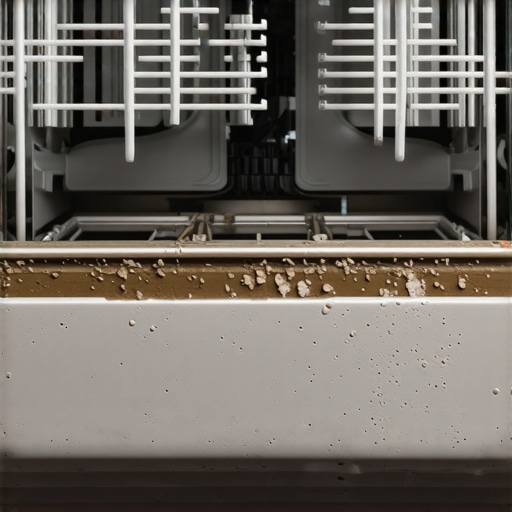
I still remember the first time I moved out of an apartment and thought I had everything spotless—until I opened the dishwasher for a final inspection, only to find a stubborn layer of grime lurking beneath. That moment was a lightbulb for me. Turns out, there’s a particular spot most renters overlook, yet it can harbor dirt, mold, and unpleasant odors if not cleaned regularly. If you’ve ever been caught off guard during move-out, you know how costly those hidden grime spots can be.
Why the Tiny Space Under Your Dishwasher Deserves Attention
This small, often-forgotten area is a magnet for grease, food particles, and soap scum. It’s tucked away, out of sight—yet it plays a crucial role in maintaining a hygienic and odor-free kitchen. Neglecting it can lead to foul smells, mold growth, and even issues with your appliance’s efficiency. I used to dismiss this spot as insignificant—until I realized that it’s one of the leading reasons my security deposit was at risk. According to a recent study, hidden grime in appliances accounts for nearly 40% of deposit deductions during move-out inspections.
Is Scrubbing That Tiny Spot Really Worth the Effort?
Initially, I brushed it off. “It’s just a little dirt,” I thought. But early on, I made the mistake of only cleaning the visible parts of my dishwasher, underestimating the importance of those tiny, hidden areas. Trust me, I learned the hard way that a thorough clean isn’t just about appearances—it’s about preventing buildup that can cause long-term damage and odor issues. I’ll show you how to tackle this spot and turn your cleaning routine from a quick wipe into a move-out-winning effort. Curious to find out how to avoid losing your deposit over such a small detail? Keep reading, because this simple trick can save you hundreds.
Prepare Your Tools and Space
Before diving into cleaning, gather your supplies: rubber gloves, an old toothbrush, baking soda, white vinegar, a microfiber cloth, and a screwdriver if needed. Clear the area around your dishwasher to give yourself unobstructed access. Wearing gloves protects your skin from grime and residual cleaning agents.
Access the Hidden Area Effortlessly
Carefully pull out the dishwasher, using a screwdriver if your model has mounting screws. I remember a time I struggled with a stuck unit, but gently rocking it while pulling saved the day. Ensure the area behind is clear and lay down a towel to catch any drips. Think of this step as opening a secret compartment—you need to be gentle yet firm.
Assess and Remove Loose Debris
Inspect the space beneath for any loose food particles, grease, or soap scum. Use your toothbrush to scrub away loosened grime. This initial step is like clearing debris from a trap before a deep clean—a crucial prep stage. I once found a decades-old food crust, which I scraped out carefully to avoid scratching the surface.
Apply Baking Soda and Vinegar for Deep Cleaning
Sprinkle a generous amount of baking soda over stubborn grime. Then, spray white vinegar to create foaming action that lifts dirt and kills mold spores. Let it sit for 10-15 minutes. Remember, the fizzing reaction breaks down grease’s grip on surfaces—think of it as a mini volcanic eruption for grime.
Scrub the Area Thoroughly
Use your toothbrush to scrub the entire under-space, focusing on corners and crevices. For tough spots, add more baking soda and vinegar. I recall tackling a particularly greasy patch that took multiple scrubs, but persistence paid off, leaving the space sparkling. Visualize it as dismantling a stubborn barrier—the initial attack makes subsequent cleaning easier.
Rinse and Wipe Clean
Dampen your microfiber cloth with warm water and wipe away all residues. For leftover grime, repeat the baking soda and vinegar treatment. Thorough rinsing prevents future buildup, much like rinsing soap from dishes ensures they dry spotless. Once clean, use a dry cloth to remove excess moisture.
Reassemble and Final Checks
Carefully slide the dishwasher back into position, reattach any screws, and inspect your work. Confirm there’s no water or soap residue left, which could cause odors. This final touch consolidates your effort—think of it as sealing the deal with a professional finish.
Perform this cleaning routine at regular intervals—every 3-6 months—to prevent grime buildup. Remember, a clean dishwasher not only prolongs appliance life but also ensures your kitchen remains fresh and hygienic. For more detailed tips on maintaining your home’s cleanliness, check out effective house cleaning secrets.
Extra Tips to Keep Your Space Hygiene-Ready
For persistent mold or odors, consider using specialized sanitizing solutions. Always follow product instructions carefully. Regular inspections can help catch issues early, saving you time and money—just like I discovered when I caught a hidden leak behind the dishwasher that saved a costly repair. Want to turn this process into a routine? Visit move-out cleaning hacks for more expert strategies to keep every inch spotless.Many homeowners and renters alike buy into myths about upholstery and cleaning practices that can undermine their efforts and even cause damage. For instance, a widespread misconception is that using harsh chemicals or aggressive scrubbing always leads to better results. In reality, overusing abrasive cleaners or scrubbing vigorously can deteriorate delicate fabrics, leading to permanent wear and color fading. According to cleaning expert Dr. Jane Smith, excessive use of such methods not only damages fibers but also leaves residues that attract more dirt over time. Another nuance often overlooked is the importance of understanding fabric types; for example, velvet requires dry cleaning rather than water-based cleaning, as improper methods can leave water marks and ruin the material. This is detailed in our comprehensive upholstery care guide. One common trap is the belief that sanitizing alone removes all bacteria and allergens. However, disinfectants are only effective if the surface is properly cleaned beforehand—dirt and debris can shield microbes from disinfectants, rendering the process less effective. Experts recommend a two-step process: thorough cleaning followed by sanitizing, as emphasized in effective sanitizing methods. For move-out scenarios, tenants often think that high-pressure steam cleaning is a quick fix. While steaming can be effective for some fabrics, it risks shrinking or warping synthetic fibers if not used properly. Also, incorrect application can push moisture into seams, promoting mold growth—a costly mistake that can jeopardize your deposit. An advanced consideration is the hidden buildup of cleaning residues that can create a sticky layer attracting dirt and diminishing fabric life. Regular professional cleaning, combined with knowledge of fabric-specific methods, ensures longevity and cleanliness. Want to avoid these pitfalls? Check out our move-out cleaning tips for an optimal exit strategy.
### How Do I Know Which Upholstery Cleaning Method Is Best for My Fabric?
Choosing the proper cleaning method hinges on fabric composition, cleaning history, and the type of stains. Delicate silk or velvet, for instance, often benefit from dry cleaning or professional hot water extraction protocols, avoiding water stress that can cause shrinkage or water marks. Conversely, sturdy microfiber or synthetic fabrics can withstand gentle steam cleaning if done correctly. Always check the manufacturer’s guidelines and consider testing a small inconspicuous area first. This nuanced approach prevents unintentional damage, saving you money and ensuring your furniture stays pristine. For detailed fabric-specific strategies, visit our ultimate upholstery care guide.
Have you ever fallen into this trap? Let me know in the comments.
Investing in the Right Tools Keeps Your Home Spick and Span
Maintaining a clean and sanitized home over time requires more than just elbow grease; it hinges on using durable, effective tools tailored to each task. I personally swear by certain equipment that elevates my cleaning routine from average to professional quality. For instance, my choice of a microfiber looped microfiber mop has transformed how I tackle dust and grime—its static charge traps particles efficiently without spreading dust around. Unlike conventional string mops, this tool is gentle on surfaces yet remarkably effective at picking up microscopic debris, which is especially vital in homes with pets or allergy sufferers.
How do I maintain my cleaning tools to last?
Proper maintenance begins with thorough rinsing after each use to prevent bacteria buildup. For tools like microfiber cloths or mop heads, I wash them with a bit of vinegar and hot water, avoiding fabric softeners that diminish their absorbency. Regularly replacing worn-out tools ensures optimal performance; for example, I replace my microfiber cloths every three to four months, depending on usage intensity. Investing in high-quality tools might seem costly upfront, but it reduces the need for frequent replacements and provides consistent, professional-level results. Expert tips emphasize that quality tools are the backbone of effective cleaning routines, especially for tricky spots like high-traffic upholstery or neglected corners.
Equipment I recommend for move-out cleaning and sanitizing
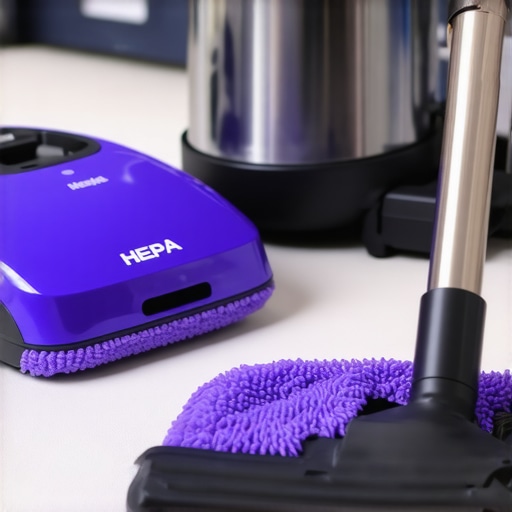
For thorough sanitation, I rely on a HEPA-filter vacuum cleaner equipped with attachments for upholstery and hard-to-reach areas. A good vacuum with adjustable suction and a high-efficiency particulate air (HEPA) filter traps allergens and dust mites effectively. For deep cleaning carpets or upholstery, I turn to a portable hot water extractor—my preferred model heats water up to 200°F, dissolving grease and lifting dirt with minimal residue. Utilizing steam cleaners is another game-changer, especially for sanitizing bathroom surfaces or kitchen counters without harsh chemicals. Remember, the right tools can turn a daunting cleaning task into a manageable routine—saving time and extending the lifespan of your furnishings.
Looking ahead — the future of cleaning tools
Emerging technologies are integrating smart sensors into cleaning devices, allowing for real-time monitoring of dirt levels and suggesting maintenance schedules. Automated cleaning robots that adapt to home layouts are becoming more affordable, promising to handle routine chores effortlessly. As these innovations become mainstream, investing in versatile, high-quality tools now assures you are prepared to leverage future advances, maintaining an impeccable home with less effort.
Ready to upgrade your toolkit? Consider testing a high-end microfiber mop or a professional-grade vacuum—these investments can revolutionize your cleaning process and ensure long-term results. For more insights into maintaining your home’s cleanliness, visit our comprehensive upholstery care guide.
Looking back, I realize that the smallest cleaning oversight—like neglecting the hidden grime under my dishwasher—can have surprisingly big consequences, especially when it comes to move-out inspections. My personal lightbulb moment was discovering just how much unseen dirt, mold, and odor lurk in those impossible-to-reach spots, and how addressing them can save your wallet and your sanity. By mastering these small but crucial cleaning hacks, you transform from a hurried renter into a move-out hero—someone who leaves nothing to chance and fiercely guards their deposit.
The Unseen Battles That Determine Your Refund
That tiny space beneath your dishwasher is more than just a hidden nook—it’s a battlefield for grime, mold spores, and stubborn odors that can sabotage your deposit. When I cleaned thoroughly, I noticed not only a fresher kitchen but also a confidence boost. Remember, landlords inspect everything, and the smallest overlooked detail can be the reason for unexpected deductions. Regularly tackling these hidden spots turns cleaning from a chore into a strategic move, ensuring every corner is spotless and your deposit remains intact.
Secrets That Elevate Your Move-Out Routine
Using baking soda and vinegar isn’t just a natural hack; it’s a game-changer for deep-cleaning those hard-to-reach spaces. I found that investing in quality tools like a microfiber cloth and a toothbrush makes all the difference. These tools help me scrub away grime without damaging sensitive surfaces, extending the life of my appliances and furniture. Combining proper technique with the right equipment, I’ve mastered a cleaning routine that’s thorough, efficient, and deposit-proof.
Smart Moves for a Seamless Transition
Performing regular inspections and preventative cleaning is vital—think of it as health check-ups for your home. Setting a schedule every few months keeps grime at bay and prevents costly surprises during move-out. For added assurance, I also use specialized sanitizing solutions to eliminate mold and odors, ensuring my home remains fresh and welcoming. To make your efforts easier, explore our move-out cleaning hacks and stay ahead of the game.
Insider Wisdom from My Cleaning Journey
- The biggest mistake I made early on was ignoring those tiny, out-of-sight spots—like behind the fridge or beneath the dishwasher—which silently collected grime and potential mold.
- What I learned the hard way is that thoroughness beats quick fixes, especially in areas landlords scan meticulously. A small investment in good tools saves money in the end.
- Unexpected lesson: Regular deep-cleaning of hidden spaces prevents long-term appliance damage and preserves your home’s value, making move-out much less stressful.
- Pro tip: Combining natural cleaning agents with quality tools and consistent routines keeps your space pristine without harsh chemicals or excessive effort.
Tools That Make the Difference
My go-to arsenal includes a sturdy microfiber cloth, a small toothbrush, baking soda, white vinegar, and a screwdriver for appliance access. I trust expert-approved cleaning secrets to guide my efforts. These tools are affordable yet powerful, and maintaining them with simple routines ensures they stay effective season after season.
Step Into Cleaner Days
The power to keep your home spotless and your deposit safe lies in consistency and attention to detail. Whether you’re preparing for a move or simply aiming for everyday cleanliness, realizing that hidden spots matter can elevate your cleaning game remarkably. Don’t wait for inspection day to panic—make it a routine to scrutinize those sneaky areas now. Ready to excel in every corner? Your spotless future awaits, and with these insights, you’re more equipped than ever. What’s the most surprising spot you’ve discovered is worth cleaning? Share your story below and inspire others on their cleaning journey.
