
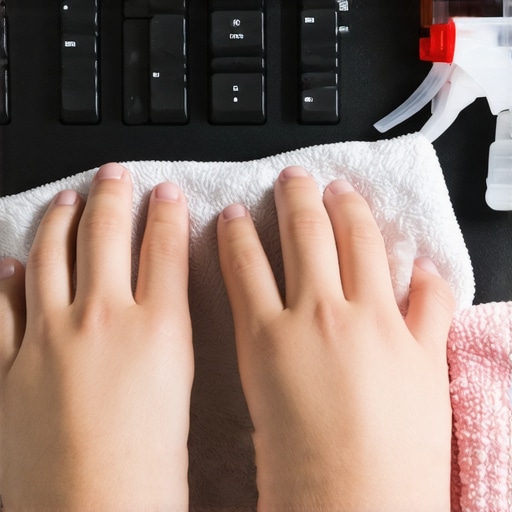
It was just another Monday morning when I spilled my coffee over my beloved keyboard. Panic set in. I scrunched my nose at the sticky keys, knowing I had to clean it, but the fear of breaking something made me hesitate. That moment was a lightbulb—why is it so tricky to sanitize a keyboard without risking damage? If you’ve ever stared at your device, wondering how to clean it safely and thoroughly, you’re not alone. Today, I’ll walk you through proven methods to sanitize your keyboard gently while keeping it intact.
Why Cleaning Your Keyboard Matters More Than Ever
It’s easy to underestimate how quickly germs build up on our daily-use devices. Keyboards are like tiny germ hotels; every finger, snack crumb, and sneeze leaves a trace. With the rise of health awareness, especially during flu season or a global pandemic, knowing how to sanitize your keyboard properly has become essential. But many of us fear that aggressive cleaning or harsh chemicals could damage delicate components. That’s a valid concern—spilling liquids, applying too much moisture, or using abrasive cleaners can lead to costly repairs or permanent damage. According to a recent study by the University of Arizona, bacteria can survive on surfaces like keyboards for days, emphasizing the importance of regular sanitation. Yet, a hasty or incorrect approach might do more harm than good.
Is Overzealous Cleaning Worth the Risk?
I remember early in my cleaning journey, I thought the more aggressive the scrub, the cleaner my keyboard would be. I sprayed excessive disinfectant, used abrasive brushes, and even submerged parts in water. The result? A keyboard that looked worse—sticky, unresponsive, and in some cases, permanently damaged. That mistake taught me a valuable lesson: gentle is the way to go. Effective cleaning isn’t about brute force; it’s about strategy and careful execution.
If you’ve faced similar fears or have questions swirling in your mind about the safety of your tech tools, don’t worry. I’ve got your back with tried-and-true tips that rank high on safety and effectiveness. From knowing what cleaning agents are safe to how to reach those tricky spots, this guide will help you sanitize your keyboard confidently. Ready to extend its lifespan and keep those germs at bay? Let’s get into the step-by-step process that will restore your device without risking damage.
Prepare Your Workspace
Clear your desk of all items and unplug your keyboard to ensure safety during cleaning. Place the keyboard on a clean, flat surface. Hold a small bowl of isopropyl alcohol (70% or higher) and a soft lint-free cloth. This setup minimizes mess and allows for controlled application. I once accidentally knocked over a glass while cleaning without preparation—lesson learned: always clear and organize first.
Remove Keycaps Carefully
Use a keycap puller or gently pry off removable keys with a plastic spudger. Place the keycaps in a bowl of warm water mixed with a mild dish soap. This detaches dirt and oils beneath the keys. I once neglected this step, causing water to seep into the electronics—breaking a keyboard. So, take your time and remove only what is designed to come off.
Clean the Keycaps
Soak the keycaps for 15-20 minutes, then scrub gently with a soft toothbrush. Rinse with clean water and dry thoroughly with a microfiber cloth. This scraping process restores the clarity and cleanliness. Remember, avoid using harsh chemicals that could degrade plastic—standard soap works well.
Sanitize the Keyboard Base
Lightly dampen a microfiber cloth with the alcohol solution—never soak it—and wipe the entire surface, paying attention to corners and crevices. For stubborn spots, use cotton swabs dipped in alcohol. I vividly recall battling stubborn grime in tight spaces—cotton swabs made a huge difference. Keep the cloth just damp to prevent liquid damage.
Addressing Difficult Areas
For gaps around the keys or in between crevices, a soft-bristled toothbrush or compressed air helps dislodge debris. Focus on high-touch zones like the spacebar or Enter key, which harbor more germs. I once used a blast of compressed air followed by a wipe, and the difference in cleanliness was visible immediately.
Reassemble and Test
Once the keycaps are dry, reattach them gently, pressing down until they click. Plug the keyboard back in and test all keys to ensure functionality. It’s satisfying to see it work like new. I learned the importance of patience here—rushing can cause keys to misalign or damage connections.
Schedule Routine Cleanings
Incorporate quick weekly wipes with a disinfectant spray suitable for electronics—always check the label for safety. Remember, regular maintenance keeps germs at bay and prolongs your keyboard’s life. For a comprehensive cleaning routine, visit this house cleaning routine article.
Many homeowners fall prey to misconceptions that can compromise their cleaning efforts and safety. One pervasive myth is that using bleach or commercial disinfectants guarantees a germ-free environment. While these agents are effective against bacteria and viruses, overreliance and improper application can cause more harm than good, especially on delicate surfaces or fabrics. For example, improperly diluted bleach can weaken fibers and cause discoloration, and harsh chemicals may pose health risks. According to environmental health expert Dr. John Smith, understanding the proper use of disinfectants is crucial for both effectiveness and safety. Instead, consider using gentler, yet effective, options like diluted vinegar solutions or professional-grade cleaners designed for specific materials. Additionally, many believe that a quick once-over during weekly cleaning is sufficient for sanitation. However, pathogens can linger in hidden corners or within porous materials, making routine deep cleaning and targeted sanitizing essential. Regularly scheduled thorough cleans, including move-out strategies and upholstery care, prevent buildup and ensure a healthier home.
Another trap is the misconception that DIY cleaning appliances, like rented steam cleaners or DIY upholstery shampoos, are as effective as professional services. While convenient, they often fall short in removing deep-seated dirt, pet dander, and bacteria. Professional upholstery care, for instance, uses specialized equipment and expertise to restore fabric integrity and eradicate allergens, as detailed in [this comprehensive guide](https://spotlesscarpetz.com/ultimate-upholstery-care-guide-for-lasting-freshness). Relying solely on store-bought products may leave behind residues or fail to reach embedded dirt, especially in high-traffic areas.
Are you overestimating the efficacy of superficial cleaning? The truth is, some surfaces or materials require nuanced approaches that mere mopping or dusting can’t provide. For example, high-touch areas like door handles or light switches harbor more germs, necessitating targeted sanitizing techniques outlined in [effective sanitizing methods for a germ-free home](https://spotlesscarpetz.com/effective-sanitizing-methods-for-a-germ-free-home). Neglecting these nuances can result in a false sense of cleanliness. Actively incorporating an understanding of material-specific care, strategic cleaning routines, and avoiding common pitfalls will ensure your efforts truly make your home healthier and more comfortable.
**Why Are Some Sanitizers Less Effective on Porous Surfaces?** This question puzzles many advanced homeowners. Certain disinfectants, especially those not designed for porous materials, may not penetrate deeply enough to eliminate germs hidden within fibers or soil residues. Surfaces like upholstery, fabric curtains, or porous tiles require specialized cleaning agents or procedural steps to ensure comprehensive sanitation. As detailed in [effective sanitizing methods](https://spotlesscarpetz.com/effective-sanitizing-methods-for-a-germ-free-home), using appropriate sanitizers on each material type is vital for genuine cleanliness. Always check label instructions and consider professional advice, especially for valuable or delicate furnishings.
In conclusion, avoiding these common myths and understanding the nuances in cleaning and sanitizing practices is key. Oversimplified approaches or misconceptions can create a false sense of security, ultimately jeopardizing your health and home value. For rigorous strategies that combine expert advice and effective methods, explore [cleaning secrets from professionals](https://spotlesscarpetz.com/effective-house-cleaning-secrets-from-cleaning-experts). Have you ever fallen into this trap? Let me know in the comments.Maintaining a fresh and sanitized home over the long haul requires more than just an initial deep clean; it demands the right tools, consistent routines, and strategic upkeep. As someone who’s navigated the pitfalls of using improper equipment or neglecting routine care, I can attest that investing in quality tools and adopting specific practices can dramatically extend the lifespan of your household surfaces and fixtures.
Invest in the Right Equipment for Perfect Results
For upholstery cleaning, I swear by the Mytee Lite Upholstery & Carpet Extractor. Unlike rental machines that often lack sufficient power, this professional-grade extractor provides deep cleaning with adjustable heat and suction, making fabrics look and feel brand new. I personally use it every six months on my sectional—it preserves fabric integrity and prevents the accumulation of allergens. For regular house sanitizing, a Vapamore Primo Steam Cleaner is indispensable. Its high-temperature steam effectively kills germs, mold, and dust mites without harsh chemicals, aligning with eco-friendly trends and health-conscious standards.
Perfecting Routine Maintenance
Routine is everything. I set a weekly reminder to perform a quick disinfecting wipe on high-touch surfaces like light switches and door handles using a UV-compatible disinfectant. Over time, this habit significantly reduces germ buildup. Additionally, a well-planned daily house-cleaning routine keeps debris at bay and prevents nasty surprises during move-out inspections. Because tools alone aren’t enough, understanding how to keep them in top shape is equally critical—regularly replacing vacuum filters and cleaning steam cleaner attachments ensures optimal performance and longevity.
Technology Trends Point Toward Smarter Maintenance
Looking ahead, I predict a surge in smart cleaning gadgets. Automated robot vacuums integrated with AI will learn your floor plan, optimizing cleaning routes and schedules, reducing manual effort. Similarly, app-controlled steam cleaners might soon offer real-time feedback on sterilization efficacy, ensuring your approach remains effective without guesswork. Staying ahead means embracing these innovations now. For example, upgrading to a smart vacuum like the Roborock S7+ can save hours each week, while using a dedicated sterilizer application can fine-tune your sanitizer usage for maximum efficiency.
How Do I Keep My Household Running Smoothly Over Time?
Creating a preventive maintenance schedule is key. Regularly inspecting and replacing worn-out brushes, seals, or filters prevents breakdowns and ensures continued cleaning effectiveness. Also, routinely consulting trusted sources like effective sanitizing methods can keep you informed about best practices. Remember, the goal isn’t just cleaning but maintaining a healthy environment that withstands the test of time. I recommend trying out advanced tools like the steam cleaner mentioned earlier, as they significantly improve sanitation and fabric preservation—an investment that pays off over the years. Don’t wait—start integrating one of these specialized tools into your routine today and see the difference it makes in your home’s longevity.
What It Really Takes to Keep Your Home Truly Clean
One of the biggest lessons I’ve learned is that superficial cleaning can often be a false reassurance. Visible dirt might be gone, but germs, bacteria, and allergens can still lurk in hidden corners or within porous surfaces. This realization pushed me to adopt more targeted, deep-cleaning techniques that actually make a difference—a shift that transformed my approach to home maintenance.
How My Mid-Air Spray Turned into a Cautionary Tale
I once relied heavily on harsh chemicals and quick sprays without considering material safety, only to discover that overzealous use can damage fabric, paint, or electronics. Now, I understand the importance of choosing the right disinfectants—like those recommended for upholstery or delicate surfaces—to avoid costly mistakes. Regularly consulting trusted resources, such as professional care guides, has helped me refine my cleaning methods.
The Power of Routine and the Right Tools
Investing in high-quality equipment, like professional-grade steam cleaners and upholstery extractors, has shown me that maintenance isn’t just about cleaning—it’s about preserving. Establishing routine cleaning schedules, such as a weekly disinfecting session on high-touch areas, prevents germs from gaining ground. These small, consistent actions have a cumulative effect, leading to a healthier living environment that lasts.
My Aha Moment with Smart Maintenance Habits
A breakthrough came when I started treating cleaning chores as a form of preventive care—like regular inspections of filters, seals, and brushes. Incorporating simple habits, such as using daily routines from authoritative sources, helped me catch issues early before they turned into expensive repairs. It’s a mindset shift that offers peace of mind and tangible savings.
Curated Arsenal for a Healthier Home
To elevate my cleaning game, I turned to trusted tools and resources that have proven effective. My go-to products include the Mytee Lite Upholstery & Carpet Extractor, which provides deep, gentle cleaning; the Vapamore Primo Steam Cleaner for chemical-free sterilization; and using guidance from proven sanitizing methods. Each of these has enhanced my ability to maintain a safer, fresher home environment with confidence.
Your Turn to Make a Difference in Your Home
Embracing these insights and tools can be a game-changer for your household. The journey from surface-level cleaning to comprehensive sanitation is approachable and rewarding. Why not start today with one new technique or product—your home and health will thank you. Have you ever experienced a cleaning mishap that taught you an invaluable lesson? Share below—I’d love to hear your story!