
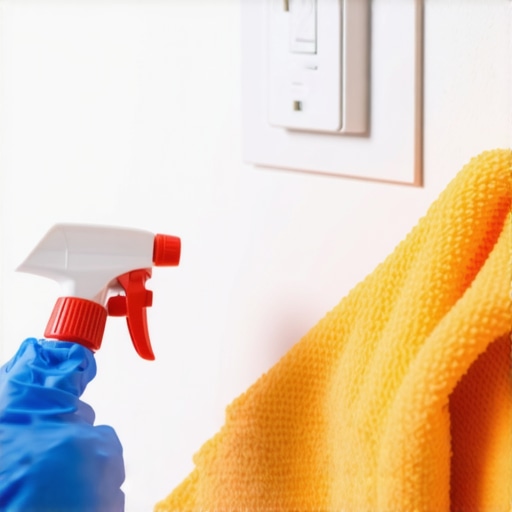
Ever gone to flip a light switch in a rush, only to hesitate because you’re worried about germs lurking on that tiny, often-forgotten surface? I’ve been there too—messy hands, tired eyes, and a nagging concern about what’s on those high-touch spots that everyone seems to ignore. One day, I realized that those switches, so small yet so vital, could be silent carriers of germs if not cleaned properly. That lightbulb moment made me dive into the world of sanitizing high-touch surfaces—especially light switches—because I knew I wasn’t alone in this struggle.
Why High-Touch Light Switches Deserve Your Attention
High-touch light switches are easily overlooked, yet they’re among the most touched surfaces in any home or office. According to a study by the American Journal of Infection Control, the average door handle or light switch can harbor thousands of bacteria and viruses, including norovirus and influenza. These tiny invaders can spread rapidly, especially during flu season or if someone in the household is sick. My own experience of catching a minor but persistent cold made me rethink my cleaning routines—those switches might have been the innocent culprits we tend to ignore.
But here’s the thing: not all cleaning methods are created equal. I used to just wipe down switches with a damp cloth, thinking that was enough. After a few failed attempts to get rid of stubborn germs, I made a mistake I see others do all the time—using harsh chemicals that can damage the switch’s wiring or surface over time. I also learned the hard way that some so-called “disinfectants” just don’t cut it on porous or textured surfaces. That’s why learning the right, safe ways to sanitize high-touch light switches is so important—it’s about protecting my family, my guests, and myself without risking damage or exposure to toxic chemicals.
So, today I promise to share practical, proven tips that will help you clean your switches safely and effectively. We’ll explore the best cleaning agents, techniques to avoid common mistakes, and even some quick habits to keep your surfaces germ-free in the long run. Ready to turn your light switches into safe zones? Let’s get started!
Choose the Right Cleaning Tools and Supplies
Start with a microfiber cloth that won’t scratch or damage the switch surface. Gather a bottle of isopropyl alcohol (at least 70%) or a disinfectant that is safe for electronics. Avoid harsh chemicals like bleach or abrasive cleaners, which can harm wiring or finish.
Power Off and Prepare
Always turn off the power at the circuit breaker or switch off the light to prevent electrical hazards. Remove any decorative covers if possible, to access the entire switch surface more easily. I recall a time I tried to skip this step; I nearly shocked myself because I didn’t switch off the power first—never again.
Apply Disinfectant Effectively
Lightly dampen the microfiber cloth with your disinfectant solution. Don’t soak it—excess liquid can seep into the switch mechanism and cause damage. Wipe down the entire switch cover, ensuring you reach all surfaces. I once used a spray directly onto the switch, which caused a short circuit; emphasizing the importance of proper application.
Focus on High-Touch Areas with Precision
Pay special attention to the edges and corners where germs tend to hide. Use a cotton swab dipped in disinfectant to reach small crevices. During my last deep clean, I noticed that neglecting these areas left some germs intact, so I now include this step in my routine.
Allow Proper Drying and Reassembly
Let the disinfectant sit for the recommended dwell time—usually around 60 seconds—to ensure germs are killed. Then, dry the surfaces thoroughly with a clean cloth. Reattach any covers, turn the power back on, and switch the lights on to verify functionality. Remember, rushing this step can leave moisture that might cause electrical issues later.
Incorporate Routine Maintenance Habits
Make a habit of quick daily wipes with disinfectant, especially during flu season. For a quick routine, I use disinfectant wipes after cleaning my hands—quick and effective. This daily habit keeps germs at bay and reduces the need for intensive deep cleaning sessions, which can be disruptive.
Special Tips for Different Switch Types
If your switches are textured or have plastic covers, choose a disinfectant compatible with those materials to prevent deterioration. For touch-sensitive or smart switches, consult the manufacturer’s cleaning instructions to avoid voiding warranties or damaging electronics. I learned this the hard way when I accidentally used a harsh chemical on my smart switch, which stopped responding afterward.
Many homeowners and renters alike believe they know the basics of upholstery and cleaning, but some of the most widespread advice actually leads to mistakes that compromise cleanliness and even damage surfaces. In my years of professional cleaning, I’ve uncovered hidden nuances that often go unnoticed, and I’m here to share the truth behind these misconceptions. Let’s start by busting some myths and exploring advanced pitfalls that trip up even seasoned DIYers.
Is Using Bleach Always the Safest Bet for Sanitizing?
Contrary to popular belief, bleach isn’t the ultimate sanitizer for every surface. While effective on non-porous surfaces like ceramic tiles or countertops, bleach can cause discoloration and degradation when used on upholstery, fabric, or porous materials. Not only does it risk damage, but it may also produce harmful fumes without actually penetrating deep enough to eliminate all bacteria and viruses. Scientific studies back this up, showing that bleach isn’t effective against certain pathogens when used improperly on porous surfaces—something many overlook. Instead, effective sanitization for fabrics and soft surfaces requires gentler yet thorough methods, such as effective sanitizing techniques that focus on penetration and dwell time.
Beware the Trap of Over-Sanitizing Without Understanding Materials
One common mistake is over-sanitizing or over-using chemical cleaners, especially during move-outs. While aiming for a spotless space, many forget that certain materials—like delicate upholstery or vintage fabrics—can be damaged by harsh chemicals. Over time, repeated exposure can also weaken fibers or cause discoloration. The key is understanding the material’s properties and choosing appropriate cleaning agents, which is crucial for long-term preservation. For detailed upholstery tips, see upholstery cleaning tips. Rushing into heavy-duty chemical use without this knowledge can be costly and counterproductive.
How Do Incomplete Move-Out Cleans Hurt Your Deposit?
A common misconception is that a quick tidying up suffices before moving out. In truth, moving-out cleaning involves more than surface wiping; tenants must ensure every corner, crevice, and hidden spot is addressed. Overlooking areas like behind appliances, inside vents, or under baseboards can result in deposit deductions or additional charges. I recommend following a comprehensive move-out cleaning checklist that highlights often-neglected zones. Skipping this detailed approach risks leaving dirt or grime that’s visible to inspectors, leading to unnecessary costs.
What Advanced Mistakes Are Common in Sanitizing High-Touch Surfaces
While many focus on cleaning visible surfaces, neglecting the microscopic can be a costly error. Using inadequate disinfectants, applying chemicals improperly, or wiping surfaces without letting disinfectants sit for the recommended time all undermine effectiveness. Additionally, many make the mistake of recontaminating cleaned surfaces by touching them with unwashed hands or using contaminated cloths. Remember, effective sanitization isn’t just about visible cleanliness but about eliminating pathogens at a microscopic level. For in-depth strategies, I suggest reviewing sanitizing secrets to get it right every time.
So, have you ever fallen into this trap? Let me know in the comments. Recognizing these nuances can save you time, money, and potential health risks. Mastering the art of nuanced cleaning is what differentiates a professional result from a superficial one, ensuring your home stays truly spotless and safe.
Maintaining Your Equipment for Consistent Results
Ensuring that your cleaning tools remain effective over time is crucial for maintaining a spotless home. I personally swear by high-quality microfiber cloths because they trap dirt and microbes more efficiently than cheaper options, reducing the need for frequent replacements. Regularly washing and replacing microfiber cloths prevents bacterial buildup and keeps your cleaning performance at its peak, aligning with the strategies outlined in house cleaning strategies for a sparkling home.
Why I rely on a steam cleaner for deep upholstery cleaning
A steam cleaner offers chemical-free sanitation that penetrates deep into fabric fibers. It’s my go-to solution for pet dander and stubborn stains without risking fabric damage. Plus, modern models come with adjustable steam settings, allowing you to tailor the cleaning intensity to different upholstery types. This tool enables quick, effective maintenance and aligns with the future trends toward eco-friendly cleaning solutions.
How do I keep my tools working efficiently over time?
Consistent maintenance is key. Regularly descaling your steam cleaner prevents mineral buildup, which can compromise performance. For microfiber cloths, a thorough wash after each use and air drying prevent bacterial growth. Also, inspect and replace worn-out parts—like brushes or hoses—before they break down completely. Proper storage, avoiding damp areas, further extends the lifespan of your equipment. For more in-depth advice, check professional cleaning secrets.
The trend of smart cleaning tools and software
Looking ahead, I believe the integration of smart technology will revolutionize house cleaning. From app-controlled vacuum robots to sensor-driven air purifiers, automation will become standard, making long-term maintenance easier and more effective. These innovations promise fewer missed spots and more thorough sanitation, ultimately saving time and effort while ensuring healthier living environments.
How do I maintain my cleaning schedule without feeling overwhelmed?
Adopting a routine and leveraging effective scheduling apps can make a big difference. Personally, I use a digital calendar with reminders for weekly and monthly tasks, ensuring nothing slips through the cracks. Consistency is essential, especially when maintaining expensive upholstery or delicate fabrics. Regular upkeep not only prolongs their lifespan but also maintains the aesthetic and hygienic quality of your home. For detailed routines, see daily house cleaning routines. Try setting aside dedicated time each week to inspect, clean, and maintain your equipment—it keeps your tools working at their best and your home in top shape.
Over the course of this journey, I’ve uncovered invaluable lessons that go beyond the typical cleaning tips—stories and insights that transformed my approach to maintaining a spotless, healthy home. One surprising revelation was how often overlooked details, like the type of disinfectant or the sequence of steps, can make or break the sanitation process. I used to believe more chemicals meant better cleaning, but I learned the importance of selecting gentler solutions tailored to each surface, especially upholstery, to avoid long-term damage. My encounters with smart cleaning tools taught me that technology isn’t just a luxury; it’s an evolving ally in achieving consistent, thorough results. Finally, the realization that routine maintenance and proper storage significantly extend the lifespan of cleaning equipment empowered me to stay ahead in my sanitizing game, saving time and money while safeguarding my home’s hygiene.
Uncover the Hidden Truths That Elevate Your Cleaning Routine
– The biggest mistake I made was relying solely on superficial wiping, unaware that microscopic germs survive on seemingly clean surfaces. Deep understanding of dwell times and material compatibility changed that for me, making my sanitization efforts truly effective. Effective sanitizing techniques are essential, and realizing this was a game-changer.
– My myth-busting moment came when I discovered bleach isn’t always the best for every material. Knowing when to avoid harsh chemicals not only protects my upholstery but also preserves its aesthetics. Experienced professionals emphasize this nuance, and I’ve adopted their insights.
– The most valuable lesson? Routine isn’t just a habit; it’s a safeguard. Integrating quick daily disinfecting sessions prevents germs from taking hold, reducing the need for intensive deep cleans that can be disruptive. I now schedule these routines with the help of digital reminders, making it effortless to stay consistent.
Equip Yourself with Trusted Resources for True Confidence
– I personally rely on The Ultimate Upholstery Care Guide because it offers comprehensive advice tailored to different fabric types, helping me prevent damage while deep cleaning. Its expert insights have saved my furniture from stains and deterioration.
– For tools, I swear by high-quality microfiber cloths. They trap dirt more effectively and are gentle on delicate surfaces. Proper maintenance tips from cleaning secrets from pros keep my tools performing at their best, ensuring each cleaning session is efficient and thorough.
– When selecting disinfectants, I trust recommendations from industry-leading sources to avoid products that are ineffective or harmful. A well-chosen disinfectant, applied correctly, is crucial for germ-free surfaces.
Your Next Step Toward Confidence and Cleanliness
Don’t wait for germs or damage to remind you of the importance of precise, safe cleaning. Embrace the knowledge, tools, and routines that make upholstery and high-touch surfaces safe havens in your home. The future of house cleaning is as much about mindfulness as it is about technique—so start today, and enjoy the peace of mind that comes with a truly clean space. Remember, the effort you invest now creates a healthier environment for everyone you love.
What’s the first area or surface you plan to upgrade your cleaning routine on? Let me know below—I’d love to hear your plans and help you get started!