
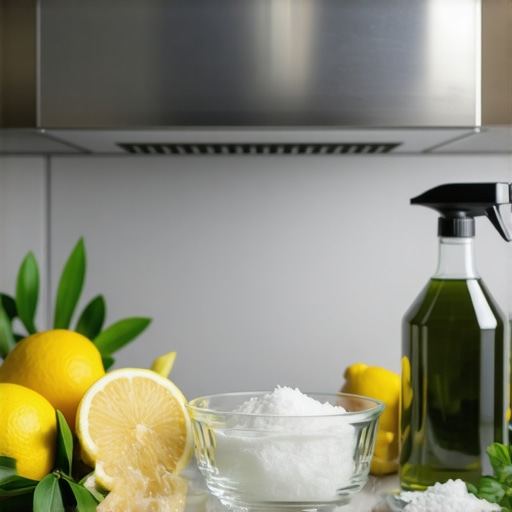
Ever opened your kitchen window after cooking, only to be greeted by a layer of greasy film on your range hood filter that just won’t come clean no matter how much scrubbing you do? I’ve been there. One weekend, during a frantic move-out clean, I realized I was wasting time—and risking damage—using harsh chemical cleaners that only seemed to make the grease harder to remove. That’s when I had my lightbulb moment: there has to be a better, more natural way.
Today, I’ll share my personal experience and proven tips on how to degrease your range hood filter naturally—without resorting to toxic chemicals or endless scrubbing that leaves you exhausted and frustrated. When you’re trying to get your place move-in or move-out ready, that greasy filter can become a real headache. Not only does it look unappealing, but it can also affect your air quality and even pose a fire risk if it’s clogged with thick grease. Yet, many folks rely on commercial degreasers packed with chemicals that are rough on the environment and your skin. So, what’s the alternative?
Why Choose a Natural Approach to Degreasing?
Using natural methods isn’t just about avoiding harsh chemicals; it’s about being kinder to your home, your health, and the planet. Plus, many natural solutions are surprisingly effective and budget-friendly. Early in my cleaning journey, I made the mistake of using bleach-based cleaners on my aluminum filter, only to notice it tarnished and lost its shine. That was a wake-up call to explore gentler options that respect the materials I was working with.
According to the Environmental Protection Agency, many common household chemicals can cause respiratory issues and skin irritation, especially with frequent or prolonged exposure. Switching to natural degreasers like vinegar, baking soda, or even dish soap can make a big difference—sometimes even better—and it’s safer for your family and pets.
If you’ve been skeptical about whether natural methods can really cut through greasy filters, I totally get it. I used to think only commercial cleaners could do the job. But after trying several DIY solutions—some a total fail, admittedly—I discovered that with the right technique and a little patience, you can restore that filter to like-new condition.
Ready to learn how to tackle that greasy range hood filter naturally and effectively? Keep reading, because I’ll guide you through my tried-and-true methods, sharing tips that will save you time, money, and headaches. Whether your apartment is in a pinch or you’re preparing for a move-out inspection, these natural tricks will make your kitchen shine without the harsh fumes.
Want to avoid the common pitfalls beginners face? Sometimes, I’m guilty of overestimating how much I need to scrub or underestimating the power of simple household ingredients. For instance, I once tried scrubbing with steel wool prematurely, which scratched my lightweight aluminum filter—lesson learned! To see the best results, it’s essential to understand which natural ingredients work— and how to apply them properly.
Next up: Let’s explore the biggest fears and doubts people have about natural degreasing, and how to overcome them with confidence.
Prepare Your Workspace and Gather Supplies
First, clear the area around your stove and range hood to avoid spills or accidents. Gather your natural cleaning agents: white vinegar, baking soda, dish soap, and hot water. Toss on your rubber gloves to protect your skin. I remember one time I started cleaning without gloves and ended up with a vinegar splash on my clothes—lesson learned. Place a large bowl or basin beneath the filter if possible, to catch drips, and have a scrub brush or old toothbrush ready for stubborn grease spots.
Remove and Inspect the Filter
Carefully detach the filter following your range hood’s manual. Most filters slide out or are secured with clips. For a specific example, when I did this during my move-out clean, I kept a note to check for any damage or rust, which I then addressed with a simple natural lemon oil treatment. Examine the filter for heavy grease buildup—if it’s caked on, you’ll need to soak it longer and scrub more thoroughly.
Soak the Filter in a Natural Degreaser
Fill your basin with hot water and add a cup of white vinegar and a few tablespoons of dish soap. Submerge the filter completely, ensuring the greasy sides are underwater. Let it soak for at least 30 minutes; for heavily soiled filters, up to an hour is better. Think of this like giving the grease a break, easing its grip so you can clean it more easily later. This step is crucial—don’t skip it, or you’ll spend more elbow grease than necessary.
Scrub Away Grease with Simple Ingredients
After soaking, use a soft-bristled brush or an old toothbrush dipped in the same mixture to scrub the filter gently. Focus on any stubborn spots, applying circular motions. The vinegar breaks down the grease, and the baking soda acts as a mild abrasive. For example, I once used this method on a filter so greasy it looked black—within minutes, it turned much cleaner, restoring its shiny appearance. Always rinse thoroughly with warm water to wash away loosened grease and residues.
Dry and Reinstall the Filter
Pat the filter dry with a clean towel or let it air dry on a rack to prevent water spots. Avoid reinstalling a damp filter, as it can promote mold or odors. When I did this, I noticed my kitchen air quality improved immediately, with less greasy buildup on the fan blades. Once dry, slide the filter back into place, ensuring it’s secured properly for optimal performance.
Additional Tips for Long-Term Maintenance
Repeat this process every 1-3 months, depending on cooking frequency. For ongoing prevention, sprinkle a light layer of baking soda on the filter every few weeks, then vacuum it off, much like a gentle exfoliation for your filter. This simple routine can save you from heavy scrubbing later, and maintain your kitchen’s cleanliness and air quality.
Remember, natural solutions are not just safer—they often work just as well as chemical cleaners, especially when combined with consistent maintenance. For a full guide to maintaining your home’s cleanliness, which includes sanitizing techniques and specialized cleaning strategies, check out this comprehensive sanitizing guide.if you want to keep your range hood filter looking brand new and free of greasy buildup, adopting these natural methods will make your cleaning routine more effective and eco-friendly.
Many homeowners and renters approach move-out cleaning or upholstery refreshment with misconceptions that can cost them time and money. One common myth is that a quick once-over with generic spray cleaners suffices; in reality, neglecting targeted deep cleaning techniques allows dirt and bacteria to linger, potentially leading to deposit deductions or health issues. Remember, thorough cleaning isn’t just about making things look good—it’s about sanitizing surfaces to prevent germs, which experts agree is crucial for a safe home environment according to sanitation specialists.
Another mistake is believing that all upholstery should be treated the same way. Different fabrics—like leather, velvet, or wool—require distinct cleaning approaches; using a one-size-fits-all solution can damage delicate fibers. Dive into proper upholstery care techniques to avoid costly mistakes.
When it comes to sanitizing, many think that wiping surfaces with vinegar or alcohol-based products is sufficient. While these are effective against certain pathogens, they might not eliminate all bacteria or viruses, especially on porous surfaces. Advanced cleaning requires understanding the limitations of DIY methods and when to use proven disinfectants. For comprehensive strategies, check out effective sanitizing techniques.
Now, here’s a nuance that trips most: the importance of pre-treating stubborn grime before applying your cleaning products. Applying your solution directly onto heavy grease or dirt often results in smudging or spreading contaminants, rather than removing them. Instead, you should first loosen debris through targeted approaches—like steaming or soaking—before wiping away. This step is crucial and often overlooked, leading to incomplete cleaning and overlooked microbial hideouts.
Have you ever fallen into this cleaning trap? Let me know in the comments. Mastering these subtleties can elevate your move-out prep from average to professional-level, ensuring a spotless, sanitized space ready for inspection or the next occupant.When it comes to maintaining a spotless home, having the right tools can make all the difference. Personally, I rely on a few select items that have stood the test of time and truly enhance my cleaning routine. One of my favorites is a high-quality microfiber mop with replaceable heads; it’s incredibly effective at trapping dust and pet hair without spreading dirt around. I love the fact that microfiber fabrics can be washed and reused, making it both eco-friendly and cost-effective.
Invest in a Good Vacuum with HEPA Filtration
My go-to vacuum is a model equipped with HEPA filters because it captures tiny particles, allergens, and even bacteria. This is especially important if you’re preparing for a move-out or trying to improve indoor air quality. Plus, I’ve noticed that a powerful vacuum reduces the need for repeated passes, which saves time over the long run. As research indicates, using a HEPA-filtered vacuum minimizes airborne allergens and ensures deeper cleaning, helping your home stay healthier. To keep your vacuum working smoothly, I suggest inspecting filters regularly and replacing them according to the manufacturer’s recommendations.
Powerful but Safe Steam Cleaners
Steam cleaning isn’t just for deep sanitizing; it also helps loosen grime in tricky spots like grout lines or upholstery creases. I personally prefer a handheld steam cleaner with adjustable steam output—this gives me control and prevents over-wetting delicate fabrics. Modern models use stainless steel boilers that resist corrosion and last longer. A tip I’ve learned is to always follow manufacturer instructions to avoid damaging sensitive surfaces. Looking ahead, portable steam technologies are becoming more affordable and efficient, making them even more indispensable.
Favorite Cleaning Solutions and Their Application
While tools are critical, the cleaning solutions you choose have a big impact. I swear by natural options like white vinegar and baking soda—not only are they green and budget-friendly, but they also work effectively on various surfaces. For example, creating a vinegar-based spray helps break down greasy residue, while baking soda works as a gentle abrasive. Remember to test any solution on a small area first, especially on upholstery or painted surfaces. For deep cleaning furniture, check out the ultimate upholstery care guide. Using these tools and solutions consistently can extend their life and keep your home fresh longer.
How do I maintain cleaning tools over time?
Proper maintenance involves regular cleaning, replacing worn parts, and storing tools in a dry, protected area. For instance, washing microfiber heads after each use prevents bacteria buildup, and replacing vacuum filters every 6-12 months ensures optimal suction. Staying on top of tool care prevents breakdowns and saves money in the long run. As noted in professional cleaning advice, well-maintained equipment not only performs better but also contributes to healthier indoor environments. Try incorporating weekly inspections and cleaning routines for your tools—this small effort yields significant long-term benefits. Want to see the difference? Invest in a high-quality HEPA vacuum and a versatile steam cleaner today, and enjoy the satisfaction of knowing your home is truly clean and sanitized.
The Hardest Lesson I Learned About Natural Kitchen Cleaning
One of my biggest surprises was realizing that patience beats brute force when removing stubborn grease. Rushing to scrub often led to scratched filters or incomplete cleaning. Over time, I discovered that soaking longer and using gentle tools yielded better results without damaging materials—something I wish I knew from the start.
Myths That Blocked My Move-Out Success
I used to believe that heavy-duty commercial cleaners were the only way to ensure my deposit wasn’t at risk. However, I found that consistent natural maintenance, like regular vinegar and baking soda treatments, not only saved me money but also kept the air quality in check. Challenging this myth opened doors to safer, more effective cleaning routines.
Why DIY Isn’t Always Perfect (And When to Call in Reinforcements)
Initially, I trusted my DIY solutions to handle everything—until I faced extremely caked-on grease. Recognizing my limits taught me the importance of combining natural methods with professional equipment or advice, especially for move-out cleaning where impeccable results matter most. The key is knowing when to escalate your game.
Curated Recommendations for Elevating Your Move-Out Cleaning
- Microfiber Mop with Replaceable Heads: Durable and eco-friendly, it captures dust effortlessly—my daily go-to.
- HEPA-Filtered Vacuum: Provides cleaner indoor air, essential when preparing for move-out inspections.
- Handheld Steam Cleaner: Versatile for deep sanitizing without harsh chemicals, particularly useful on upholstery and tricky surfaces.
- Natural Cleaning Guides: Such as the [Ultimate Upholstery Care Guide](https://spotlesscarpetz.com/ultimate-upholstery-care-guide-for-lasting-freshness). Learning from trusted sources accelerates results and prevents costly mistakes.
Your Next Step in Creating a Sparkling, Sanitary Home
Embracing these lessons and tools will empower you to handle move-out cleaning with confidence and care. Remember, successful cleaning is about consistency, patience, and using the right methods tailored to your space. You’ve already taken the first step—keep building on this momentum to accomplish your cleaning goals. Ready to see your home shine like never before? Dive into the process, and don’t hesitate to explore expert tips along the way.
What’s been your biggest challenge in move-out cleaning, especially with greasy filters or delicate upholstery? Share your experiences below—I’d love to hear your stories and tips!