
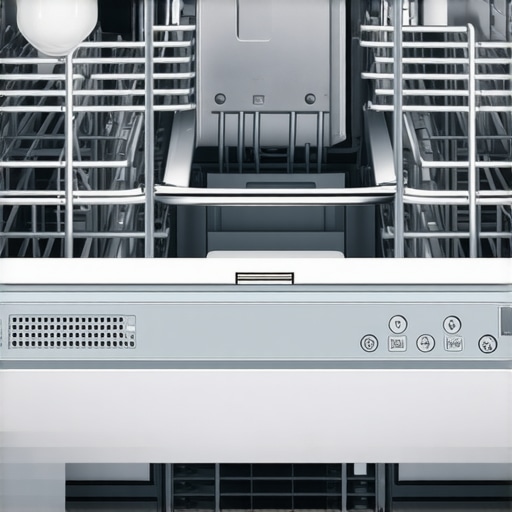
Ever opened your dishwasher only to be met with a foul smell and dishes that come out less than spotless? I remember the lightbulb moment when I realized that the real culprit wasn’t just leftover food or hard water—no, it was the trapped gunkbuilding up inside the drain. At first, I shrugged it off, blaming my dishwasher for being
Start with Decluttering and Prepping
Before diving into sanitize and clean, clear out clutter. It’s like laying a clean canvas before painting—removing unnecessary items provides better access and an honest view of what needs attention. I remember one time during a move-out, I spent a morning just stacking old magazines and scattered shoes aside, which made the actual cleaning process much smoother, especially when tackling hidden spots.
Deep Clean High-Traffic Surfaces
Focus on surfaces that harbor germs and grime. Use effective methods like hot water mixed with a gentle (but effective) disinfectant, avoiding harsh chemicals that can damage surfaces or cause health issues. For countertops, especially in the kitchen, pay attention to edges, seams, and hidden corners where buildup like grease or mineral deposits hide. Sanitizing secrets will give you tips on choosing the right disinfectant and method.
Pay Attention to Hidden Corners
Don’t neglect the back of shelves, under appliances, or inside cabinets. For instance, the space behind the refrigerator often accumulates dust and grime—gross, but easy to overlook. During my last deep clean, I pulled out the fridge and used a microfiber cloth slightly dampened with vinegar solution to wipe down the hidden spots, achieving a noticeably fresher smell.
Target Upholstery and Soft Furnishings
Upholstery can trap dust, pet hair, and odors. Use specialized cleaning techniques—like upholstery care tips—to refresh fabric surfaces without over-wetting or damaging. For example, I once cleaned a microfiber sofa with a gentle steam method, which lifted built-up dirt and restored softness. Remember, always test a small area first.
Remove Stains and Odors Safely
For stubborn stains like wine or ink, avoiding harsh bleach is crucial. Instead, apply a mix of baking soda and water or use specialized stain removers. To combat persistent odors, wipe the fabric with a solution of white vinegar and water, then air out thoroughly. You can find proven techniques at stain lifting methods.
Sanitize Bathroom and Kitchen Fixtures
High-touch areas like faucets, handles, and switches are germ hotspots. Use a proven sanitizing approach—like leaving a disinfectant spray to sit for at least 10 minutes—to ensure maximum bacteria kill. For stubborn grime, such as soap scum or mineral deposits, use a brush with stiff bristles and a household vinegar solution, avoiding abrasive tools that might scratch surfaces. Incorporate specialized cleaning hacks for hard-to-clean spots.
Manage Floors Efficiently
Vacuum and mop thoroughly, paying special attention to corners, under furniture, and behind doors. For floors prone to grime, like kitchen tiles, use a mop dampened with hot water and a safe cleaning agent. When mopping, don’t forget to wring out excess water—this prevents scattering dirt and causes streaks. Remember, microfibre mops are best, as they trap dirt effectively without spreading germs.
Deep Clean Grout and Edges
Use a grout brush for tiles in bathrooms and kitchens—avoiding quick scrubbing that leaves residue. Apply a mixture of baking soda and vinegar, let it foam, then scrub and rinse. This combo dissolves grease and mold, leaving tiles brighter. Regular polishing with a dry cloth removes lingering streaks, maintaining a shiny finish.
Air Out and Final Inspection
Open windows and doors to allow fresh air to circulate, dispersing any lingering cleaning chemical smells. Double-check that all surfaces are dry, especially high-touch and soft furniture. After completing your cleaning routine, walk through each room with a checklist—like those at move-out checklists—to ensure no spot is missed.
Many homeowners hold firmly to common myths about cleaning, often leading to ineffective results or even damage. For instance, the widespread belief that hot water always sanitizes surfaces is misleading; in reality, temperature alone doesn’t guarantee germ elimination, especially on porous materials where bacteria can hide. Instead, the choice of disinfectant plays a crucial role, as highlighted by experts at Effective Sanitizing Methods. Moreover, there’s a common misconception that a quick wipe is sufficient for move-out cleaning. In truth, thoroughness is key—skipping detailed tasks like deep grout scrubbing or soft furnishings sanitization can jeopardize your deposit return, as outlined in Move-Out Hack Strategies. Advanced cleaning requires understanding the subtleties, such as avoiding abrasive tools that scratch surfaces or incorrect disinfectant dwell times that render the process ineffective. For example, many forget to allow disinfectants to sit for the recommended period, which studies show significantly reduces microbial load (see the CDC guidelines). When it comes to upholstery, a common mistake is over-wetting fabrics, risking mold growth and fabric damage. The Ultimate Upholstery Care Guide emphasizes gentle techniques like steam cleaning and spot testing prior to full treatment. Plus, many overlook hidden corners or behind appliances, which harbor grime and bacteria, undermining overall cleanliness. Regular inspection and targeted cleaning in these areas are often the difference between a genuinely spotless home and one that just looks clean. Have you ever fallen into this trap? Let me know in the comments. Remember, effective cleaning isn’t about shortcuts—it’s about understanding these hidden nuances to truly protect your health and ensure your space shines.
Maintaining Your Equipment for Consistent Results
Investing in quality cleaning tools is just the beginning; proper maintenance ensures they stay effective over years of use. For example, I personally swear by a high-grade microfiber mop, which I rinse thoroughly after each session and replace every two years to prevent bacterial buildup. Regularly checking your vacuum filters and replacing them every 6 to 12 months keeps your house air quality optimal and ensures deep cleaning performance. Remember, neglected tools can become dirt traps, reducing their lifespan and cleaning efficacy.
Optimize Your Equipment with Smart Scheduling
Set up routine maintenance intervals—like inspecting grout brushes monthly or sanitizing reusable cloths every week. A well-maintained steam cleaner not only prolongs its lifespan but also guarantees sanitation at the microscopic level, as advocated by expert cleaning tips. Using tools as intended and caring for them actively reduces the need for costly replacements and ensures your home remains germ-free long-term.
Choosing Tools That Save You Time and Effort
For upholstery, I rely on a professional-grade steam cleaner that I run monthly—this removes deep-seated dust and pet odors without harsh chemicals. To keep your vacuum performing at its best, wash or replace filters regularly, a simple yet often overlooked step that prevents dust recirculation, according to cleaning experts. These small routines significantly extend tool longevity and enhance cleaning quality, making your efforts more effective over time.
Future Trends in Cleaning Tools
Looking ahead, I anticipate AI-powered cleaning devices becoming more prevalent—robots that automatically scrub and sanitize with minimal oversight, integrating smart sensors to adapt to surfaces. This evolution will make maintaining cleanliness even easier, freeing up your schedule for other priorities. Until then, the focus should remain on diligently caring for your existing tools, which will serve you reliably through these advancements.
How do I keep my cleaning tools working efficiently over time?
Regularly inspecting, cleaning, and replacing parts of your equipment is key. For example, a microfiber mop should be rinsed thoroughly after each use and replaced every couple of years to prevent bacteria transfer. Similarly, maintaining your vacuum filters and brushes guarantees optimal suction and air quality. Implementing a maintenance schedule, such as monthly filter checks and yearly deep cleans of your steam devices, will ensure your tools perform at their best, saving you money and time in the long run. For guidance on keeping your supplies in top shape, visit effective sanitizing methods. Try scheduling a weekly tool check—your future self will thank you for the spotless, germ-free home that results from diligent maintenance.
The Hidden Lessons That Changed My Cleaning Game
The biggest breakthrough in my cleaning routine came when I realized that addressing only the surface isn’t enough—true cleanliness involves paying attention to those overlooked cracks and crevices. I used to believe that spot cleaning was sufficient until I discovered how much grime and bacteria hide behind appliances and in grout lines. This lightbulb moment taught me that consistent, targeted efforts prevent build-up and save me time in the long run.
Tools That Do the Heavy Lifting—And How to Keep Them Effective
My trusted microfiber mop has revolutionized how I clean floors, but I learned early on that neglecting maintenance diminishes its power. Rinsing it thoroughly after each use and replacing it every two years ensures it continues to trap dust and dirt effectively. Similarly, regular filter checks on my vacuum help maintain optimal suction, preventing dirt recirculation. These proactive steps have been game-changers, ensuring my efforts always deliver sparkling results. For more insights on tool care, visit effective sanitizing techniques.
Revelations About Chemical Use That Aren’t Common Knowledge
I used to think that more disinfectant meant a cleaner home, but I soon learned that overusing harsh chemicals could damage surfaces and harm my family’s health. Experts emphasize allowing disinfectants to sit for the recommended dwell time—usually around 10 minutes—to ensure bacteria are truly killed. Additionally, mixing certain chemicals can be dangerous, so understanding which products to combine is vital. Knowing these subtle nuances has made my cleaning safer and more effective. Discover more about proper disinfectant use at disinfectant secrets.
The Power of Overlooked Spots in Achieving True Cleanliness
One of my biggest mistakes was ignoring behind the toilet and under the kitchen sink. Once I started inspecting these hidden spots regularly, my home felt exponentially fresher and healthier. Micro-areas like grout lines, vent covers, and inside appliances harbor bacteria and dirt, silently compromising hygiene. Regularly targeting these spaces has become my secret weapon for a home that not only looks clean but is genuinely sanitized. Check out move-out cleaning checklists for comprehensive guidance on this.
Refining Upholstery Care for Lasting Freshness
I realized that fabrics like microfiber and velvet aren’t just about aesthetics—they can trap odors and allergens. Using steam cleaning and spot testing ensures I refresh furniture without risking damage. Over-wetting can cause mold, so I’ve learned to apply solutions carefully and air out thoroughly. These small tweaks have extended the lifespan of my soft furnishings and kept my home feeling inviting. For detailed upholstery tips, explore upholstery care strategies.
The Unexpected Effect of Proper Equipment Care
Surprisingly, maintaining my cleaning tools has made the biggest difference in results—clean tools mean cleaner homes. Regularly inspecting, cleaning, and replacing parts like filters and brushes not only prolongs their life but also guarantees optimal performance. A deep-cleaned steam machine or a fresh-vacuum filter enhances sanitation, making every effort more effective. Investing time in tool maintenance has paid off in my home’s cleanliness and my peace of mind. For more on this, see tool maintenance advice.