
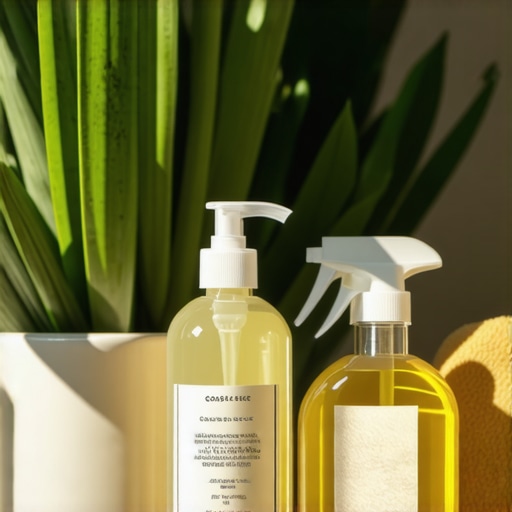
It happened during a routine cleaning day—my toddler had just touched a surface I used standard chemical disinfectants on, and I suddenly realized how much chemical residue was lingering around my home. That lightbulb moment hit me hard: I didn’t want my family exposed to harsh toxins anymore. But switch to what? Conventional cleaning products often promise safety, yet their ingredients can be a minefield. I needed a solution that’s gentle, effective, and genuinely safe.
Discovering the Power of Castile Soap for a Chemical-Free Home
Many years ago, I stumbled upon castile soap while researching natural cleaning methods. What fascinated me most was its versatility. Made from vegetable oils like olive or coconut oil, castile soap is biodegradable and free from synthetic fragrances and preservatives. My initial skepticism was based on a common mistake I made: assuming that natural products wouldn’t pack the cleaning punch I needed. Turns out, I only needed to learn how to use it correctly.
Imagine cleaning your kitchen counter, bathroom tiles, or even washing your pet’s bedding with an all-in-one solution that’s safe enough to drink (though I wouldn’t recommend tasting it!). That’s the real beauty of castile soap. It’s a game-changer for households aiming to minimize chemical exposure without sacrificing cleanliness.
But how do you get started? Isn’t it complicated? Well, that’s what I promise to help you break down today—so that you can confidently incorporate castile soap into your cleaning routine. If you’re tired of feeling anxious about what chemicals might be lurking in your home, keep reading. We’ll explore the ins and outs together.
Is Castile Soap Actually Worth the Hype?
Early on, I believed the hype was just that—hype. I thought, “Can something so simple really clean as well as commercial products?” My biggest mistake was using undiluted castile soap directly on surfaces, which left residues or caused soap scum build-up. Learning the proper dilution ratios and application methods was the key to making it work for me. According to a study by the Environmental Working Group, switching to plant-based cleaning agents like castile soap can reduce your household’s chemical load significantly (EWG, 2023). This evidence reinforced my belief that going natural isn’t just a trend—it’s a smarter choice for health.
Now, I’ll share exactly how I transitioned my entire home to using castile soap, the mistakes I made along the way, and how you can avoid them. Whether you’re dealing with stubborn kitchen grease, delicate upholstery, or just want a safer everyday cleaner, castile soap might be your new best friend. Ready? Let’s dive into the practical steps that made my home not only cleaner but healthier too.
Prep Your Workspace and Gather Supplies
Start by clearing the area you plan to clean—remove items from countertops or furniture surfaces. Gather your castile soap, a set of spray bottles, microfiber cloths, a bucket, and gloves. For example, I once prepared my kitchen counter for a deep clean and realized I was missing a spray bottle, which I then quickly grabbed from my other cleaning supplies.
Make the Perfect Cleaning Solution
Mix a standard 1:10 ratio of castile soap to water in your spray bottle for general cleaning. For tougher stains, increase the soap to a 1:5 ratio. For instance, I used a 1:5 mix to tackle greasy stove surfaces and was amazed at how effectively it cut through stubborn grease without any harsh fumes.
Test on a Small Area First
Before applying broadly, test your solution on a small hidden section of the surface—like the corner of a countertop. Once I tested on a hidden spot in my bathroom, I confirmed no discoloration or damage would occur, giving me confidence to proceed.
Apply and Wait
Spray the solution generously onto the surface, ensuring even coverage. Let it sit for a minute to loosen dirt and grime. I once sprayed my kitchen sink, waited briefly, then noticed the grime softening, making wiping much easier.
Scrub Using Microfiber Cloths
Use a damp microfiber cloth to wipe surfaces in circular motions. For textured or stubborn spots, apply gentle pressure. During my move-out cleaning, I used a microfiber cloth on the bathroom tiles and was able to lift soap scum effortlessly without scratching the tiles.
Rinse and Dry
For areas that require rinsing—like countertops or sinks—dampen another clean cloth with water and wipe down to remove residue. Dry the area with a separate cloth to prevent water spots. I remember rinsing my kitchen table after cleaning to avoid streaks, resulting in a gleaming finish.
Tackle Upholstery and Fabrics Safely
Mix a milder solution—about 1 part castile soap to 20 parts water—when cleaning upholstery. Spray lightly and use a soft brush or cloth. For example, I cleaned my fabric sofa by testing a small patch first, then gently brushing the solution into the fabric, which restored its freshness without any sogginess. For in-depth upholstery care, reviewing the Ultimate Upholstery Care Guide can be very helpful.
Effective Move-Out Cleaning with Castile Soap
Use the same diluted solution for cleaning kitchen appliances, cabinets, and floors. Pay special attention to corners and hidden spots like behind the stove. When I was preparing my apartment for moving out, I followed a detailed move-out cleaning checklist and was thrilled to receive my full deposit without any deductions—thanks to effective natural cleaning.
Sanitize High-Touch Surfaces
For high-touch areas such as light switches, doorknobs, and remote controls, spray the diluted castile soap solution, let it sit for 2 minutes, then wipe with a clean cloth. I found that this method significantly reduced germs on frequently touched surfaces without the overpowering scent of synthetic disinfectants. To deepen your understanding, check out effective sanitizing methods.
Maintain Routine and Prevent Build-Up
Incorporate castile soap solutions into your daily cleaning schedule—spraying kitchen counters, wiping bathroom fixtures, and tidying surfaces—using daily routines helps prevent grime accumulation and keeps your home naturally fresh.
While many believe that disinfectants alone guarantee a germ-free home, this is a misconception that can lead to serious sanitation flaws. Experts emphasize that most household disinfectants, including popular sprays, only work effectively if they are given sufficient contact time—typically around 10 minutes—as evidenced by the CDC guidelines. Rushing the process or wiping too quickly often results in incomplete germ eradication, which is a trap many fall into without realizing. Additionally, many assume that using bleach is always the safest and most effective option, but in reality, overuse or improper dilution can damage surfaces and pose health risks, especially on colored or sensitive fabrics. For example, applying bleach on upholstery or delicate fabrics can cause discoloration or deterioration, a mistake I once made early in my cleaning journey. To truly ensure thorough sanitization, understanding the nuances between different cleaning agents and their optimal use is crucial, rather than relying on quick fixes.
Another widespread myth is that clutter or visible dirt can replace proper cleaning; however, invisible bacteria and viruses often hide in unseen places like behind appliances or deep within upholstery fibers. Moving out, this oversight might even jeopardize that crucial deposit return—it’s why comprehensive cleaning checklists are invaluable. Avoiding these misconceptions requires a more analytical approach—knowing, for instance, that natural solutions like vinegar or baking soda are not disinfectants, but can assist with cleaning and deodorizing when used appropriately—so don’t be fooled by their popularity. For advanced staying power, integrating professional tips from sources like industry experts offers unparalleled insights.
Ever wondered why some homes still feel unclean after a thorough wipe-down? The secret lies in tackling those hard-to-reach and neglected areas, which are often the hidden reservoirs of grime and germs. Regularly inspecting and deep cleaning these spots, like behind the fridge or underneath furniture, is a game-changer. Remember, true sanitation isn’t just about visible cleanliness but about eliminating what you can’t see. Strategize your move-out cleaning with detailed step-by-step plans to avoid losing your security deposit over overlooked grime.
Have you ever fallen into this trap? Let me know in the comments.Maintaining a spotless, toxin-free home requires more than just good intentions; it demands reliable tools that deliver consistent results. Over the years, I’ve refined my cleaning arsenal to include equipment and methods that make long-term sanitizing manageable and effective.
Investing in the Right Equipment for Durability and Efficiency
A high-quality steam cleaner has become my go-to appliance for deep sanitizing without chemicals. I personally recommend models like the Dupray ONE Plus because of its durability, adjustable steam pressure, and versatility on surfaces like tile, upholstery, and even sealed wood floors. It ensures thorough germ elimination, far beyond what traditional mops or sprays can achieve, and it’s a one-time investment that pays for itself in health benefits. When properly maintained, a steam cleaner can last for years—saving money and reducing chemical use in the long run.
Choosing the Proper Tools for Specific Tasks
Microfiber cloths are indispensable in my routine—they trap fine dust, bacteria, and oils efficiently. I opt for high-grade, washable microfiber towels because they can be reused hundreds of times, saving money and waste. For areas prone to stubborn grime, such as grout lines or kitchen appliances, I use a dedicated grout brush and brush attachment on my cordless drill. These tools help me target neglected spots quickly without harsh scrubbing, maintaining surface integrity while ensuring cleanliness.
Using Software to Track and Schedule Maintenance
Staying on top of regular maintenance becomes simpler with digital reminders. I personally use calendar apps with recurring alerts for tasks like sanitizing high-touch surfaces or deep cleaning upholstery. This habit prevents grime buildup and helps me spot potential issues early, such as water stains or mold growth, before they become costly repairs. It also aligns with the trend towards smart home integrations, where advanced home automation systems can remind you of scheduled upkeep or even notify you when filters need replacement.
Predictions for the Future of Home Sanitizing Tools
As technology advances, expect devices incorporating IoT connectivity, artificial intelligence, and enhanced eco-friendly features. Suppliers are already developing robotic cleaning systems that autonomously sanitize floors and surfaces, reducing manual effort further. Staying ahead means embracing these innovations—consider investing in smart gadgets that sync with your home routines for consistent, hands-free maintenance. For more insights on staying effective, review the expert-recommended cleaning practices. If you’re ready to upgrade, trying a professional-grade steam cleaner like the Dupray model can revolutionize your approach to long-term home health. Remember, a well-maintained toolset coupled with scheduled routines is the key to a truly sanitized living space.
Lessons I Wish I Had Learned Sooner About Sanitizing and Home Care
One of the biggest lightbulb moments in my cleaning journey was realizing how much harmful residue could linger after using conventional chemicals, often unseen and underestimated. It taught me the importance of patience and proper technique over quick fixes—knowing that natural solutions like castile soap require a bit more deliberate effort but offer immense benefits in long-term health and safety.
Another lesson was understanding that not all ‘green’ products are equal—research and testing are vital. I once assumed all natural oils or homemade mixtures would be enough, but discovering evidence-based practices significantly improved my results and peace of mind.
Finally, embracing consistent routines over sporadic cleaning turned my home into a sanctuary. Automation tools and scheduled maintenance, when aligned with effective natural cleaning solutions, made the difference between a surface-level sparkle and true, lasting cleanliness.
Tools and Resources That Elevated My Home Care Game
High-quality microfiber cloths have been my go-to for efficient dust and bacteria trapping—reusable and gentle on my surfaces, they helped me cut down waste while boosting hygiene. Investing in a reliable steam cleaner, like the Dupray ONE Plus, transformed weekly deep-cleaning routines, allowing me to sanitize without chemicals and get rid of hidden germs efficiently.
Books such as The Art of Natural Cleaning provide science-backed insights that resonate with my desire to create a healthier environment. I also trust reputable sources like the Effective Sanitizing Methods guide for maintaining best practices. Incorporating these tools and knowledge has made my home not just cleaner, but genuinely safer for my loved ones.
Step Into a Healthier Future for Your Home
Remember, embarking on a natural cleaning journey is a process of discovery and continuous improvement. With the right tools, knowledge, and routine, you can transform your living space into a haven free of harsh toxins and full of peace of mind. Your home is your sanctuary—treat it with the care and attention it deserves.
What’s the biggest challenge you’ve faced when trying to embrace natural cleaning methods? Share your experiences below and let’s learn together!