
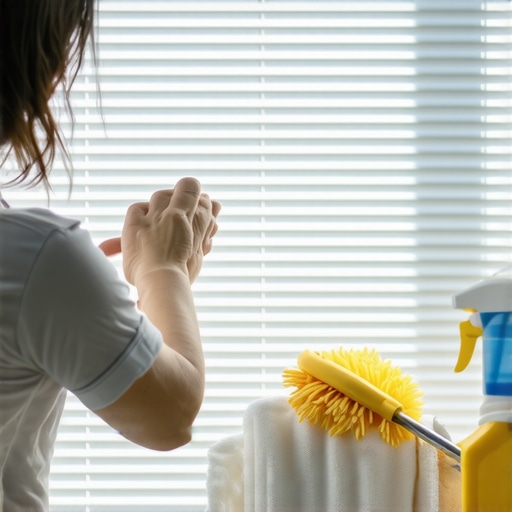
It was one of those mornings where I glanced up at my window blinds and immediately regretted not cleaning them sooner. Dust bunnies had decided to settle comfortably between the slats, and I honestly felt my allergies kicking in just looking at them. In that moment, I realized something: I had been using my duster all wrong. Despite countless cleaning sessions, those stubborn dust particles refused to budge.
The Lightbulb Moment: Rethinking How We Clean Blinds
Like many of you, I relied on my trusty feather duster, thinking it was the quickest way to keep the blinds looking good. But after some trial and error—and a fair bit of frustration—I discovered that a damp cloth actually works wonders. It not only traps dust more effectively but also makes the task less messy and more satisfying. This simple shift transformed my approach, saving me time and effort, and significantly improving the cleanliness of my home.
Today, we’re diving into why a damp cloth outperforms a duster when it comes to cleaning blinds, backed by real-life experience and a dash of expert advice. If you’re tired of battling endlessly with dust and want a more effective method, you’re in the right place.
Could a Damp Cloth Really Make that Much Difference?
Before you dismiss this as just another cleaning tip, let me share a quick mistake I made early on. I used a damp cloth but didn’t wring it out enough—leaving it too wet. That only caused water spots and made my blinds harder to dry. Learning to squeeze out excess moisture was a game-changer, and now I swear by this approach. Interestingly, some professionals recommend this technique for a thorough, dust-free clean. For more expert insights, check out this article on effective [house cleaning secrets](https://spotlesscarpetz.com/effective-house-cleaning-secrets-from-cleaning-experts).
So, if you’ve been battling dust with a duster and wondering why it never quite gets the job done, stay tuned. We’ll explore the step-by-step process to make your blinds sparkle—without the hassle—and share tips to keep your home allergen-free and looking its best.
Start with a Clear Plan of Action
Before diving into cleaning, visualize the entire process, including all rooms and surfaces. Create a checklist using a move-out clean checklist for comprehensive coverage. Break the task into stages: dusting, scrubbing, disinfecting, and finishing touches. This structured approach prevents overlooked areas and keeps you motivated.
H2>Gather Your Effective Tools and Products
Equip yourself with the right supplies—microfiber cloths, scrub brushes, disinfectant solutions, and gentle yet effective cleaners. For upholstery, explore upholstery cleaning tips to select suitable detergents. Remember, the quality of your tools directly impacts cleaning efficiency and results. Avoid harsh chemicals unless necessary, aiming instead for solutions like vinegar or natural disinfectants.
H2>Remove Clutter and Prepare Surfaces
Clear surfaces, pay attention to often-forgotten spots like underneath furniture or behind appliances. Clutter hampers cleaning and may harbor dust or germs. For stubborn debris, employ tools like a small brush or vacuum attachment designed for tight spaces.
H3>Tackle Dust with Precision
Start dusting from the top—ceiling fans, crown molding, and light fixtures—using dry microfiber cloths. Then, dampen cloths slightly for ledges and corners, ensuring dust doesn’t resettle elsewhere. Remember, a lightly damp cloth is more effective than a dry duster, as it traps dust better and prevents it from becoming airborne again. For ceiling fans, consider using specialized fan blade dusters.
H2>Sanitize Every Surface Smartly
Apply disinfectants to high-touch areas like doorknobs, switches, and countertops. Use a spray that needs to sit for a few minutes to sanitize thoroughly, following the proper sanitizing secrets. For surfaces that can’t be soaked, use microfiber cloths soaked in sanitizing solution, ensuring they’re wrung out well to avoid water damage or streaks. Remember, multiple light passes are better than soaking surfaces excessively, which can damage materials over time.
H2>Deep Clean Upholstery and Fabrics
Move onto upholstery, which often traps pet hair, dust, and allergens. Use a handheld vacuum for loose debris, then employ specialized upholstery cleaning products. For delicate fabrics like silk or velvet, opt for dry cleaning or natural oils for restoring texture. Regularly cleaning upholstery extends its lifespan and keeps dust mites at bay.
H2>Restore Hard Surfaces with Precision
Focus on floors, tiles, and countertops with appropriate cleaners. For grout, use a brush combined with a cleaning paste for stubborn stains, ensuring a thorough sanitization of hidden dirt. Pay special attention to neglected areas such as behind appliances or under sinks, which harbor built-up grime. Check grout cleaning hacks for efficient results.
H2>Finish with Attention to Detail
Inspect all cleaned areas to spot missed spots or streaks. Use a lint roller for quick removal of pet hair from textiles. For glass surfaces, treat with a streak-free cleaner for a spotless shine. Finally, ventilate the space to dry surfaces and disperse any lingering cleaning fumes, ensuring a fresh, sanitized environment that’s safe for everyone.
Even seasoned homeowners often fall prey to misconceptions about proper sanitizing and cleaning techniques, especially when it comes to move-out cleaning, upholstery care, and maintaining a germ-free environment. One pervasive myth is that spraying disinfectant on surfaces immediately eliminates all germs. In reality, most disinfectants require a specific contact time—often around 10 minutes—to be truly effective, as backed by studies from the CDC. Rushing the process can leave harmful pathogens behind, giving a false sense of security.
Another common error is neglecting to clean behind or underneath furniture and appliances. These overlooked spots can harbor dust, pet dander, and bacteria, subtly compromising indoor air quality and health over time. Using a simple checklist, like the ones found in our move-out clean guide, can ensure you don’t miss these critical areas.
For upholstery, many believe that regular vacuuming suffices. However, advanced cleaning reveals that deep fabric care involves more than surface dust removal. Professionals utilize specialized techniques, such as controlled steam cleaning, to eliminate hidden allergens and bacteria without damaging delicate fibers. Check out our upholstery cleaning tips for achieving lasting results.
A subtle nuance many overlook is the proper maintenance of cleaning tools themselves. Reusable microfiber cloths and brushes can become contaminated over time, transforming from cleaning aids into germ vectors. To prevent this, it’s vital to regularly sterilize tools—ideally after every use—by laundering with hot water or disinfectants. This simple step significantly elevates your cleaning game.
### Why does proper sanitizing contact time matter more than just applying disinfectant?
It’s a question that trips up many DIY cleaners. Simply spraying a surface and wiping it away doesn’t guarantee germ eradication. Disinfectants need to dwell on surfaces long enough to deactivate microbes effectively. This
Tools That Stand the Test of Time
Investing in quality equipment saves you money and frustration in the long run. I personally rely on a high-grade microfiber mop and vacuum with HEPA filtration. The microfiber mop’s dense fibers trap dust and allergens effectively, especially when paired with a natural, pH-balanced cleaning solution like vinegar diluted with water, which is gentle yet powerful. I prefer a vacuum with adjustable suction and washable filters because it maintains its performance over years, unlike cheap models that clog or lose suction quickly.
For upholstery, I recommend a handheld steam cleaner, which allows deep sanitation without soaking fabrics—crucial for preventing mold and bacteria buildup. The key is to choose models with adjustable steam settings and washable microfiber pads, enabling consistent performance and easy maintenance. Regularly inspecting and replacing worn brushes or filters ensures your tools don’t become sources of dirt spread or bacteria growth.
Staying Ahead with Proper Maintenance
To keep your cleaning arsenal functioning optimally, establish a routine of thorough tool maintenance. After each use, rinse microfiber cloths and pads in hot water with disinfectant to eliminate germs. For vacuum filters, check manufacturer instructions—most recommend washing or replacing every few months—to prevent loss of suction and dirt redistribution. A quick inspection of your steam cleaner’s seals and gaskets prevents leaks that can diminish effectiveness or cause damage.
Furthermore, cleaning your tools isn’t just about hygiene; it enhances their longevity. For example, regularly descaling your steam cleaner according to the manufacturer’s guidance prevents mineral buildup, ensuring consistent heat and pressure during deep cleans. And don’t forget to keep all equipment stored dry and organized—this simple habit prevents mold and damage, effectively extending their lifespan.
How do I maintain my cleaning tools over time?
Deeply inspect and service your equipment monthly. For microfiber cloths and pads, laundering in hot water with a disinfectant like white vinegar or specialized laundry sanitizer keeps germs at bay. Wash filters and replace parts as needed based on usage and manufacturer recommendations. For vacuum cleaners, clear the brush rolls and check belts for wear, replacing them when necessary. These small but consistent maintenance steps ensure your tools perform reliably, making each cleaning session more effective. Staying on top of maintenance not only saves money but keeps your home healthier and reduces the need for frequent replacements. To go even further, consider adopting a regular deep-cleaning schedule for your tools, inspired by professional standards outlined in effective sanitizing methods for a germ-free home. Try incorporating a monthly descaling regimen for your steam cleaner to prevent mineral deposits, backed by technical advice from appliance manufacturers.
Lessons That Changed Everything About Cleaning
- I’ve learned that rushing through sanitizing can leave behind unseen germs. Giving disinfectants adequate contact time isn’t just advice; it’s a game changer in achieving a truly clean home.
- Over time, I realized that neglecting little areas like behind appliances or inside vents quietly undermines my efforts. Every corner, no matter how hidden, deserves attention for optimal cleanliness.
- One lightbulb moment was understanding that maintaining my cleaning tools is just as important as cleaning surfaces. Regular sterilization of microfiber cloths and filters keeps germs at bay and extends tool lifespan.
- I’ve found that deep cleaning upholstery with specialized techniques not only freshens the look but also drastically reduces allergens, improving indoor air quality for my family.
Tools That Elevate My Cleaning Routine
- HEPA-certified vacuum with washable filters: It offers reliable suction and long-term savings, ensuring both efficiency and eco-friendliness.
- Microfiber steam mop: Perfect for quick, chemical-free floor sanitation while being gentle on delicate surfaces.
- Upholstery steam cleaner: A versatile device that deep cleans fabrics without saturating them—crucial for allergy sufferers.
- Natural disinfectants like vinegar and hydrogen peroxide: Proven safe and effective, they ensure my home remains sanitized without harsh chemical residues.
The Power of Consistent Care
Maintaining a sanitized home isn’t a one-time effort but a continuous journey. Implementing a routine daily cleaning schedule keeps germs at bay and preserves the freshness of your living space. Regular inspections and maintenance of tools, inspired by professional sanitizing methods, ensure your efforts remain effective over time. Remember, small, consistent actions—like sterilizing cloths or checking filters—compound into a healthier, happier home environment.