
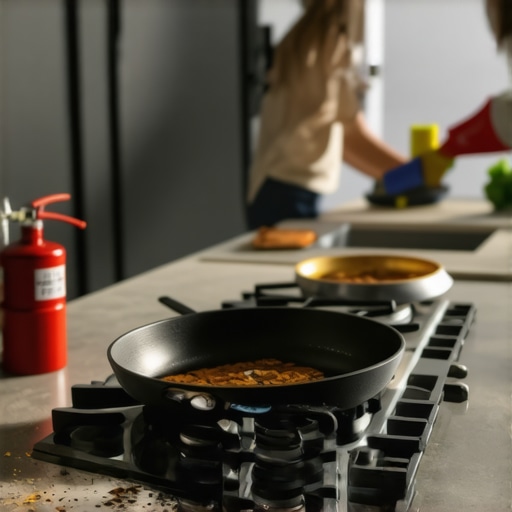
It was one of those chaotic evenings in my new apartment when I decided to cook a simple dinner. As I turned my back for just a moment, a sudden flare-up from the stove reminded me how quickly a grease fire can escalate. The smoldering residue left behind was even more stubborn than I anticipated—caked onto my sleek, modern kitchen surfaces, turning my spotless space into a greasy battleground. That lightbulb moment hit me hard: I needed an effective, safe way to handle this mess without causing further damage or resorting to harsh chemicals.
Why Grease Fire Residue Can Never Be Ignored
What surprised me early on was just how damaging grease residue can be if not properly cleaned. Not only does it foul your kitchen’s appearance, but it also poses a real fire risk, especially in modern kitchens with their minimalist designs and heat-sensitive surfaces. I learned that grease buildup can insidiously trap dirt, harbor bacteria, and diminish the integrity of your appliances—potentially affecting your family’s health and safety. According to the National Fire Protection Association, kitchens are the most common sites of house fires, many of which start from overlooked grease residues (NFPA, 2023). Clearly, neglecting these spots isn’t just an aesthetic mistake; it’s a safety hazard.
Early in my cleaning escapade, I made the mistake of using standard kitchen detergents that promised quick results but only spread the grease around, making the problem worse. That’s a mistake I wouldn’t want you to repeat. Instead, I discovered effective strategies that combine simple household items with expert tips, transforming my approach from frustrated scrubbing to efficient cleaning. If you’ve ever faced a similar greasy nightmare, stick around—I’m about to share what really works, the way I wish I had known from the start. And trust me, once you master these methods, your kitchen will not only look clean but be safer and more hygienic than ever before. Ready to dive into the solution? Let’s get started with the best way to tackle that stubborn grease fire residue.
Start with Protective Measures
Before diving into cleaning, wear rubber gloves and an apron to protect your skin and clothes from harsh cleaners and grease. This simple step ensures safety and keeps your hands clean for more effective scrubbing.
Assess the Damage
Identify the areas with the thickest greasy buildup, usually around stovetop edges, oven doors, and backsplash. Use a flashlight if needed to spot hidden patches and plan your cleaning approach to avoid unnecessary spreading of grease.
Prepare an Effective Cleaning Solution
Mix equal parts of white vinegar and warm water in a spray bottle. Add a few drops of dish soap, preferably one labeled for degreasing. This household concoction is a powerful, non-toxic alternative to commercial cleaners and breaks down grease efficiently.
Apply and Let Sit
Spray the vinegar solution generously on the greasy surfaces. Allow it to sit for at least 10 minutes—this gives the acetic acid time to weaken the fats, making removal easier and preventing passively spreading grease during scrubbing.
Scrubbing Technique
Use a non-abrasive scrub brush or a microfiber cloth for gentle but thorough scrubbing. Focus on the crevices and edges where grease tends to settle. Think of it like peeling off a stubborn sticker—firm, consistent pressure yields better results without damaging your surfaces.
Tackle Stubborn Residue
For tough spots, apply a paste of baking soda and water directly on the grease. Let it fizz for a few minutes—they act like tiny scrubbers breaking apart stubborn fats. Use a soft-bristled brush to remove the paste and residue.
Rinse and Dry
Dampen a clean microfiber cloth with plain water to wipe away any remaining solution and loosened grease. Finish by drying with a soft towel—this prevents new grease from settling and leaves a streak-free shine.
Deep Clean with a Sanitize Boost
Enhance hygiene by applying a disinfectant suitable for kitchen surfaces. For a natural approach, spritz with a solution of 70% isopropyl alcohol, which evaporates quickly and kills bacteria effectively. This step ensures your surfaces are not just grease-free but also germ-free, adding an extra layer of safety.
Maintain Regularly
Incorporate daily wipe-downs using a microfiber cloth with vinegar solution to prevent grease buildup. Consistent maintenance is easier than tackling thick layers later—think of it as brushing your teeth daily for ongoing freshness.
Applying these steps transformed my greasy mess into a spotless, safe kitchen space. Remember, tackling grease fire residue isn’t about harsh chemicals but smart, consistent techniques that make cleaning manageable and your home healthier. Interested in more expert tips? Check out effective house cleaning secrets from cleaning experts to refine your routine further.
Many homeowners believe they understand the essentials of effective cleaning, but in reality, some widespread myths can sabotage your efforts and even compromise safety. Let’s dig deeper into these misconceptions to help you clean smarter, not harder. One frequent mistake is thinking that using any disinfectant will eliminate all germs instantly. In fact, studies show that most disinfectants need to sit on surfaces for a specified dwell time—often 10 minutes—to be truly effective.
Is Your Cleaning Routine Truly Germ-Free or Just Superficial?
Another common falsehood is believing that natural remedies like lemon or vinegar alone can fully sanitize your home. While these are great for cleaning surfaces and removing odors, they often lack the ability to kill viruses and bacteria effectively, especially on porous materials. For comprehensive sanitation, relying solely on these can leave your home vulnerable. This misconception can lead to neglecting proper disinfecting procedures, especially during flu season or a pandemic. Consider integrating scientifically backed methods, such as using EPA-registered sanitizers, and check out these sanitizing secrets for a safer house to refine your routine. Moving on, many think that regular vacuuming is enough to keep up with upholstery cleanliness. However, vacuum cleaners often spread dust mites, allergens, and pet dander deeper into fibers if not equipped with HEPA filters. Additionally, neglecting deep cleaning can result in accumulated grime and bacteria that a quick vacuum won’t remove. Upgrading to a professional upholstery cleaning once a year, or following expert tips like these upholstery cleaning tips, can significantly improve your home’s hygiene and prolong furniture lifespan. Here’s a question: how many of your cleaning chores target hidden bacteria lurking inside furniture, vents, or behind appliances? The truth is, many overlook these critical spots, which can harbor dangerous microbes. Moving out, for example, homeowners often skip detailed cleanings, risking deposit deductions. Many believe wiping surfaces is enough—until they realize that dust and grime build up in vents, baseboards, or inside cabinetry, which standard cleaning misses. To ensure a spotless move-out, leverage comprehensive strategies like move-out cleaning strategies. Finally, a trap even seasoned cleaners fall into is overusing bleach or harsh chemicals, thinking more is better. While effective on certain stains, over-reliance can damage fabrics, surfaces, and pose health risks. Plus, some stains react worse when treated with aggressive chemicals, leading to discoloration or permanent damage. Modern cleaning science recommends balancing chemical use with natural alternatives, combined with proper application techniques. For advanced insights, see these expert tips on avoiding cleaning pitfalls. Remember, effective cleaning isn’t just about hard scrubbing; it’s about doing the right things precisely and safely. Have you ever fallen into this trap? Let me know in the comments.
Invest in Quality Equipment for Lasting Results
When it comes to maintaining a spotless and safe home, relying on premium tools makes all the difference. For instance, I personally swear by a high-quality steam cleaner like the Hoover SteamFast SF-370, which allows deep sanitizing of carpets, upholstery, and tiles without harsh chemicals. Its powerful steam penetrates beneath surface fibers, effectively killing bacteria and dust mites, and I find it indispensable for weekly upkeep. Similarly, a microfiber mop with a swivel head ensures you can reach into corners and under furniture easily, making daily dusting and mopping more efficient. These tools not only improve cleaning quality but also reduce the physical effort required, encouraging consistent maintenance.
Embrace Smart Cleaning Technologies
Automation has entered the cleaning realm, with robotic vacuums such as the iRobot Roomba i7+ standing out as my top recommendation. Equipped with mapping technology and scheduled routines, these vacuums help keep floors constantly clean, preventing dust and debris buildup that can harbor germs over time. I’ve integrated mine into my weekly routine, which has significantly extended the intervals between deep cleans. Looking ahead, advances like AI-powered cleaning systems will become smarter, more adaptable, and more integrated with home automation hubs, making long-term upkeep effortless for busy homeowners.
Use the Right Cleaning Agents for Sustainability
Choosing eco-friendly, effective cleaning solutions is vital for both your health and the environment. I highly recommend diluting a natural disinfectant like thymol-based thymol spray, which is registered in studies such as the EPA’s documentation for its germicidal properties, as an all-purpose cleaner. Combining these solutions with proper tools enhances long-term maintenance. For example, regular use of natural disinfectants prevents the buildup of pathogens without the harsh chemical residues that can degrade surfaces over time, especially on delicate finishes.
Implement Routine Checks and Maintenance Routines
Establishing a regular schedule for inspecting and maintaining your cleaning tools prolongs their effectiveness. Clean your vacuum filters and brushes every month, and replace microfiber cloths regularly. This simple habit ensures tools operate at peak efficiency, preventing dirt and bacteria from spreading instead of removing them. Moreover, I recommend scheduling annual deep cleaning of appliances like your dishwasher, oven, and HVAC filters, referencing comprehensive strategies found in move-out cleaning guides to ensure thorough sanitation and prevent long-term damage or foul odors.
How do I maintain my cleaning equipment over time?
To keep your cleaning tools performing optimally, develop habits like rinsing and drying mops and scrub brushes after each use, and storing them in dry areas to prevent mold growth. Periodically check electrical cords and motors on powered devices for signs of wear. Following the manufacturer’s care instructions and investing in replacement parts as needed can extend their lifespan significantly. As I predict, integrating smart maintenance sensors into cleaning devices might be the next big step, alerting homeowners when tools need service before issues arise—making upkeep more proactive than reactive.
Ready to elevate your home maintenance routine? Start by upgrading to a commercial-grade steam cleaner or smart vacuum. These investments pay off by reducing long-term repair and replacement costs and ensuring your home remains a safe haven. For more advanced advice on effective house cleaning and maintenance strategies, visit these expert tips.
Discover the Hidden Lessons Behind Grease Residue Clean-Up
One thing I learned the hard way was how overlooked grease buildup can silently threaten your home’s safety, especially when you think a quick wipe is enough. It’s tempting to rely on shortcuts, but the stubborn residues left behind from cooking mishaps reveal that patience and right techniques are key. I once believed harsh chemicals were the only solution, but I soon realized that natural solutions like vinegar and baking soda, when used correctly, make a safer impact without risking surface damage. The biggest lightbulb moment for me was understanding that consistency in cleaning prevents these issues from becoming emergencies, saving time and money in the long run.
My Top Picks for Maintaining a Clean & Safe Kitchen Sanctuary
To stay ahead of grease buildup, I swear by tools like the Shark Genius Steam Pocket Mop for deep sanitation and the OXO Good Grips microfiber cloths for quick daily touch-ups. Natural cleaning guides from trusted sources like cleaning experts have shaped my routines, emphasizing eco-friendly habits that work. For tackling stubborn stains and residues, I turn to specialized products such as the Krud Kutter Kitchen Degreaser, which I trust for its effectiveness without harmful fumes. Combining quality tools with reliable information ensures my kitchen not only looks pristine but remains a safe haven for my family.
You Hold the Power to Transform Your Home Today
Cleaning smarter means understanding your appliances and surfaces, embracing eco-friendly methods, and investing in tools that last. Remember, every small effort compounds into a noticeably cleaner, safer home environment. I encourage you to take that first step today—start with one area you’ve neglected and see how simple techniques can revolutionize your space. Your kitchen’s safety and cleanliness depend on your proactive approach. Don’t wait until minor grease residues turn into costly repairs or hazards—make safety and cleanliness your priority now.