
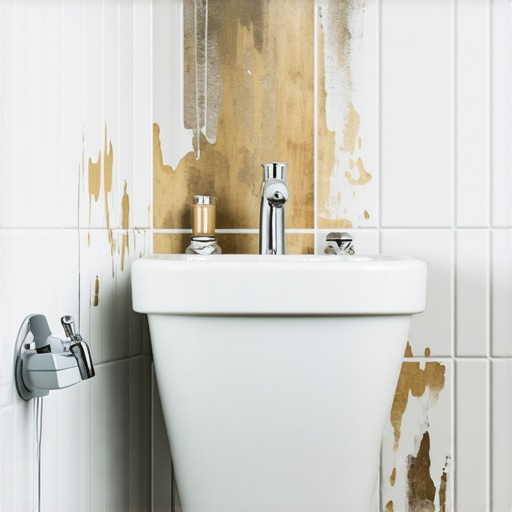
I’ll never forget the moment I swung open the bathroom door after what I thought was a thorough clean, only to be met with a disapproving glare from the inspector. It was a sinking feeling—like I’d missed something crucial, a tiny detail that could cost me my deposit. That lightbulb moment made me realize that bathrooms are full of overlooked spots that can trip you up during move-out inspections. If you’ve ever felt that rush of anxiety wondering whether you missed a spot, you’re not alone.
Your Bathroom Cleanup Might Be Missing the Mark
Bathrooms are tricky. Despite our best efforts, those sneaky corners and hidden nooks often escape our notice. Over time, I learned that neglecting these five forgotten spots could be the difference between a successful move and losing your deposit. Today, I promise to guide you through these common pitfalls and give you practical tips to tackle them head-on. By the end of this post, you’ll understand exactly what inspectors look for—those tiny details that can make or break your move-out inspection.
Will Overlooking These Spots Cost You Your Deposit?
Early in my cleaning journey, I made a costly mistake—ignoring the grime that accumulated behind the toilet base. It seemed insignificant at the time, but that was a red flag for the inspector. From that moment on, I realized that paying attention to overlooked spots isn’t just about appearance; it’s about exceeding expectations and ensuring a smooth inspection process. For detailed strategies on cleaning efficiently, check out this comprehensive move-out checklist. Now, let’s dive into these hidden spots and how to address them effectively.
Target the Hidden Corners
Start by removing the mirror and shining a flashlight behind the cabinet to check for dust or mold buildup. Use a microfiber cloth wrapped around a long-handled tool to wipe away dust from hard-to-reach spots. In my last move, I spent extra time behind the toilet because I was determined to clean every bolt and base—saving me from pet peeves during inspection. Incorporate a grout brush to scrub between tiles; this prevents mold from hiding in the pores, which inspectors often overlook. Remember, persistent grime here can trigger red flags, so don’t skip it.
When Cleaning the Toilet Base
Apply a mild disinfectant spray around the base and let it sit for a few minutes. Use a stiff-bristled brush to scrub, paying close attention to the area where dust and hair gather. I once cleaned this spot with a toothbrush that I designated solely for bathroom corners—making the task easier and more efficient. Take a ladder or step stool to reach the top of the toilet tank, wipe down the lid and sides, and shine the flush handle with a disinfectant wipe. This step prevents inspector doubts about cleanliness and hygiene.
Shine the Shower and Tub
Spray a bathroom-specific cleaner on the tiles, focusing on grout lines. Use a squeegee to remove excess water after each use during your cleaning session—it helps prevent soap scum buildup. I personally foam the shower walls in a circular motion with a soft sponge, then rinse thoroughly—small details like this make a big difference. For stubborn stains, apply a paste of baking soda and water, let it sit for ten minutes, then scrub with a nylon brush. Inspectors notice soap scum and mildew, so diligent scrubbing here ensures your deposit is safe.
Eliminate Bad Odors from Drains
Pour a cup of baking soda followed by a cup of white vinegar into your drains. Let the mixture fizz for 10-15 minutes before boiling water down the pipe. This process eradicates lingering smells and prevents mold growth—common issues often missed during cleanup. I did this as a last-minute step before my move, and the fresh scent eased my worries about hidden odors triggering discrepancies during inspection. Regular drain sanitizing keeps the bathroom smelling spotless and germ-free.
Clean Beyond the Surface
Remember to wipe down light fixtures, towel racks, and any hooks with a disinfectant wipe. Use a duster on vents and exhaust fans to remove dust accumulation. For mirrors, a quick spray of glass cleaner and a lint-free cloth will give a streak-free shine—no smudges here, unlike my previous attempt where smears showed up under inspection lights. These details reinforce a thorough cleaning routine that inspectors appreciate, especially if you document the process.
Addressing Hidden Buildup in Vent Covers
Remove vent covers and wash them with warm soapy water. Use a small brush to scrub away dust inside the vent, which often collects in the tiniest crevices. This overlooked step can be the difference in passing or failing. I learned this from a cleaning expert and applied it during my last move, resulting in praise from the landlord for my comprehensive approach. Keep your vents debris-free to avoid red flags.
Seal Up Leaks and Cracks
Inspect caulking around sinks, tubs, and tiles. Use a utility knife to remove old, cracked caulk and apply a new, mold-resistant sealant for a pristine look. This preventative step not only improves appearance but also stops water from seeping into walls or floors—issues inspectors often cite. I once caught a tiny crack and sealed it before the move, saving me from a dispute over structural damage. Think of it as giving your bathroom a fresh coat of armor against future issues.
Check and Clean the Fan Filters
Remove the bathroom fan cover and vacuum dust from the blades and filter. Wash the cover with warm soapy water and reassemble once dry. Cleaner air circulation can prevent mold growth and ensures a fresh environment—important in high-humidity spaces. I’ve done this twice during my moving process; it’s simple but effective, making your overall bathroom look professionally maintained. Don’t neglect this, as it’s a quick way to boost your cleaning credibility.
Keep a Cleaning Checklist Handy
Use a detailed move-out cleaning checklist to avoid missing critical spots. Mark off each task as you complete it, ensuring nothing slips through the cracks. Incorporate steps like wiping down baseboards, eliminating soap scum, and sanitizing handles. Back when I skipped sections of my checklist, I missed some grout lines, which led to a minor deposit deduction. With consistent use, this strategy turns your cleaning into a systematic process rather than a last-minute rush, guaranteeing thoroughness every time.
Leverage Professional Tips for Best Results
Read trusted cleaning guides like this expert-approved cleaning tip collection to refine your technique. They provide insights on disinfecting high-touch surfaces efficiently, saving you time and effort. Applying these secrets during my last move made my cleaning faster and more effective, helping me secure my deposit without disputes. Incorporate professional advice to elevate your move-out cleaning game.
Many believe that scrubbing surfaces thoroughly and using disinfectants are enough to achieve a spotless home, but in reality, there’s a complex layer of nuances that often go unnoticed. Contrary to popular belief, simply spraying a disinfectant on high-touch areas without paying attention to the material type, contact time, and application method can render your efforts ineffective. For instance, many overlook that porous surfaces like upholstery and certain plastics require different sanitizing techniques compared to hard, non-porous surfaces. Experts in hygiene, such as Dr. Charles P. Gerba from the University of Arizona, emphasize that disinfectants need adequate dwell time and proper application to effectively kill germs, which many homeowners neglect, resulting in a false sense of security.\n\nAnother common misconception is that cleaning equals sanitizing, but these are distinct steps. Cleaning removes visible dirt and grime, but sanitizing reduces microbes to safe levels only if executed properly. A mistake I often see is using the same cloth for dirty, greasy surfaces and then for high-touch areas like doorknobs or light switches, which can spread germs rather than eliminate them. Using separate, clean cloths and sterilizing tools between tasks can dramatically improve hygiene efficacy.\n\nWhen it comes to upholstery, many think a quick vacuum or spray cleaner is sufficient. However, neglecting the deep fibers that trap dust, pet dander, and bacteria is a mistake that often leads to lingering odors and allergens. Advanced techniques like hot water extraction and proper drying are essential for thorough sanitation. An interesting fact is that microfibers used in upholstery can re-release trapped particles if not cleaned with techniques that facilitate deep cleaning, as discussed in the [Ultimate Upholstery Care Guide](https://spotlesscarpetz.com/ultimate-upholstery-care-guide-for-lasting-freshness).\n\nLet’s address the myth that over-using disinfectants is always better. In fact, excessive use can lead to antimicrobial resistance, making pathogens harder to eliminate over time. This is why targeted cleaning with the correct disinfectant, applied with precise dwell time, is more effective than indiscriminate spraying. Incorporating natural cleaning agents like hydrogen peroxide or baking soda, combined with a strategic cleaning routine, can provide a safer, more sustainable approach.\n\nFinally, an often-overlooked mistake involves neglecting hidden spots during move-out cleaning. Areas behind appliances, inside vents, and under furniture can harbor dirt and bacteria, jeopardizing your security deposit. Regularly auditing these small but critical corners ensures all microbial reservoirs are effectively eradicated. For comprehensive strategies, visit [move-out cleaning strategies](https://spotlesscarpetz.com/move-out-cleaning-strategies-to-secure-your-deposit) to avoid costly red flags.\n\nIn summary, mastering the nuances of sanitizing and cleaning requires more than just surface effort. Knowing the material-specific techniques, the importance of contact time, and addressing hidden spots with precision can elevate your cleaning game from good to impeccable. Are you guilty of any of these oversights? Share your experiences and let me know in the comments.\n\nFor further expert tips on effective cleaning and sanitation methods, explore the [Effective House Cleaning Secrets](https://spotlesscarpetz.com/effective-house-cleaning-secrets-from-cleaning-experts) and keep your home truly spotless.
Keep It Working: Essential Tools and Techniques for Long-Term Cleanliness
Maintaining a pristine home over time requires more than just initial effort; it calls for the right tools and consistent routines. Personally, I rely on a few specialized items that have revolutionized my cleaning approach. For example, my cordless handheld steam cleaner allows me to sanitize surfaces quickly without the hassle of cords or chemical residues, making frequent touch-ups effortless. This tool not only saves time but also ensures a healthier environment, especially when you have pets or allergies. As the trend toward eco-friendly cleaning advances, adopting equipment like microfiber cloths and natural disinfectants becomes increasingly vital. Predicting the future, I see a surge in smart cleaning devices—robot vacuums with mapping capabilities and app integration—making home maintenance even more seamless. Incorporating these innovations helps keep your house in top shape with less stress and effort.
How do I maintain my cleaning tools and routines over time?
Regular maintenance of your cleaning equipment is crucial for sustained performance. For instance, washing microfiber cloths after each use prevents bacteria buildup that can reduce their effectiveness. Checking and replacing vacuum filters every few months ensures optimal suction and air quality. Additionally, establishing a routine schedule—such as weekly deep cleans and monthly inspections—prevents minor issues from becoming major repairs. Staying organized with checklists or digital reminders keeps you accountable. To streamline this process, I recommend keeping a dedicated storage station for cleaning supplies and tools, making quick access and routine maintenance straightforward. For comprehensive strategies, visit this guide to upholstery and tool care. Consistent upkeep not only prolongs the lifespan of your equipment but also ensures your home remains spotless year-round.
In the realm of house cleaning, the right tools are just part of the equation. Perfecting your technique—like using a grout brush correctly to prevent damage—can make a substantial difference. According to the EPA’s cleaning guidelines, employing the correct methods and maintaining your tools are vital for effective sanitization and for safeguarding your health. Don’t hesitate to experiment with advanced tips such as using a portable UV sanitizer to disinfect high-touch surfaces quickly. Implementing these practices will help preserve your home’s cleanliness long after the initial deep cleaning. Now, try incorporating one of these specialized tools into your routine and experience the difference it makes in your household maintenance.
What I Wish I Knew About Bathrooms Before My First Move-Out
One of the most overlooked lessons I learned was the importance of paying attention to those tiny, often ignored spots—like behind the toilet or inside vents—that inspectors scrutinize. Ignoring these areas can mean the difference between a full deposit refund and a costly deduction. I also discovered that investing in specific tools, such as grout brushes and steam cleaners, makes a huge difference in thoroughness and efficiency. Moreover, understanding the science behind disinfectants, like dwell times and surface types, has transformed my cleaning routine into a more effective practice. Lastly, consistency and a detailed checklist are underrated allies in achieving that spotless finish that landlords love.
Tools and Resources That Elevate My Bathroom Cleaning Routine
For maintaining a bathroom that passes any inspection, I rely on a set of trusted tools. A microfiber grout brush helps me target mold and dirt in tiles, while a handheld steam cleaner sanitizes surfaces without harsh chemicals. My go-to resource is the expert-approved cleaning secrets guide, which offers invaluable tips on disinfecting high-touch areas efficiently. Additionally, I swear by natural disinfectants like hydrogen peroxide, which are both safe and powerful. For comprehensive strategies, I often review the move-out cleaning checklist, ensuring I don’t miss critical spots during my cleaning frenzy.
Don’t Let Delays or Doubts Stall Your Progress
Caring for your bathroom’s cleanliness is a form of respect—not just for your space, but also for future tenants or inspectors. The key is to start early, stay organized, and use the right tools for the job. I remind myself that every detail counts, from wiping down exhaust fans to sealing cracks with mold-resistant caulk. If you’re hesitant or overwhelmed, reach out for professional guidance; a quick consultation via our contact page can set you on the right path. Remember, a well-maintained bathroom is a reflection of your overall home care—so take pride in mastering these hidden cleaning secrets. The future of your spotless, stress-free move-out awaits—start today!